
Blog
News, Updates, Research and Reflections
Field to Plate at Unsworth Vineyards
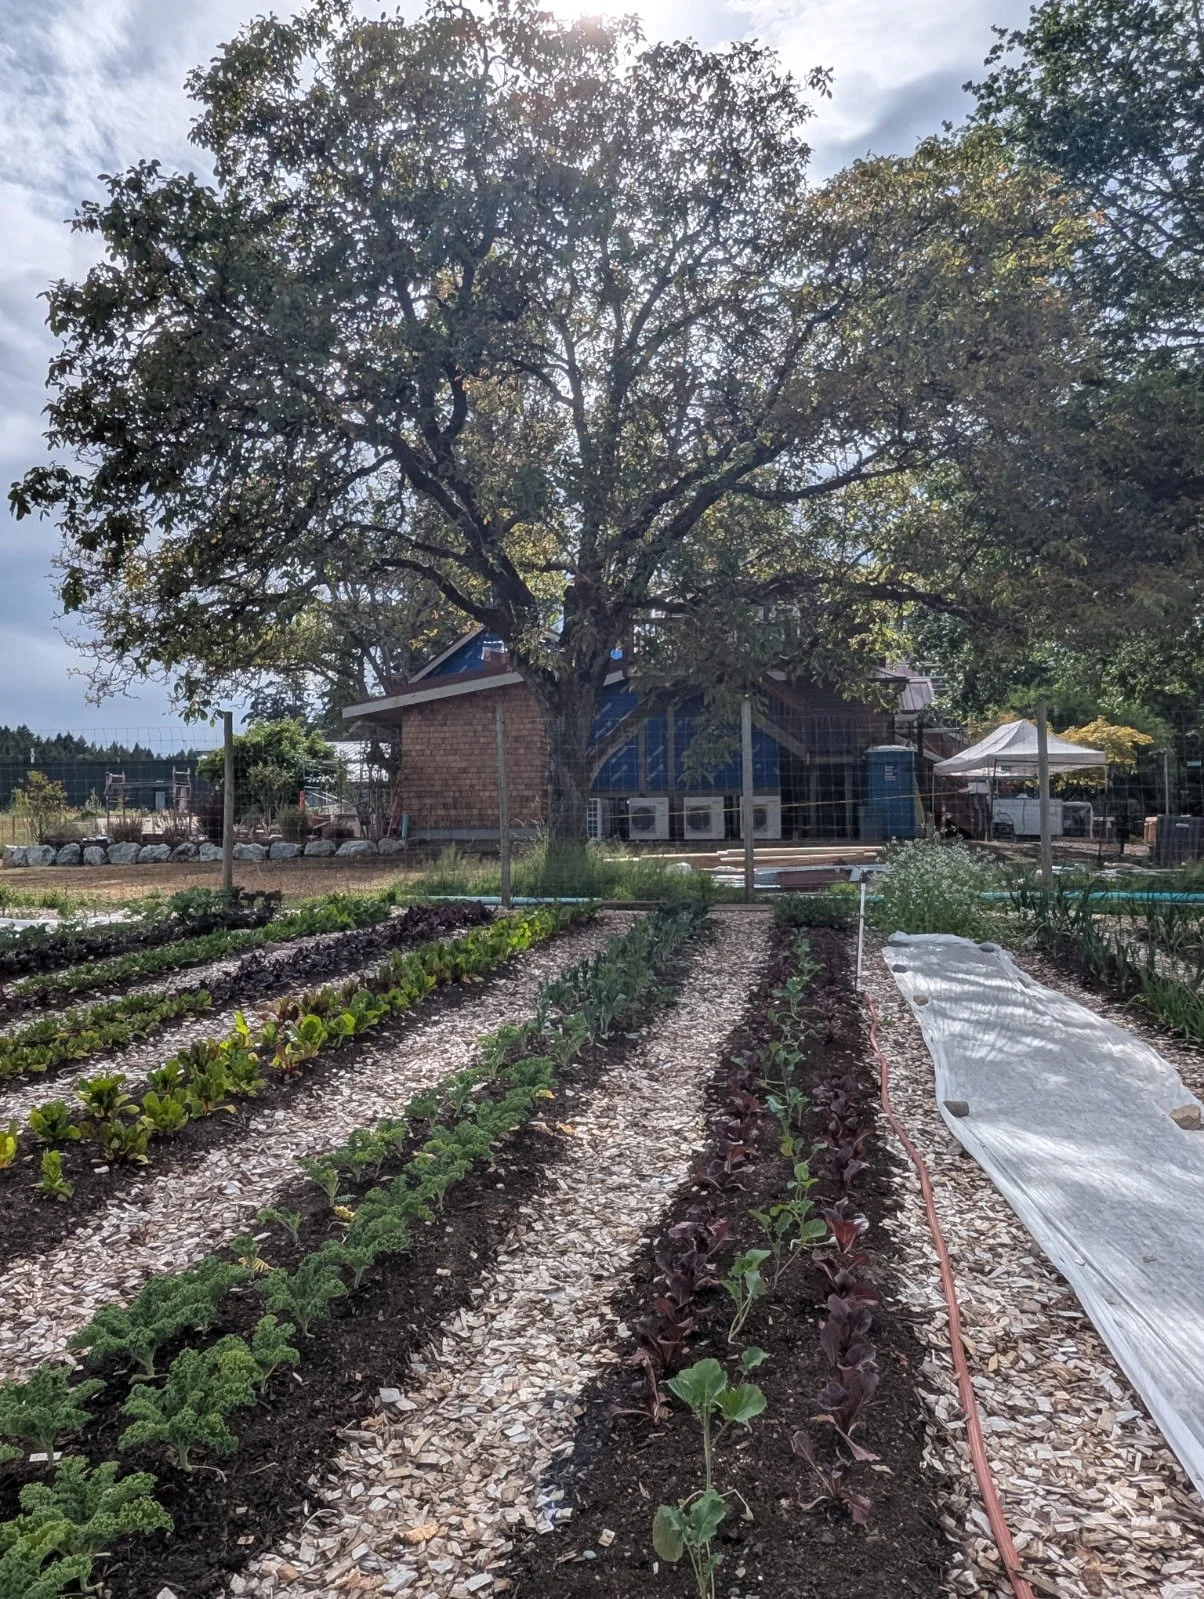
June at Unsworth - Garden planted with lettuce, sprouting broccoli, kale, swiss chard, and baby beets. Sneak peek of the new restaurant in back!
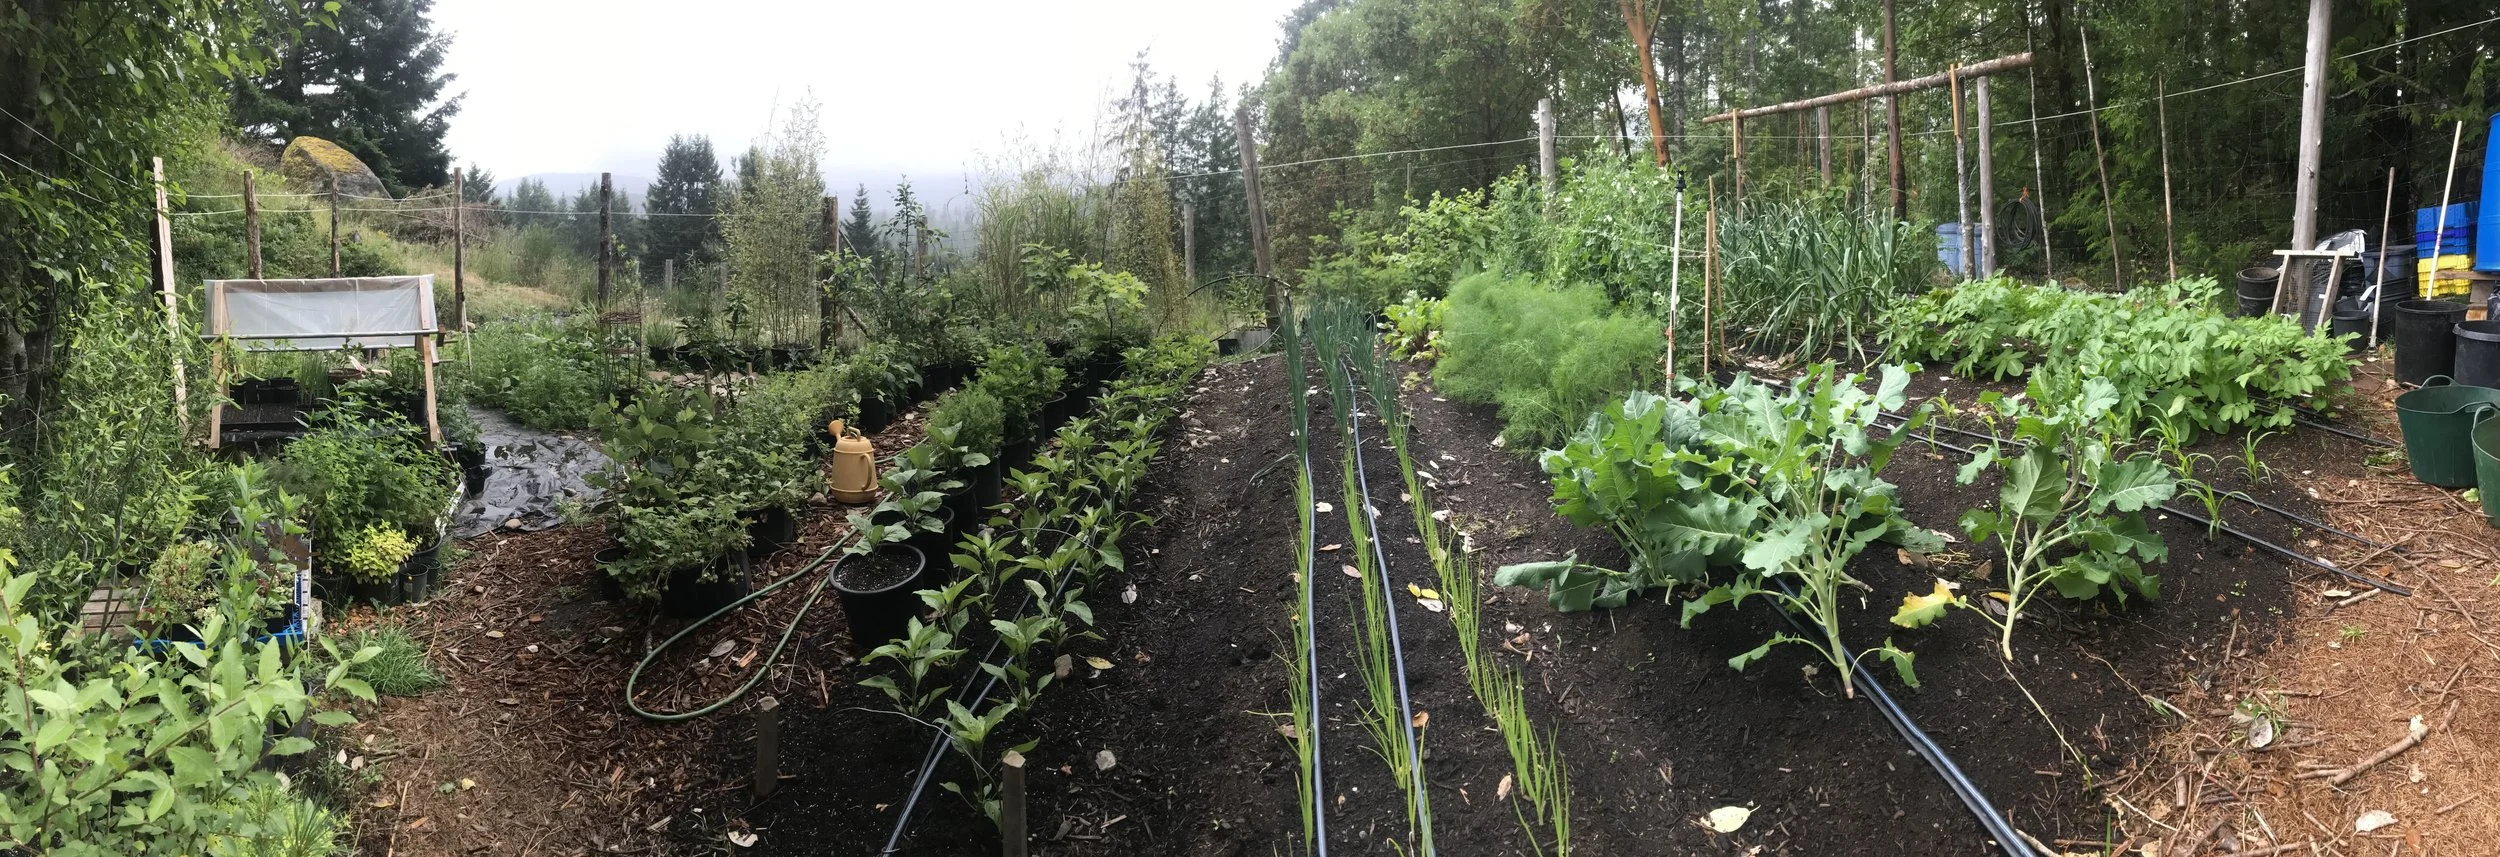
It’s June 2026, and the growing season is in full swing. We are busy tending to beautiful gardens all over the Cowichan Valley. There is one project, however, that we are particularly excited about right now (although we have been quietly working on it since last year). The client is local favourite Unsworth Vineyards, and the project is a culinary garden for Chef Dan Bain and The Restaurant at Unsworth.
“Farm-to-table” was always part of the vision at Unsworth, but in 2025 things really got real when Chef Dan, together with vineyard manager Felix and other vineyard staff, committed several big work days to building a market garden just outside the beloved patio, overlooking the vines.
While renovations on The Restaurant were ongoing, they tilled, put down a cardboard mulch, spread many yards of compost, laid out twenty-five 40’-long beds, and installed pathways of alder woodchips. Then they called Laura and asked her to take it from there. What a dream come true!
Over the winter, Laura and Dan collaborated on a crop plan. Felix built an awesome little greenhouse to serve as an early-season nursery. Luca and Laura started hundreds of seedlings. And slowly but surely, an abundant edible landscape has taken shape. Eventually, these beautiful crops will make their way into the kitchen and on to guest’s plates for the ultimate farm-to-table experience. The garden design also includes two long borders dedicated to edible and cut flowers, for decoration and floral flavour.
To learn more, check out the photos and read the captions below.
The newly renovated Restaurant at Unsworth is due to open in July 2026. Come for a tasting or a meal and see the garden for yourself!
November 2025 - Laura’s first visit
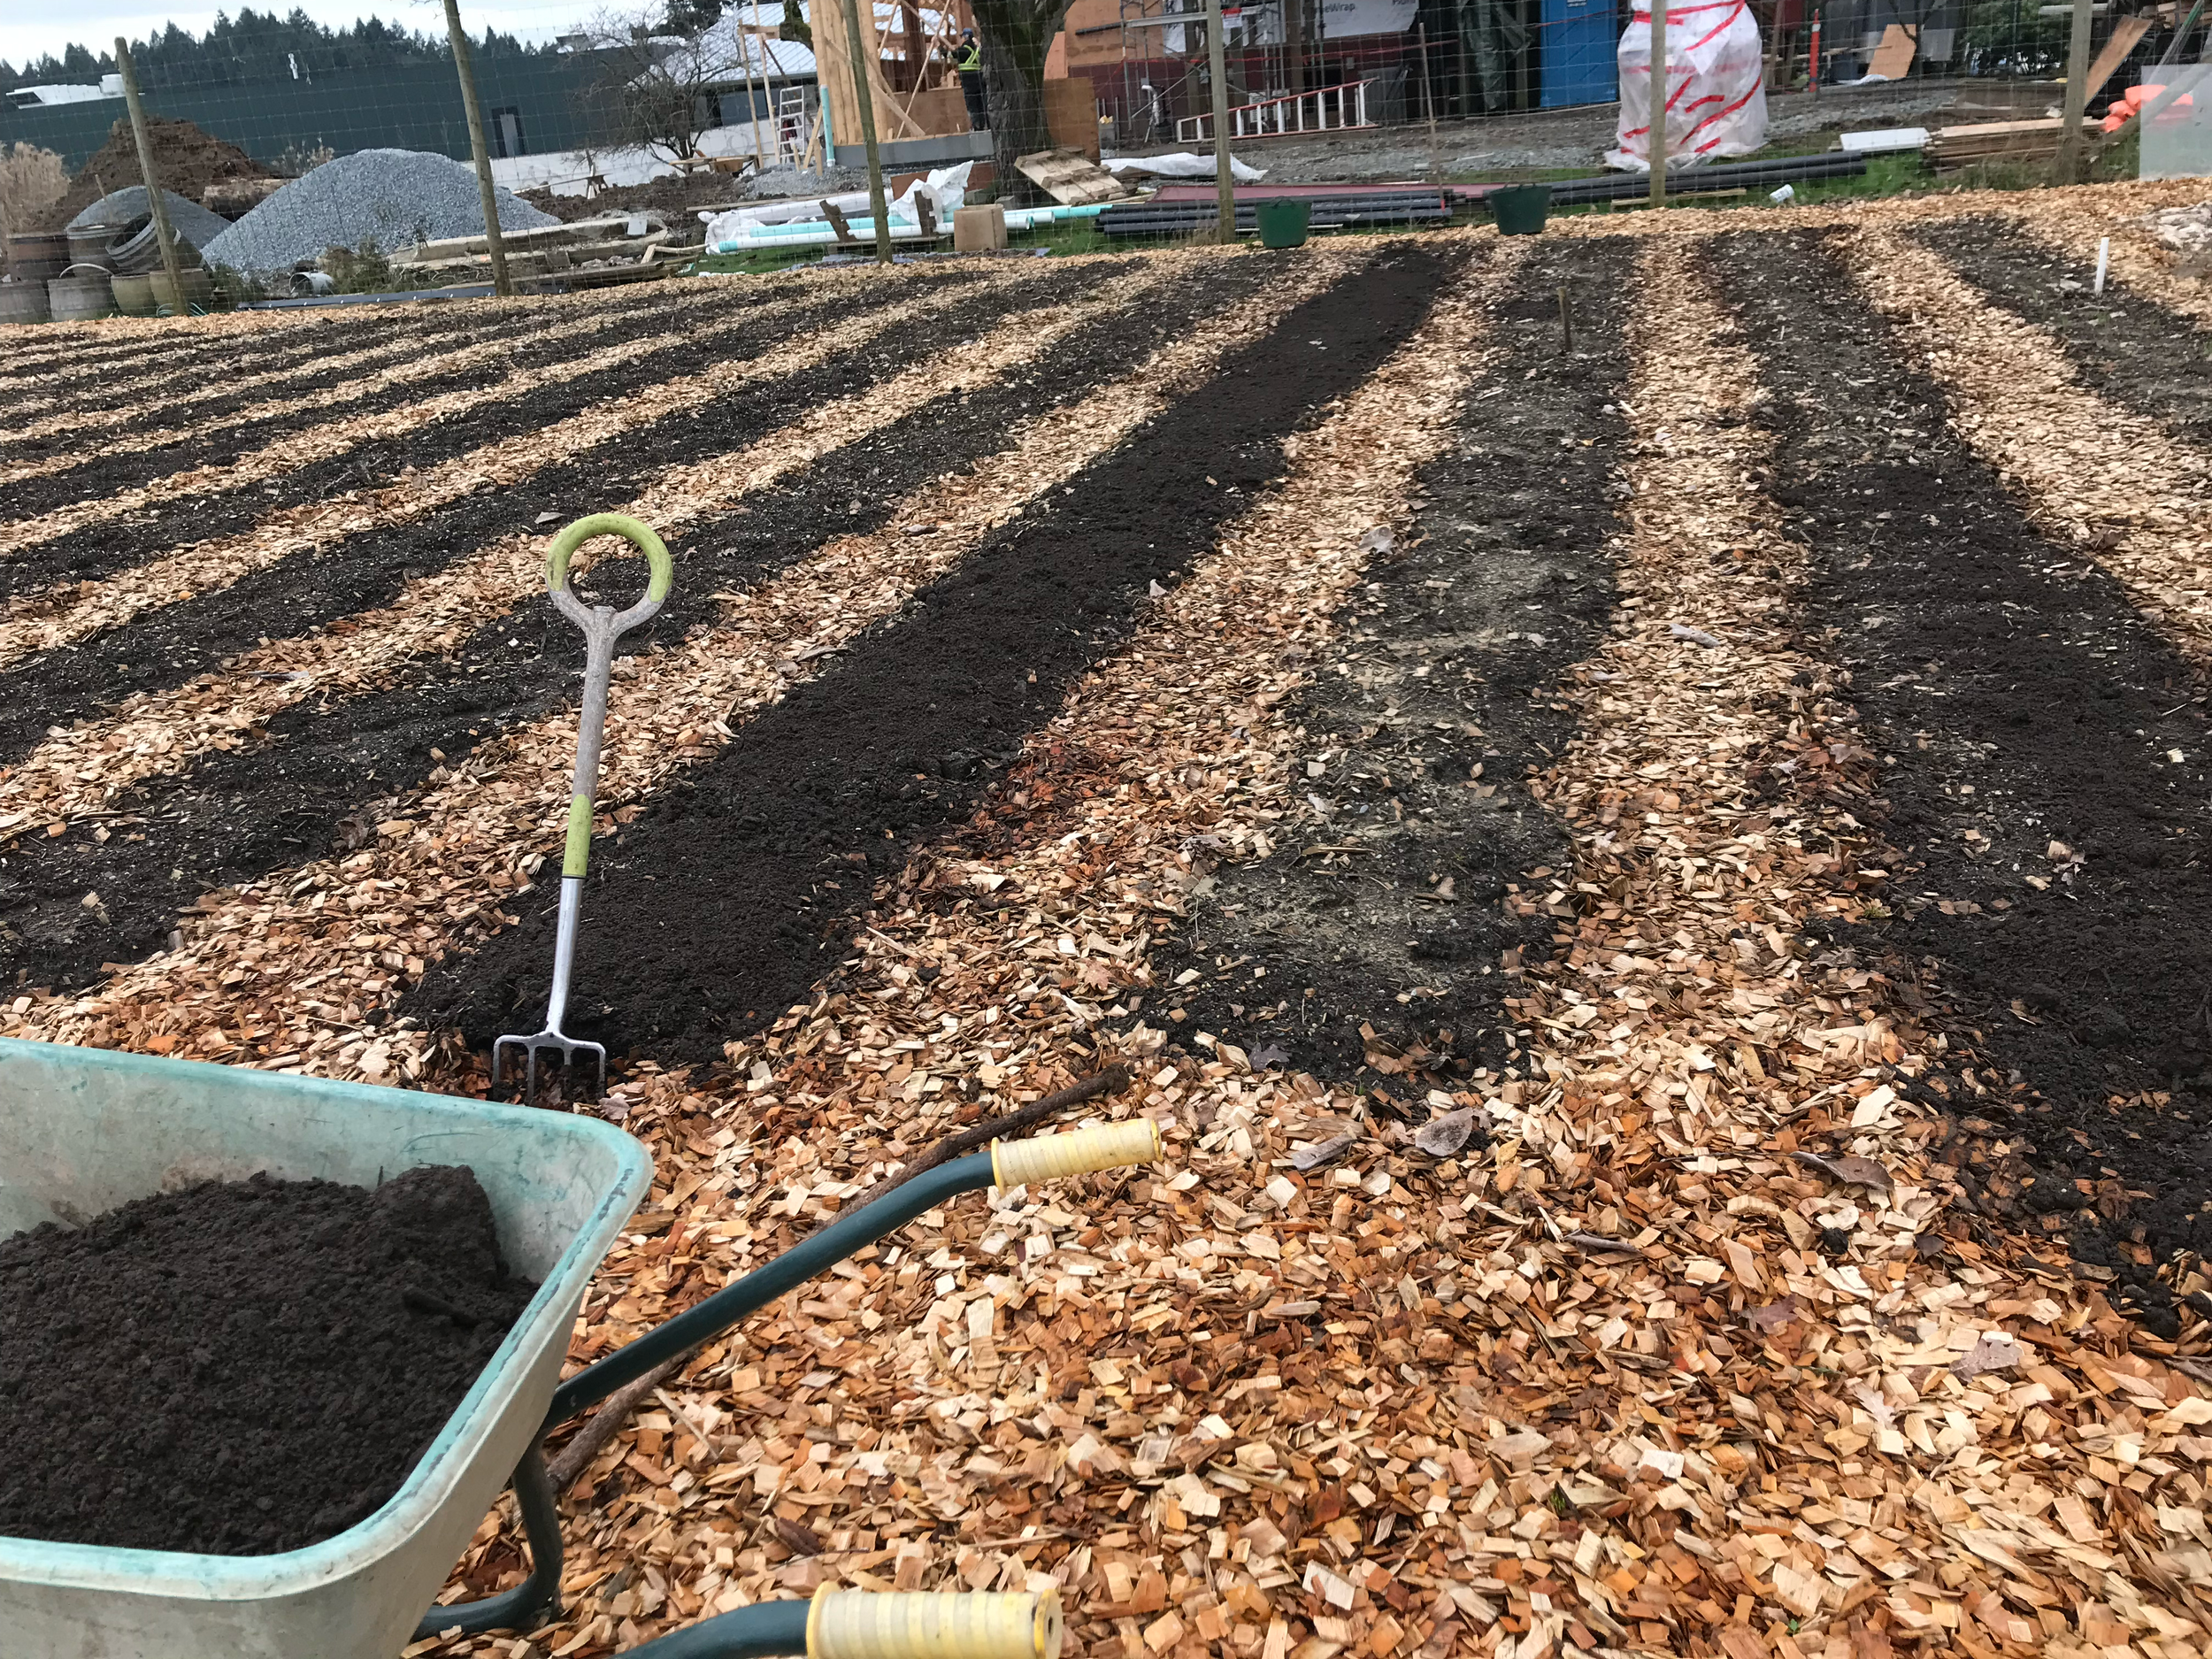
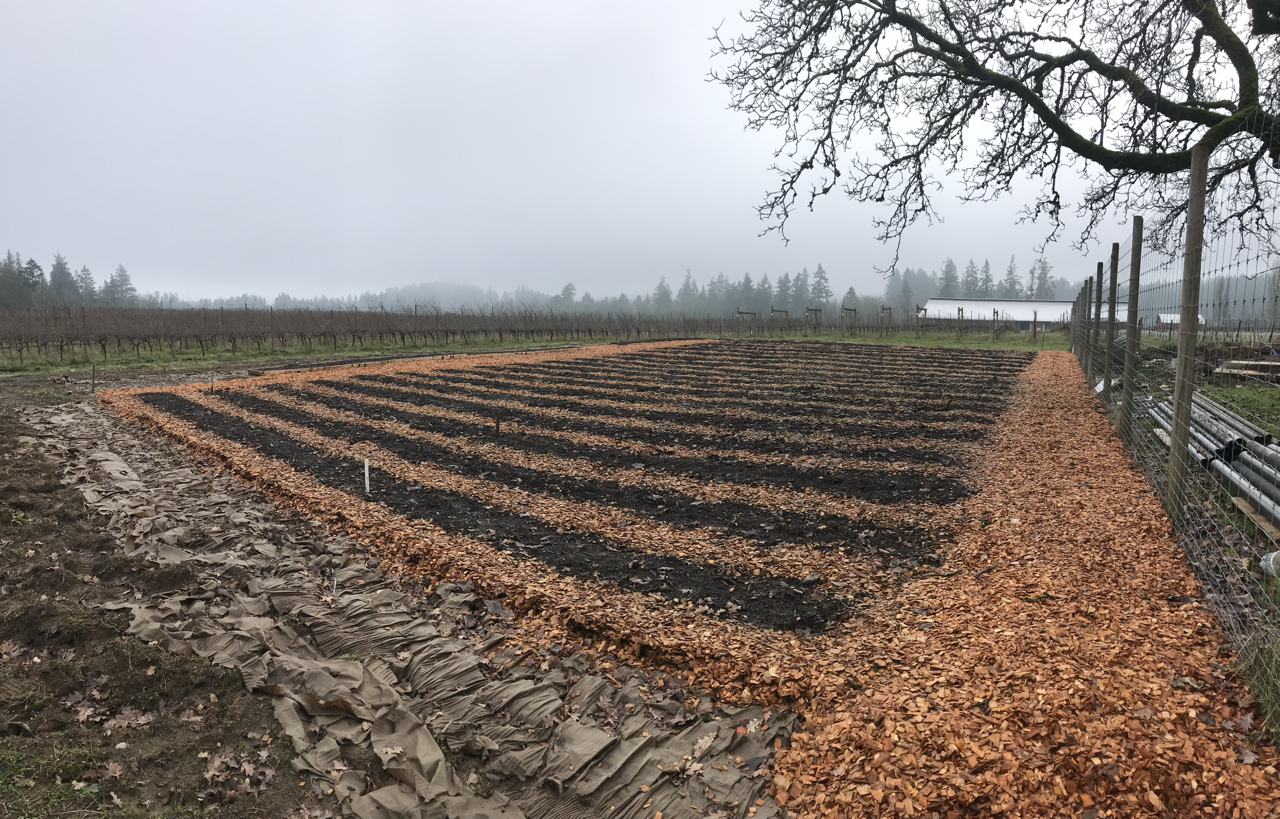
February 2026 - Mulching beds with our favourite fish compost.
February 2026 - A new greenhouse and freshly tilled soil
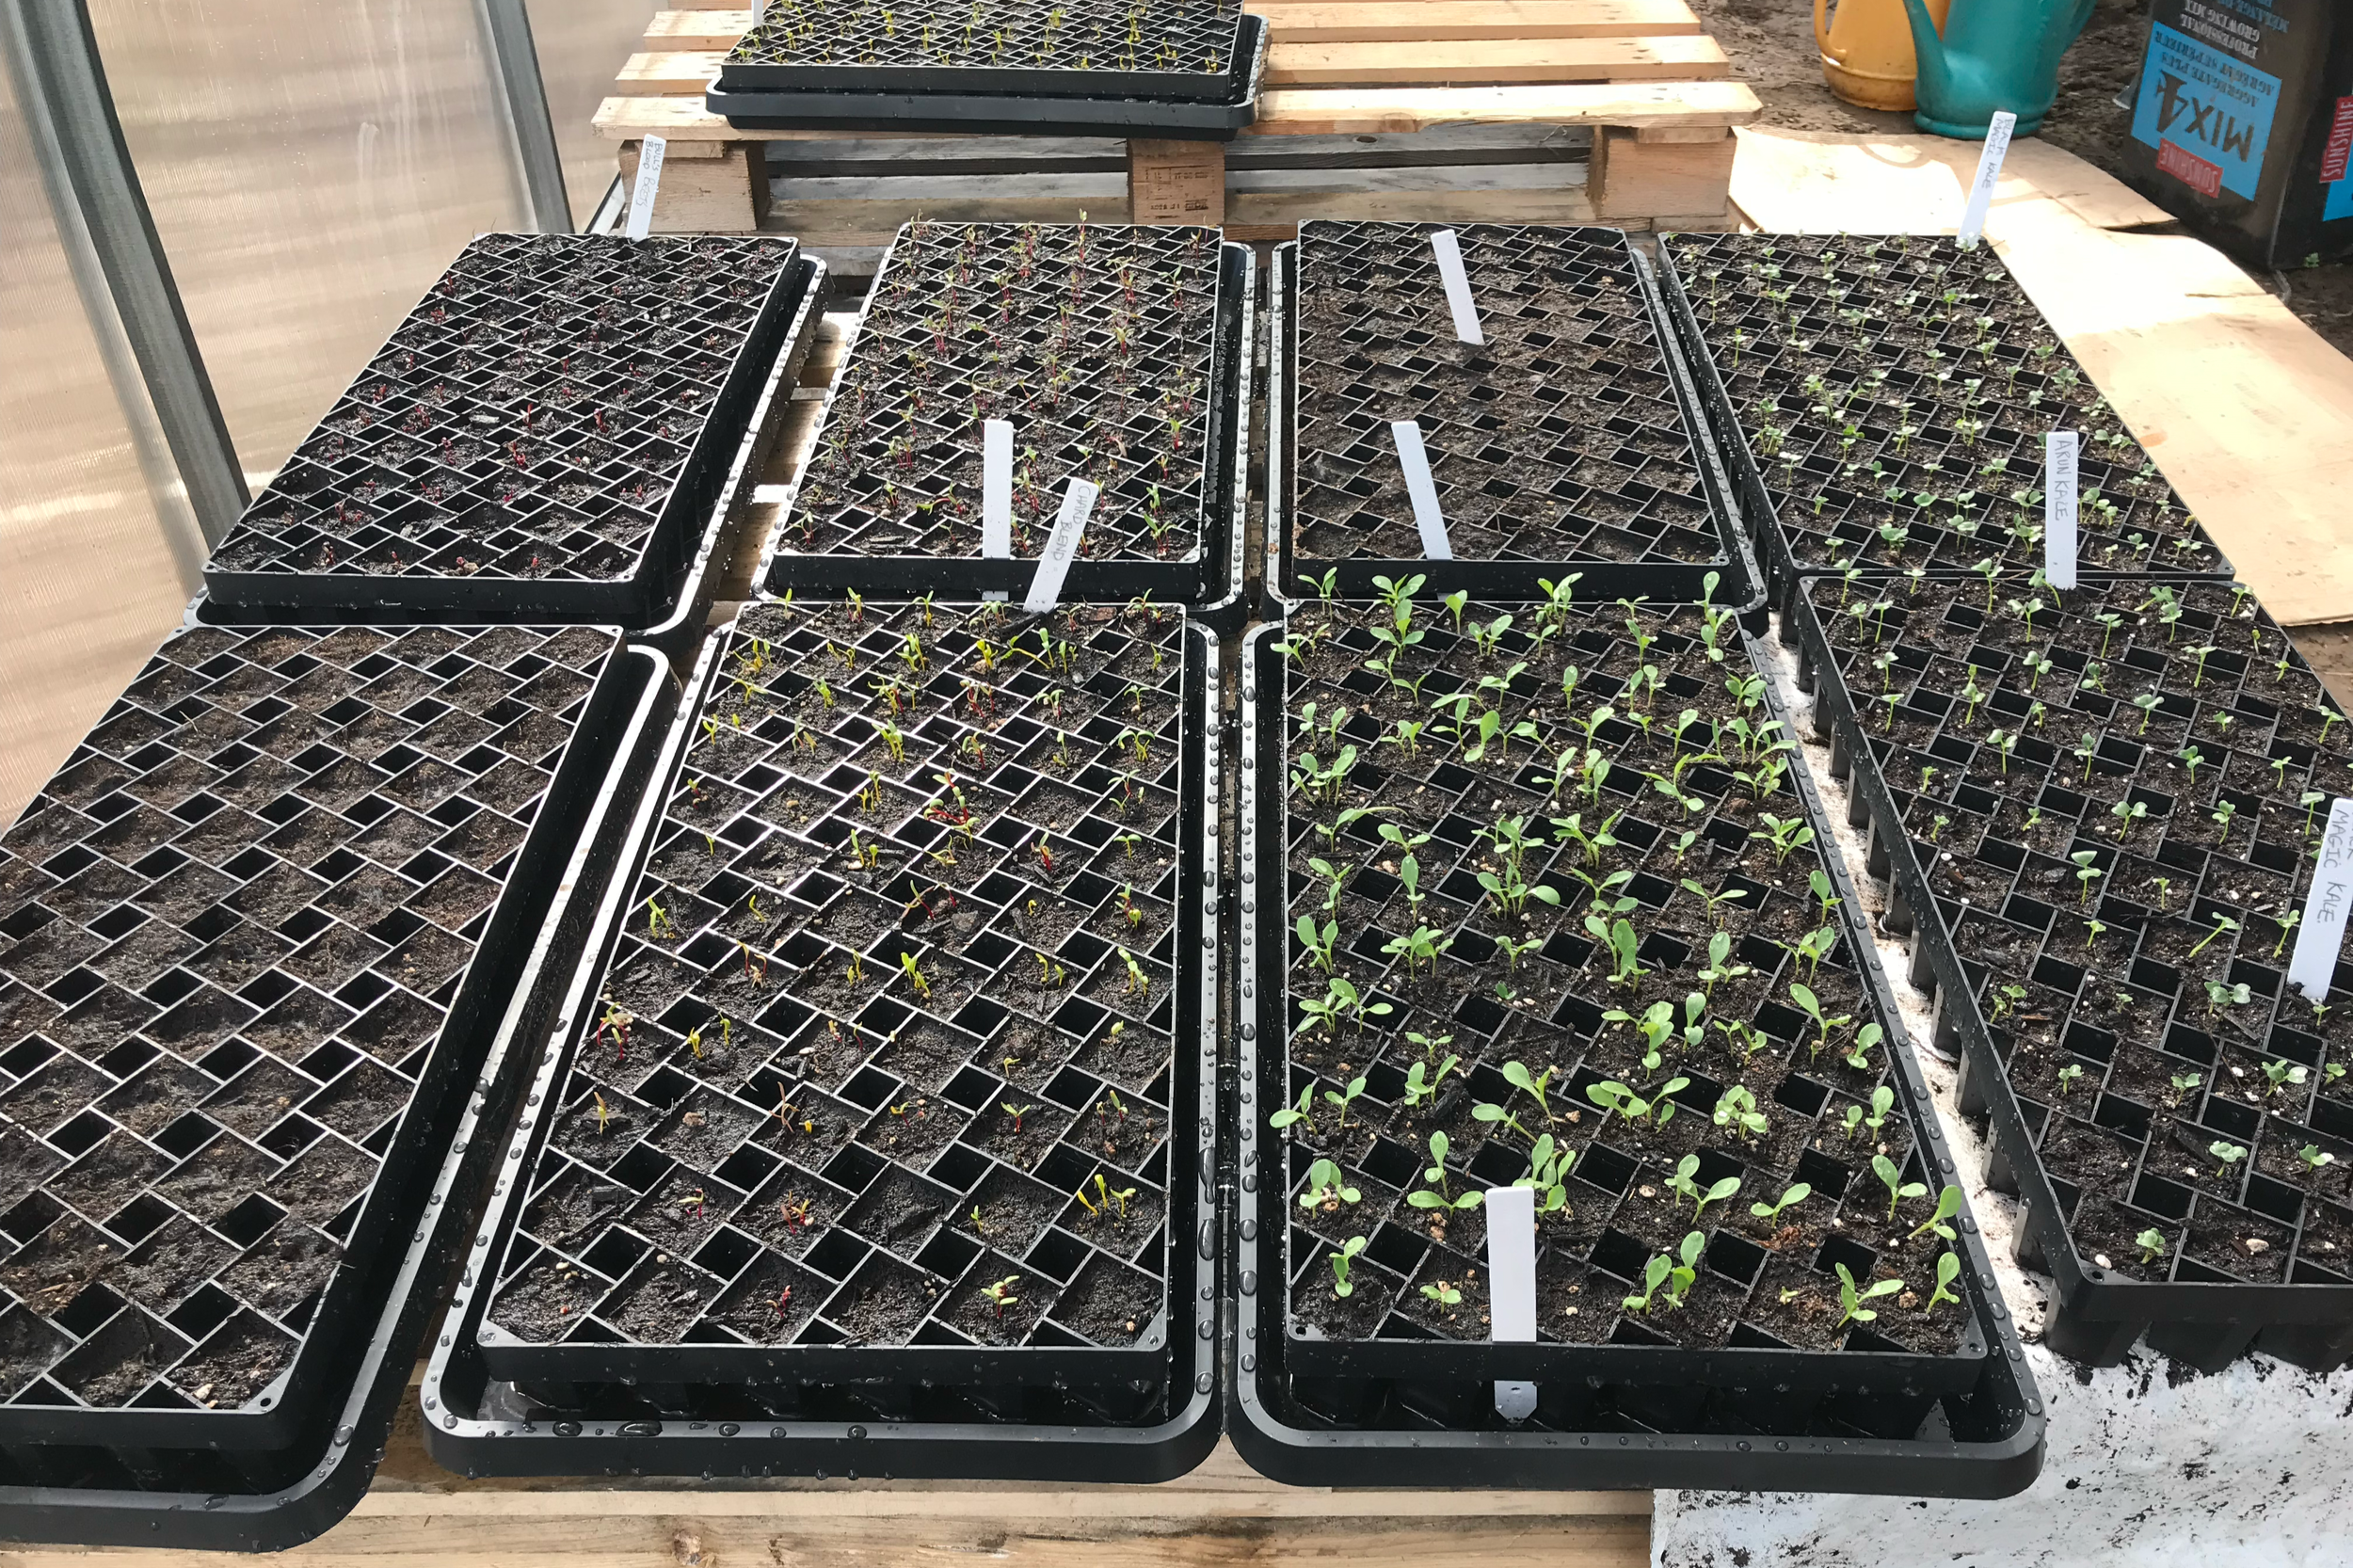
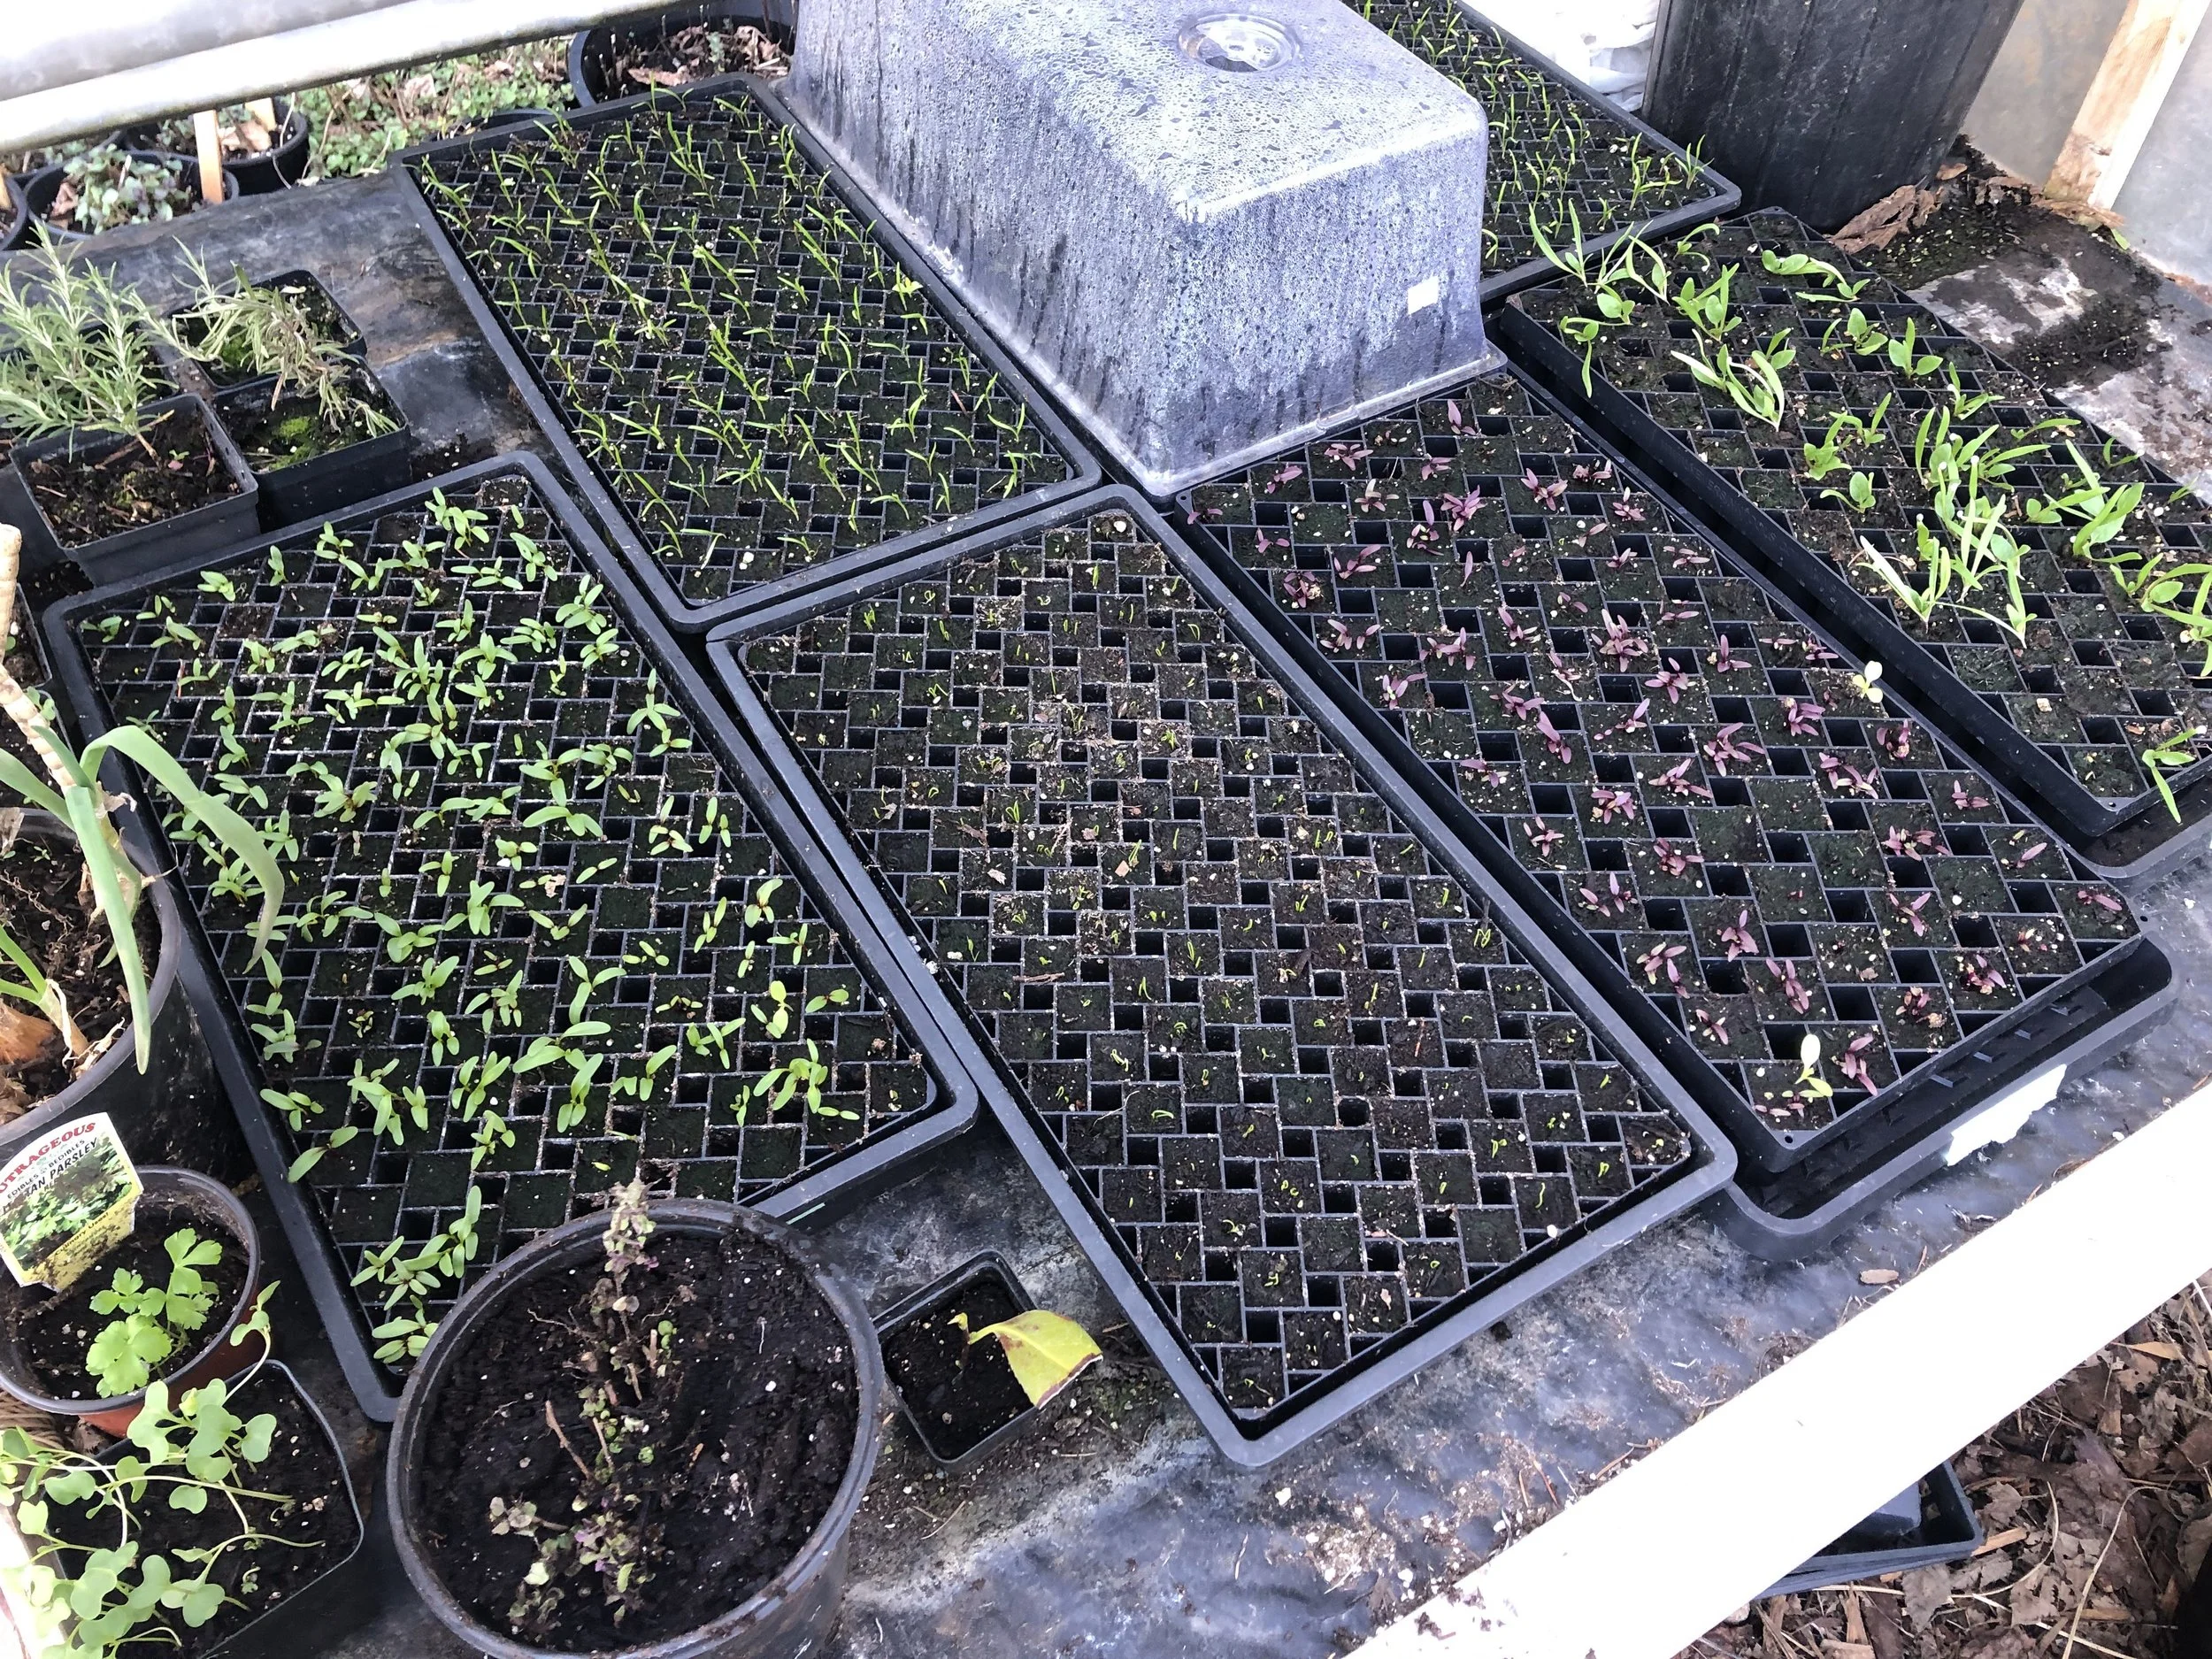
March 2026 - Seedlings in the greenhouse
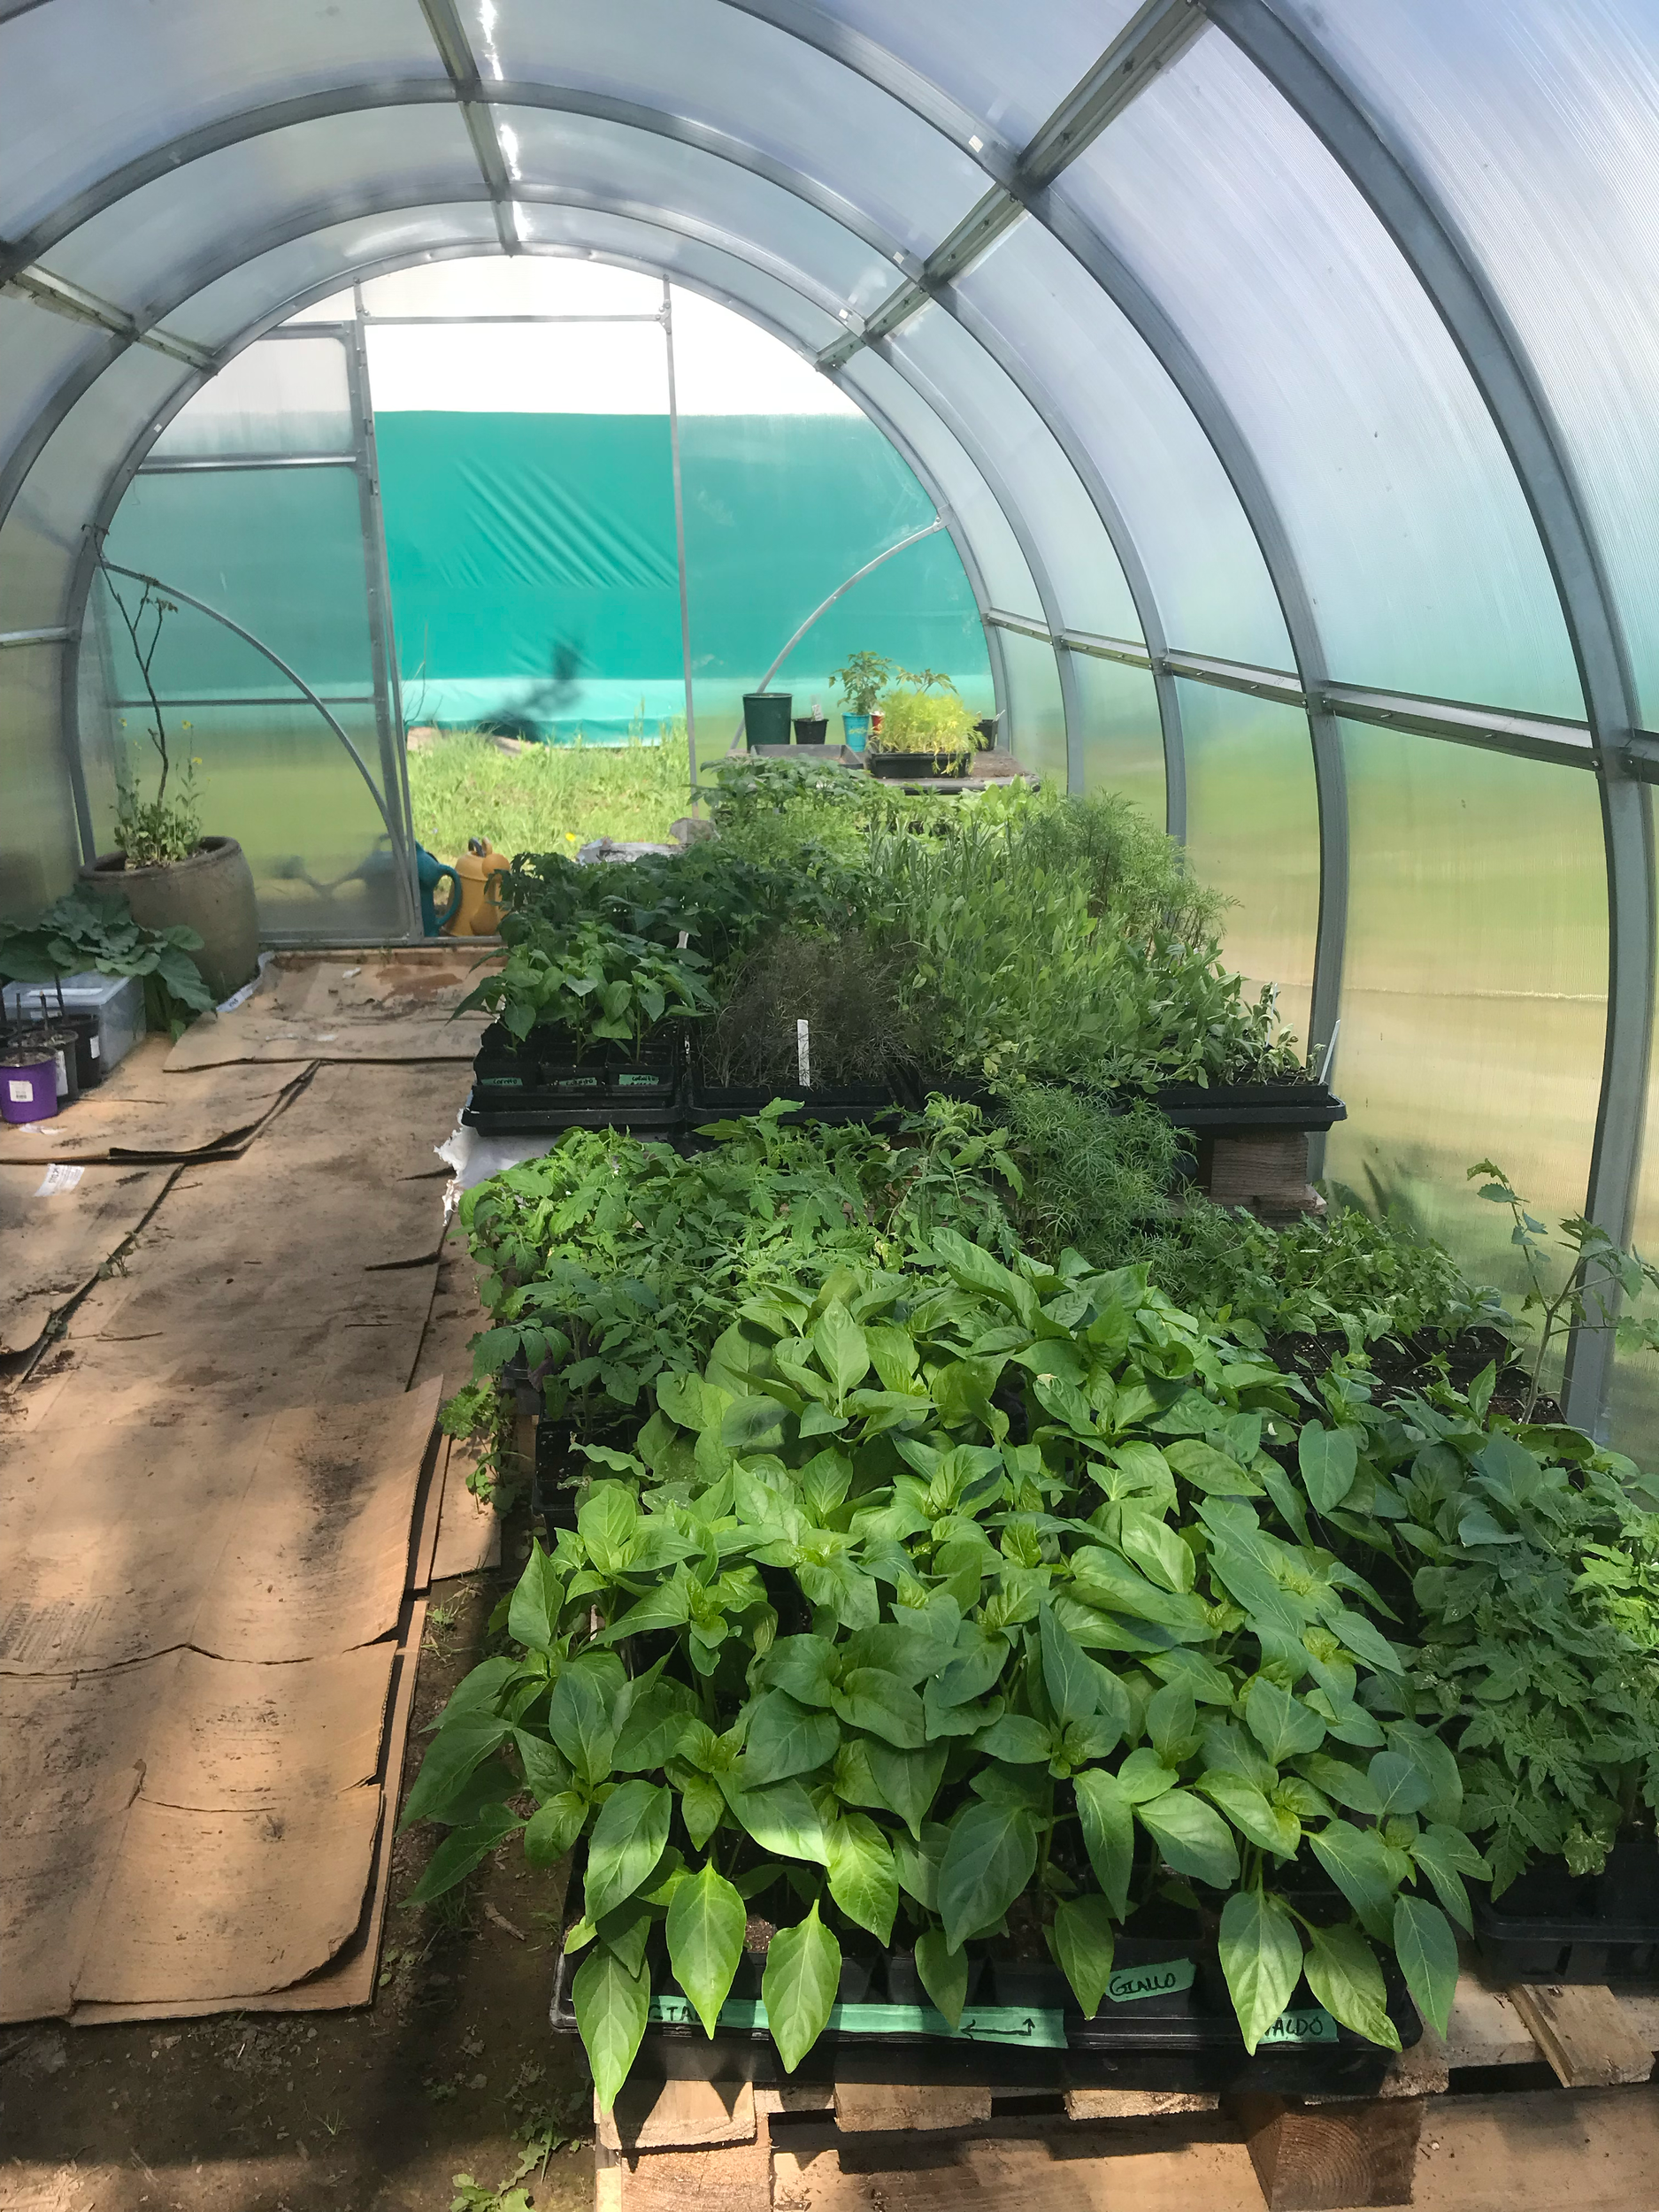
May 2026 - Nursery full of plants ready to go in the ground!
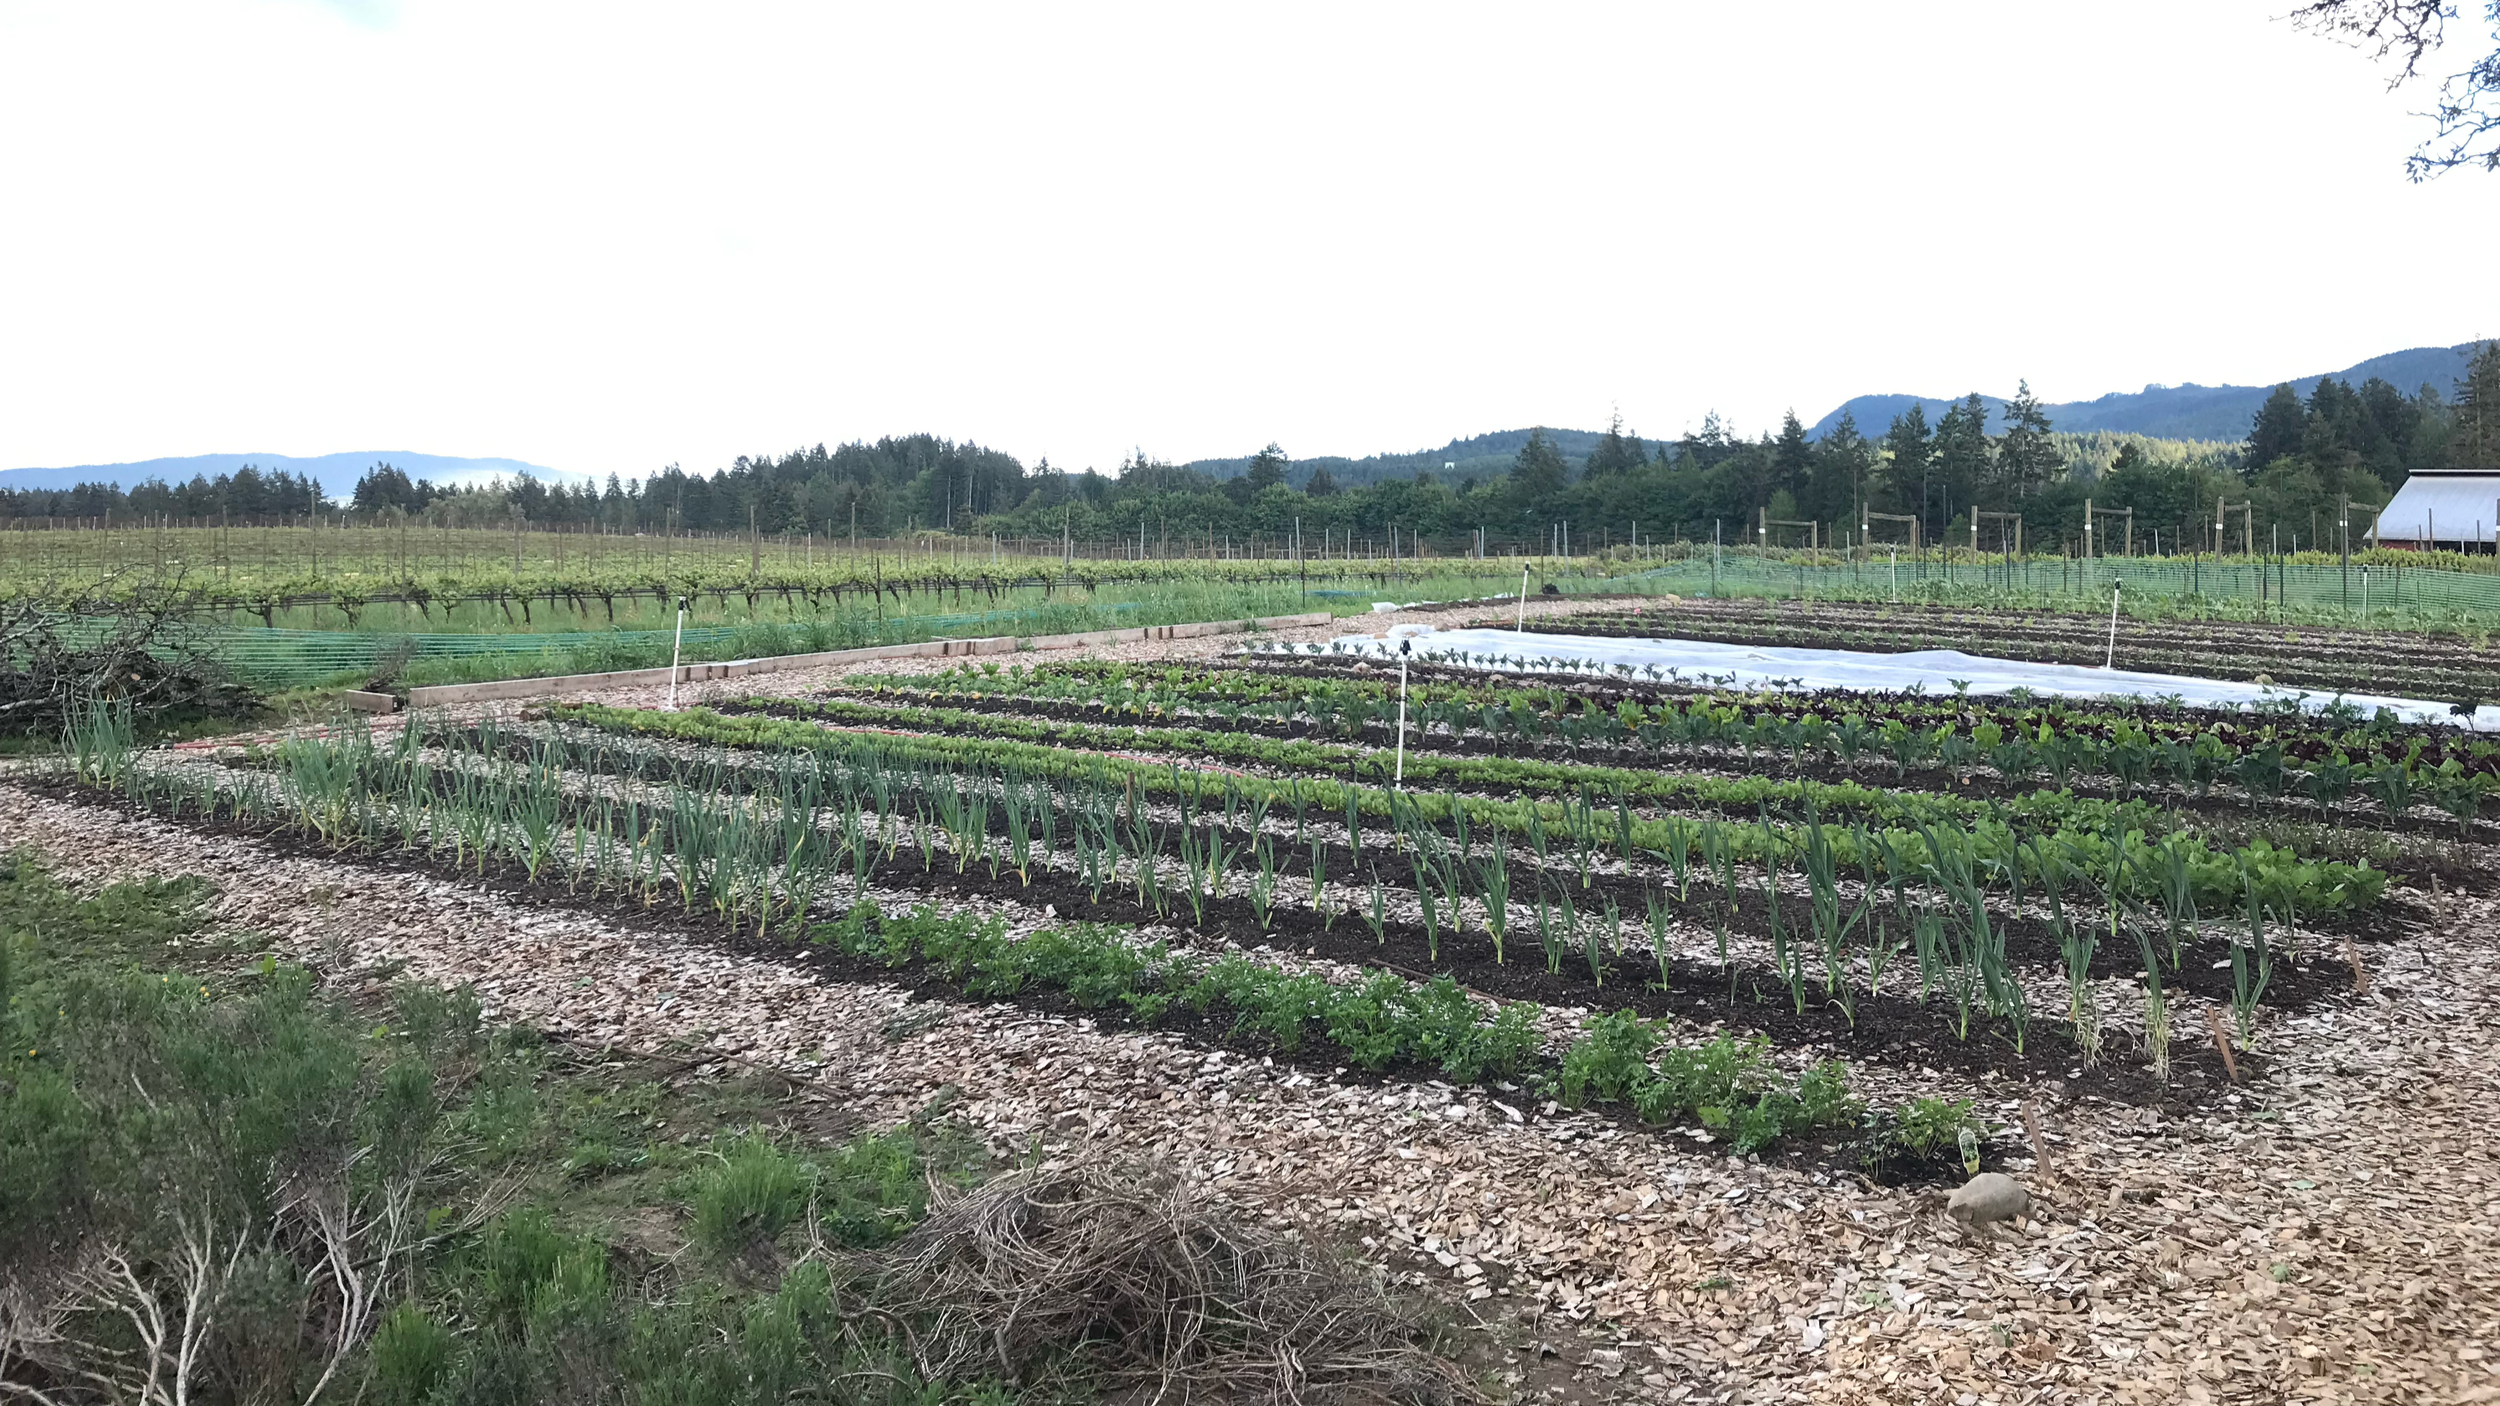
May 2026 - Beds fully planted with garlic, spring greens, carrots, beets, and legume cover crops

June 2026 - Installing arched cattle panel trellises
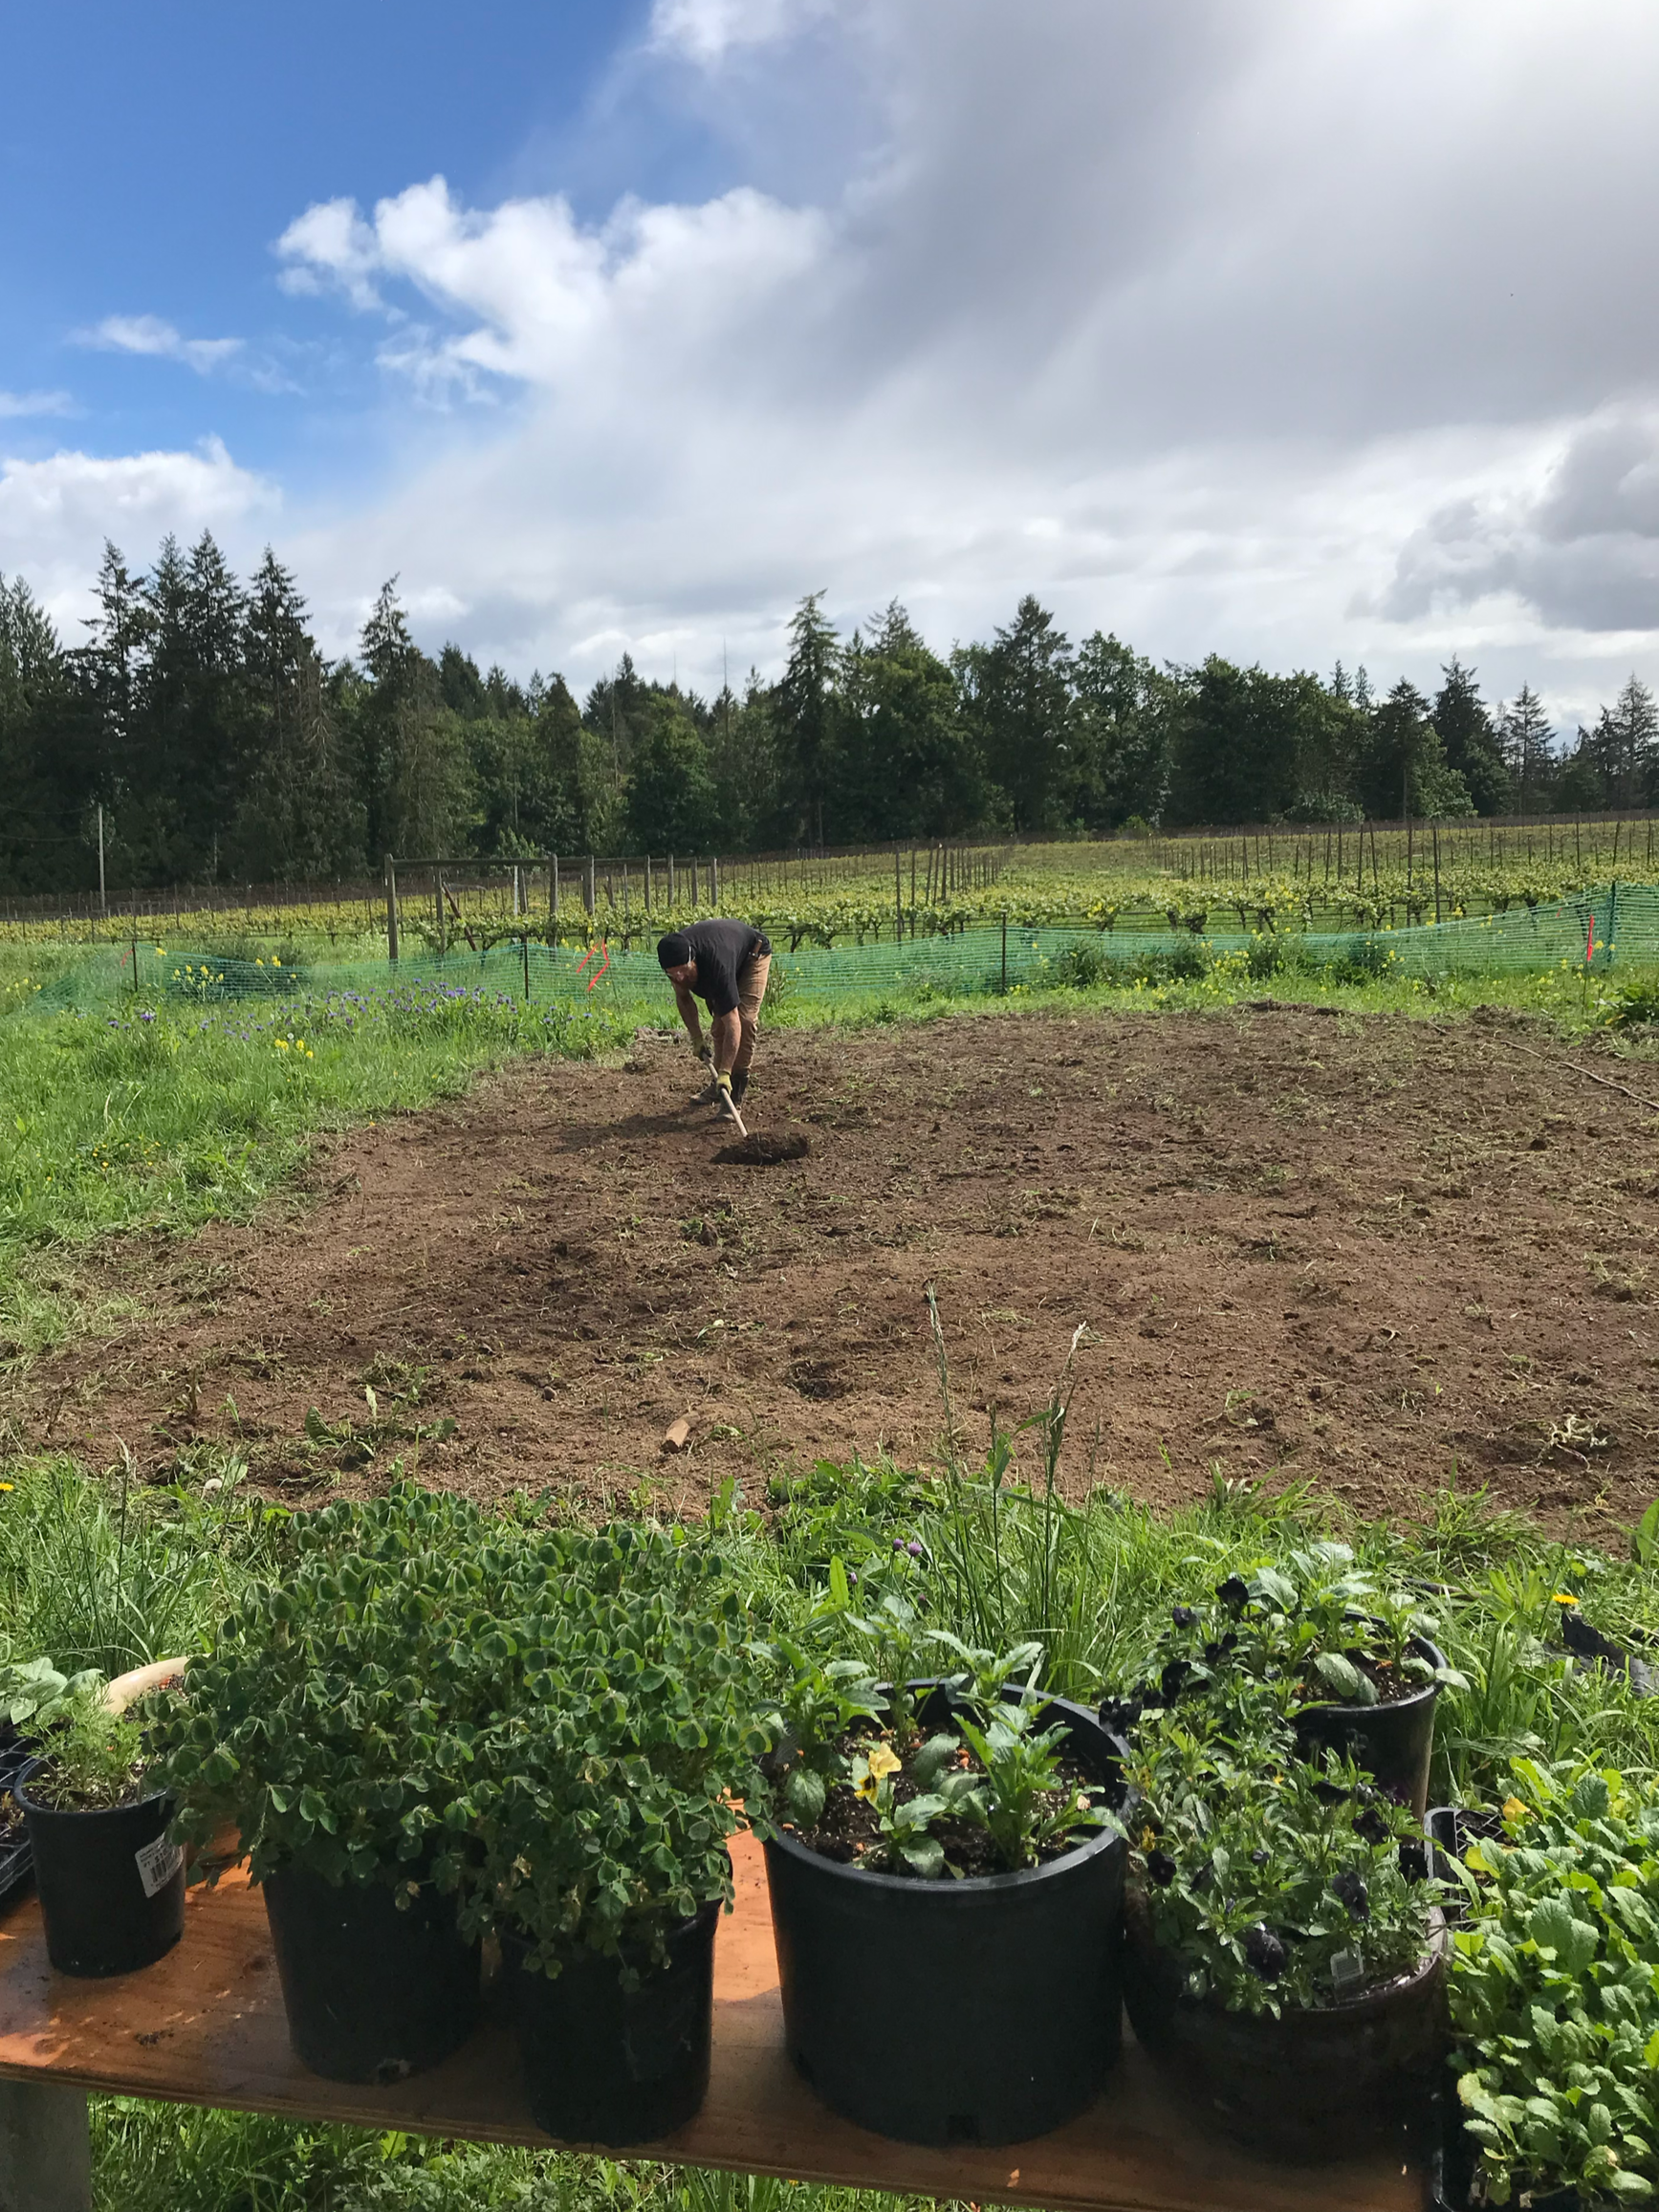
June 2026 - Logan prepping beds for squash and melons
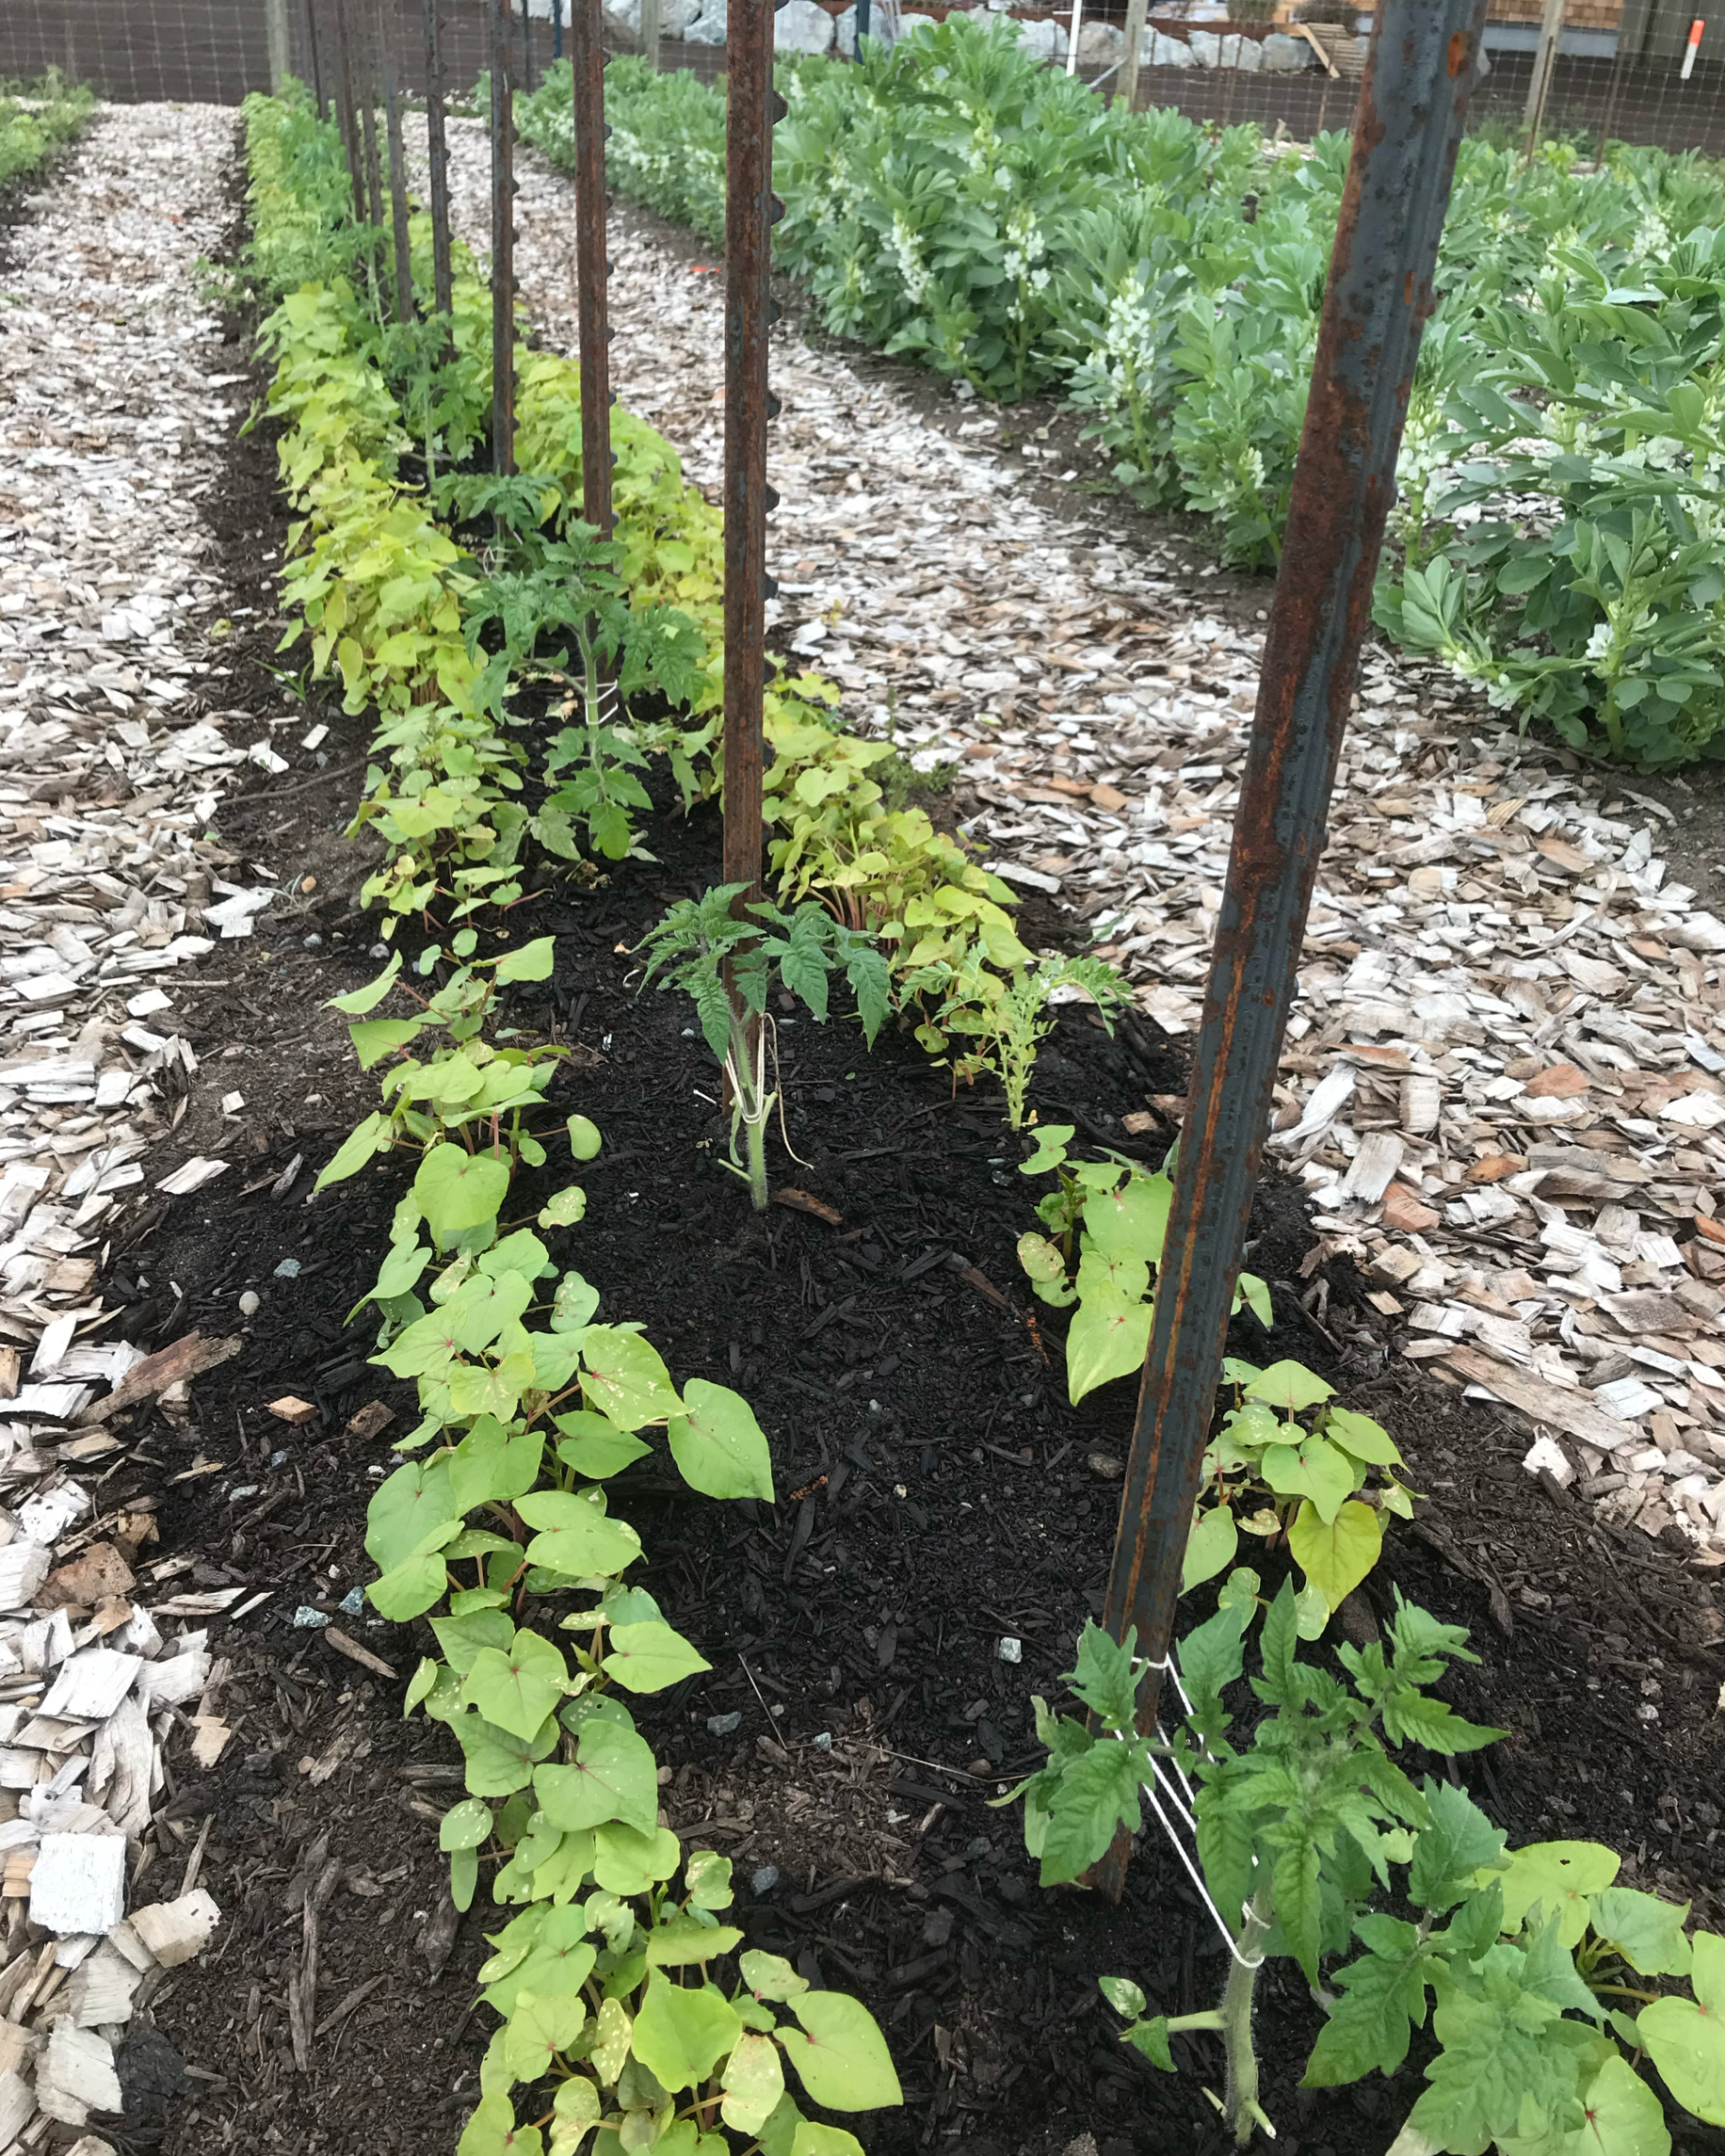
June 2026 - Roma tomatoes in the field, surrounded by a cover crop of buckwheat. Fava bean cover crop in the background.
Stay tuned for more photos and updates from the new food gardens at Unsworth!
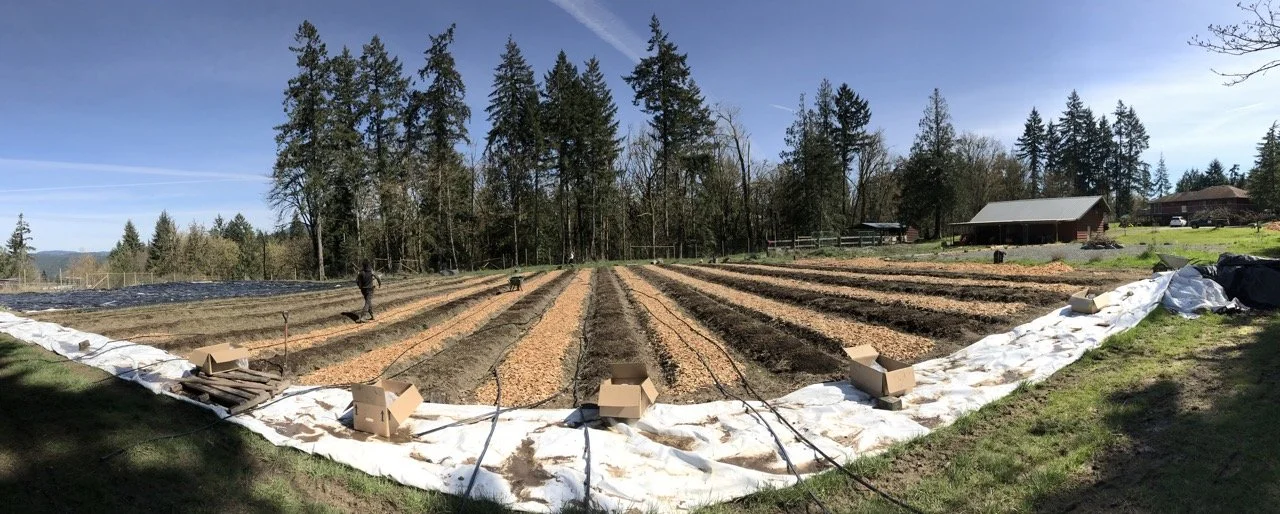
Planting a field of blueberries
This week, we helped plant 200 blueberries in a single day.
The client’s goal is ultimately to create an abundant berry field for a future u-pick operation, with food forest-style hedgeways. This first round of planting is only the beginning of her long-term vision. Already, it’s been months in the making, starting last year, when she reached out to book an initial consultation and received our project proposal with step-by-step recommendations on how to make the most of her 1 acre plot.
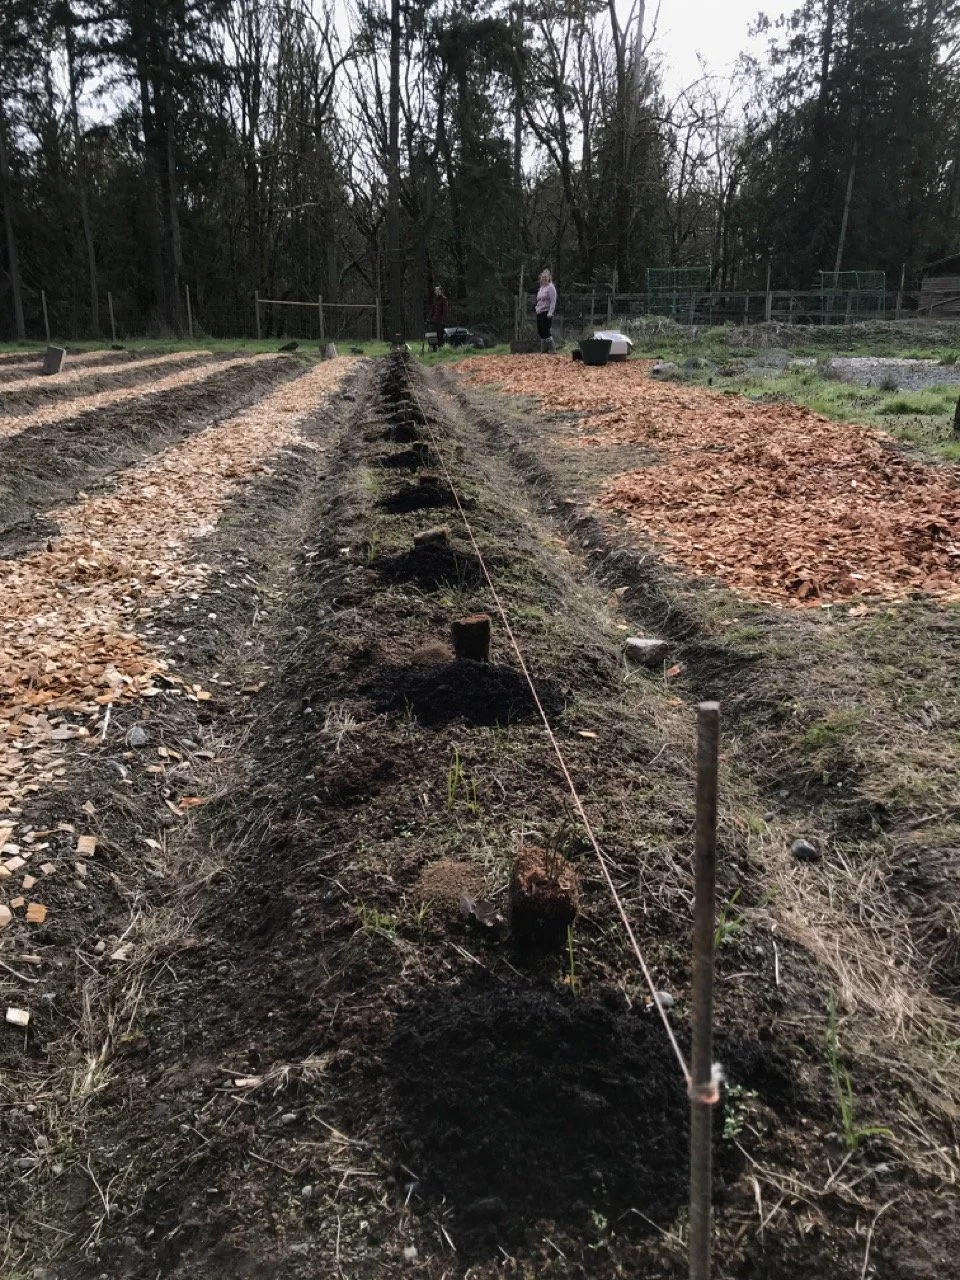
Together, we tarped the field in Autumn 2025 to smother any aggressive weeds. We pulled the tarps off together earlier this month (March 2026), and sowed a cover crop of crimson clover seed to encourage nitrogen fixing.
Then, we put down alder woodchips to mulch the pathways, and added 2 bales of peat on each beds to promote an acidic soil environment for the blueberries.
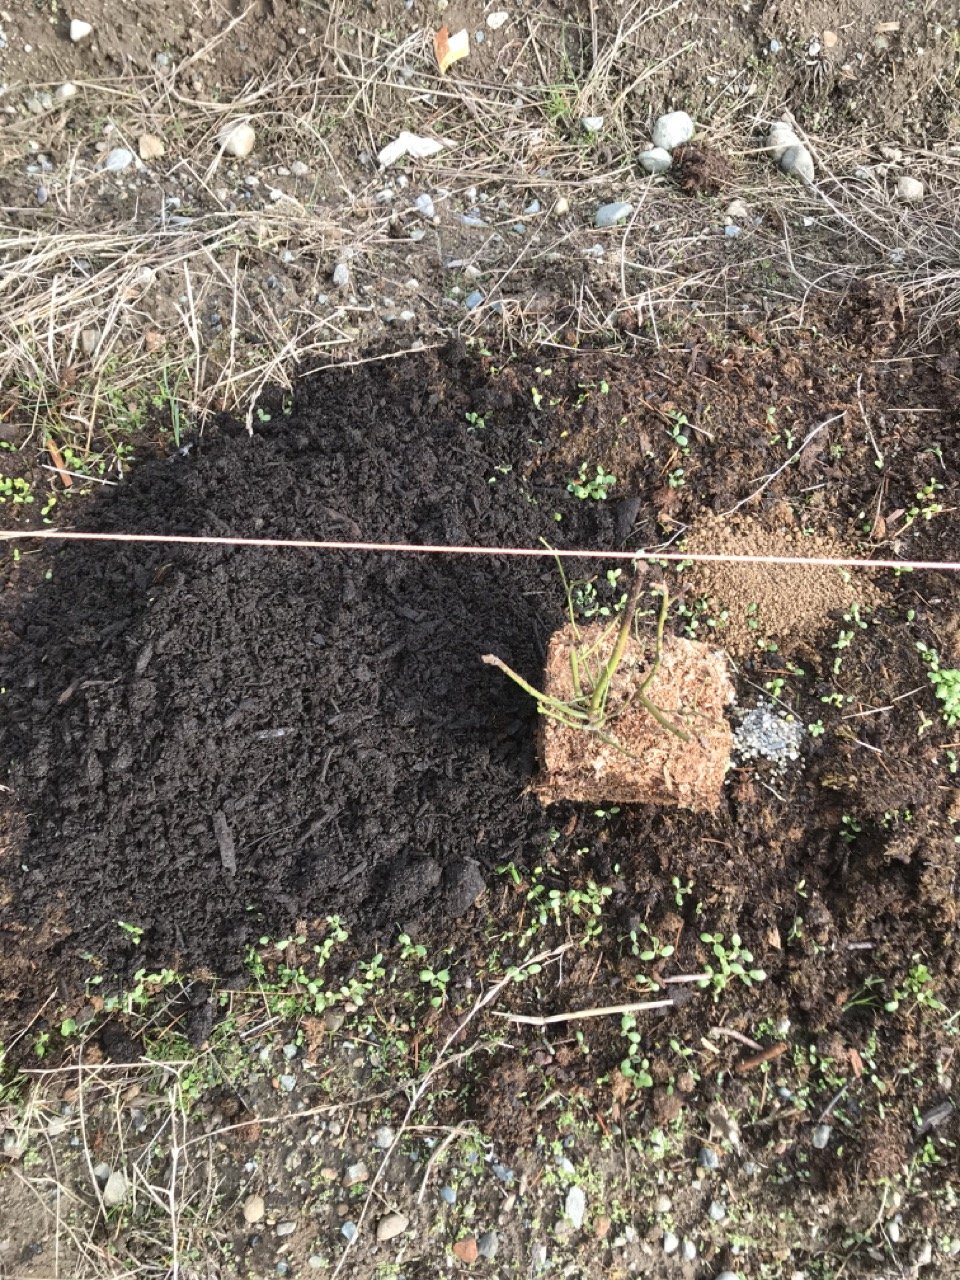
We selected three different varieties of blueberries: Bluecrop, Chandler, and Duke. This ensures a longer harvesting window, as each variety ripens at a different time, with Duke being the earliest, followed by Bluecrop at midseason, and Chandler ripening last. The plants arrived from Canadian supplier Van Noort packed neatly into cardboard boxes.
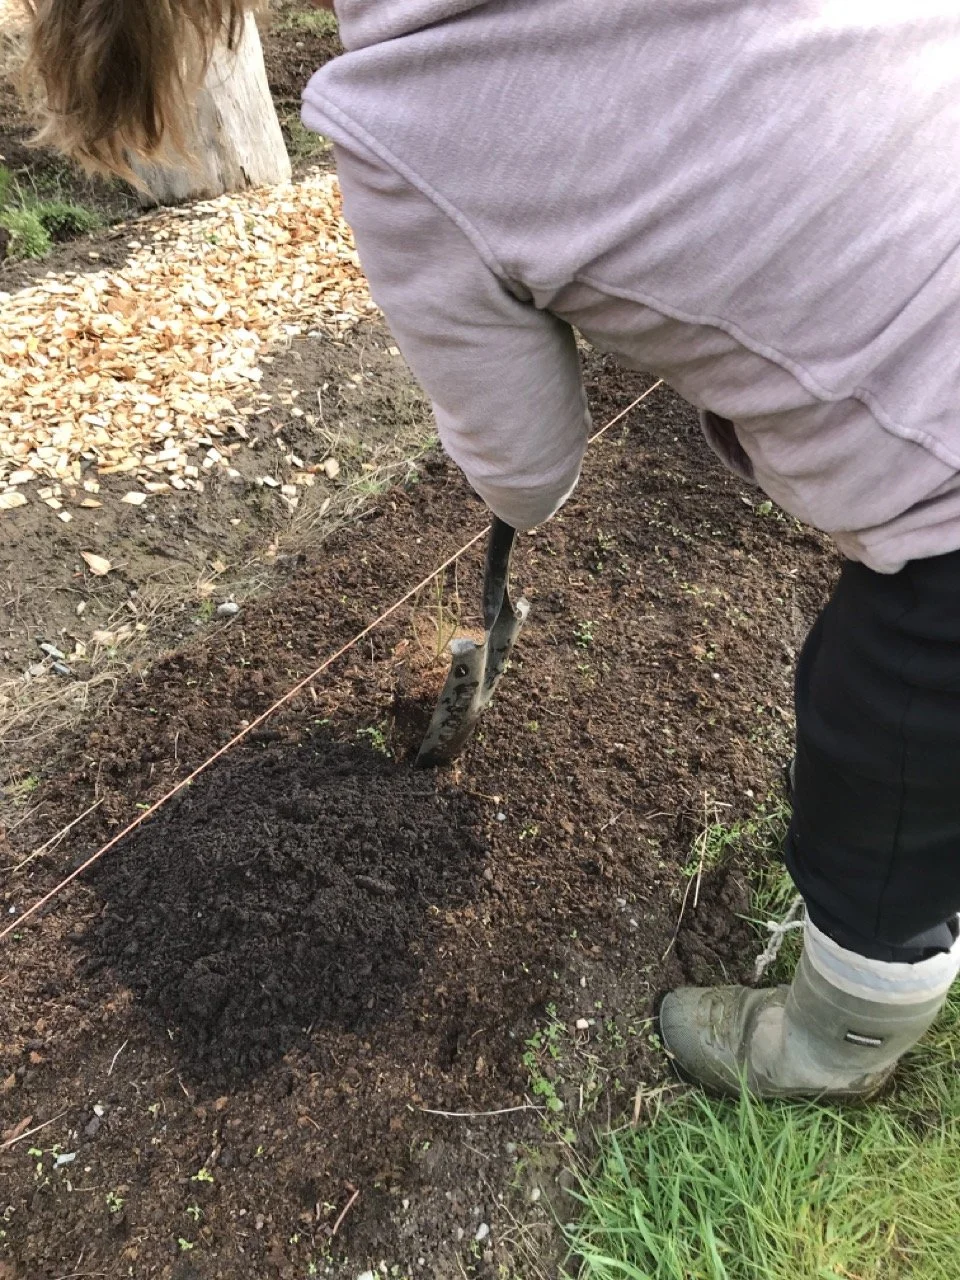
When it came time for the big day, we started by running a string line down the centre line of each bed, and laying out a measuring tape. We set out the plants 4 feet apart in row, and followed up with a scoop of each for every planting hole:
- bone meal for root development,
- slow release fertilizer designed for acid-loving plants,
- a generous shovel full of premium locally produced fish compost (shout out to Jordan at Rootbound Sustainability,)
Then, we dug them in to their new homes, and repeated the process on the next 7 beds. In the end, it took three of us 5 hours to plant all 200 plants.
It was a beautiful sunny day full of anticipation of harvests to come. We could see that our client was excited that her farming dreams were becoming a reality.
The next step will be to finish installing the irrigation, which will consist of two lines of drip tape per bed. Once the clover cover crop starts to flower, it will be chopped down and left in place as a green mulch before getting covered with landscape fabric to keep persistent weeds under control, and conserve soil moisture.
Laying plants out
The client planting the first blueberry - hundreds more to come!
Every blueberry was planted with a scoop of compost, bone meal, and fertilizer. Notice the clover seedlings everywhere!
A “Bluecrop” baby all tucked in
Cool Season Harvests
The first spinach harvests of the year have arrived, always an exciting start to our growing season here on Vancouver Island. Spinach has proven to be one of the most reliable crops for overwintering in our climate. These plants were started from seed in late October last year, grown-on in a cold frame through the winter, and then transplanted into the garden about a month ago.
At this time of year, we like to sow smaller batches of greens at regular intervals. This is called “succession planting”, and it ensures a continuous supply of fresh, tender leaves. It also serves as a practical strategy to hedge against potential losses from surprise frosts along with the birds, slugs, rabbits and deer, who are all ravenous after a Wintry famine.
Our favourite variety to grow is ‘F1 Space,’ a smooth-leafed, slightly savoyed spinach that performs consistently well. For early plantings, we cover newly transplanted spinach with row cover material supported by simple wire hoops pushed into the earth. This added protection shields the plants from harsh winter winds, heavy rain, and animal pests.
Spinach is a cool-season staple, well suited to withstand the freezing temperatures we experience on Vancouver Island. With a bit of planning and protection, it keeps rewarding us with fresh harvests even in the colder months.

Overwintered Spinach, March 2026
Early Spring seedlings in the cold frame
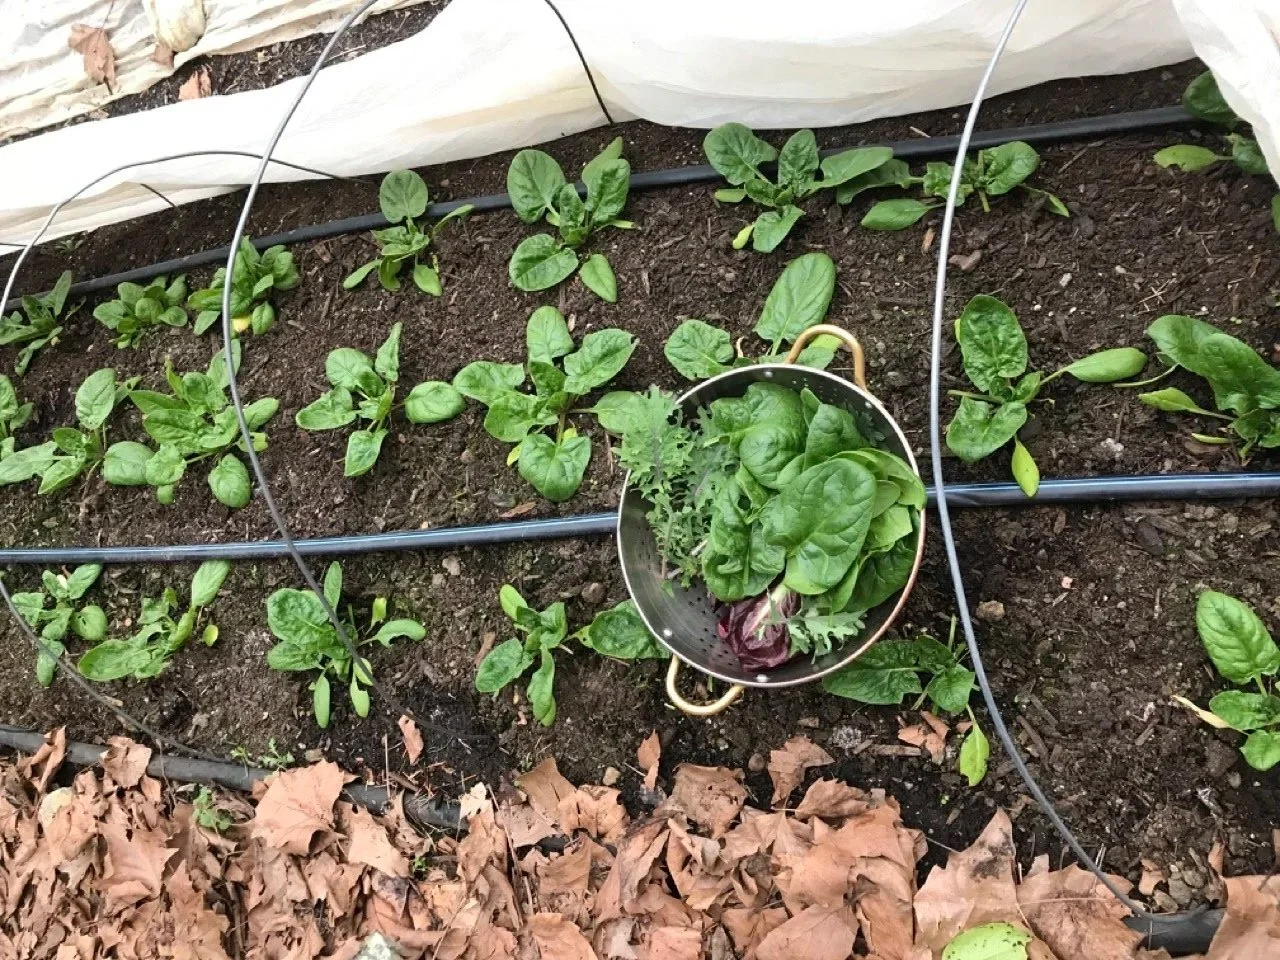
Harvesting greens from under protective covering
Propagating Apple Rootstock in a Small Garden
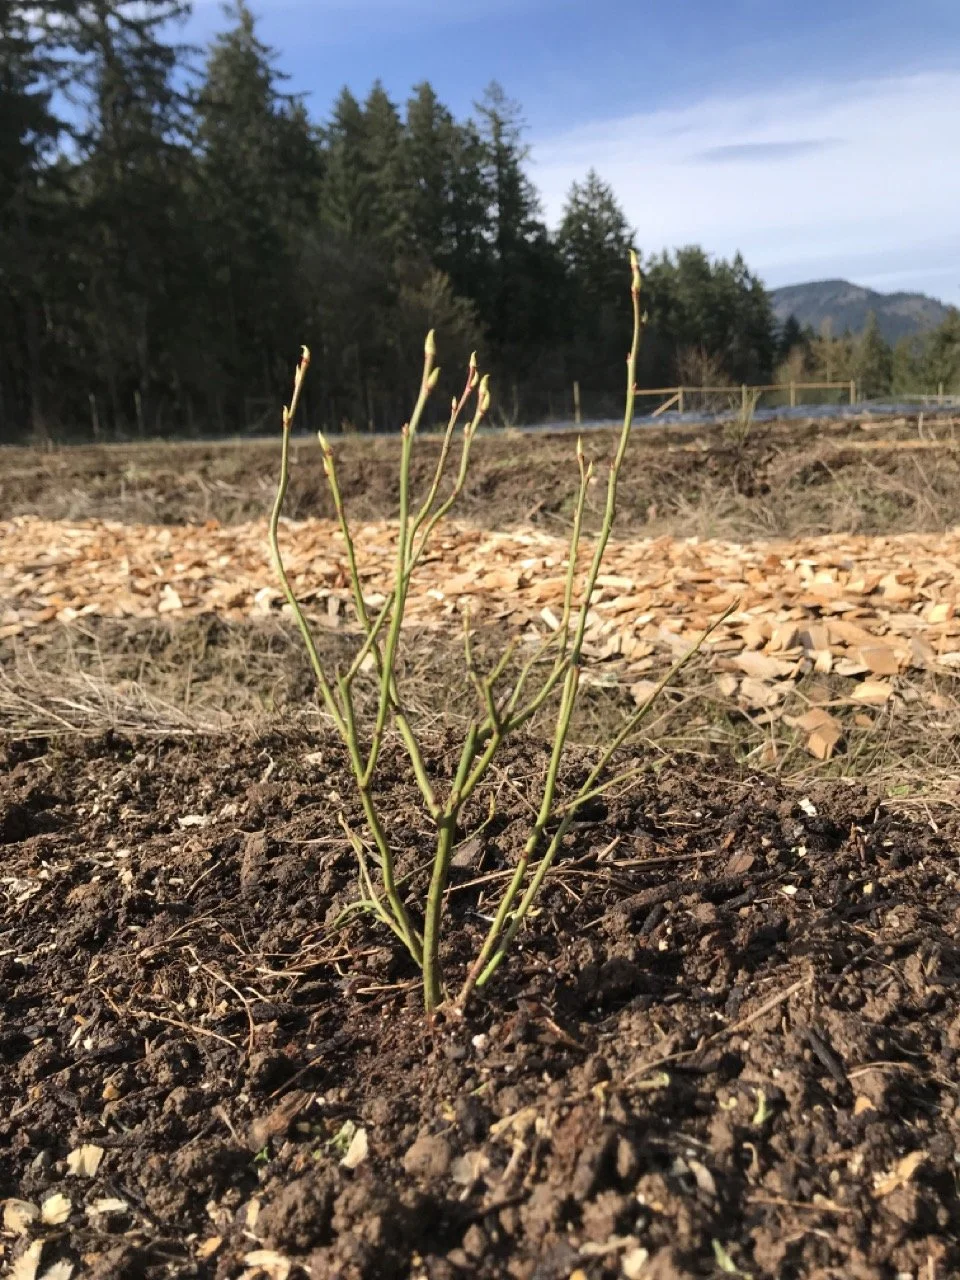
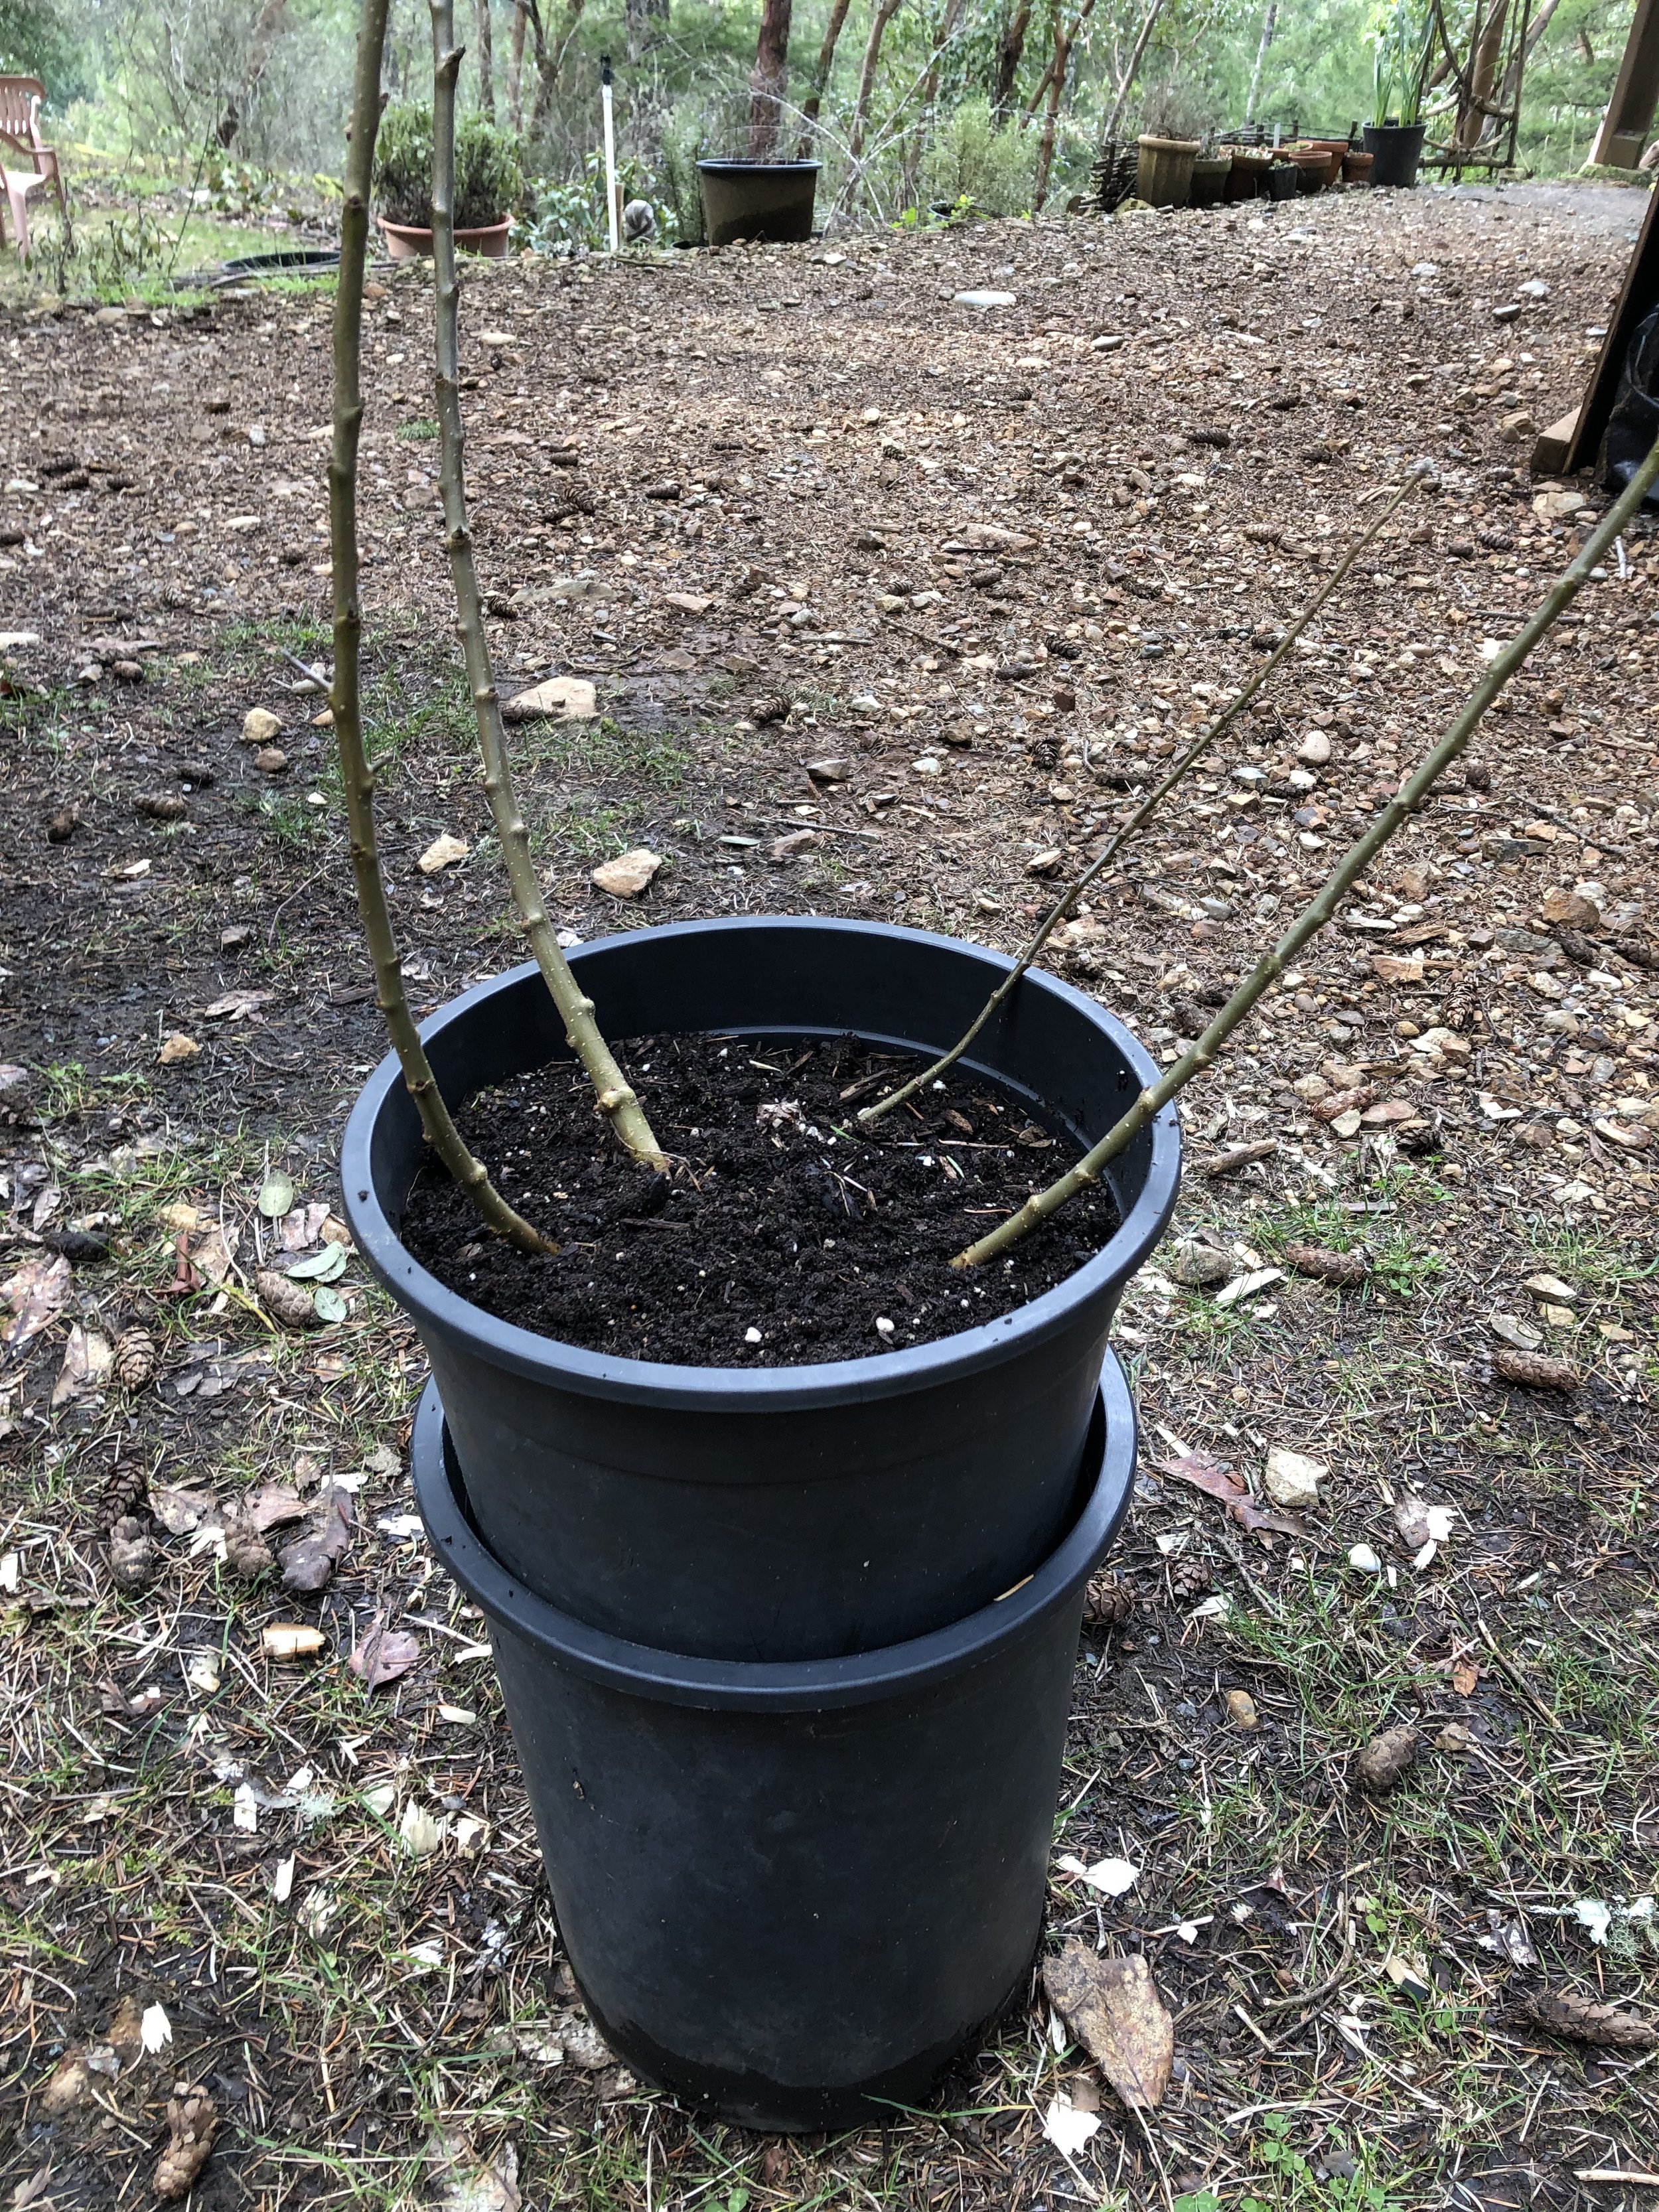
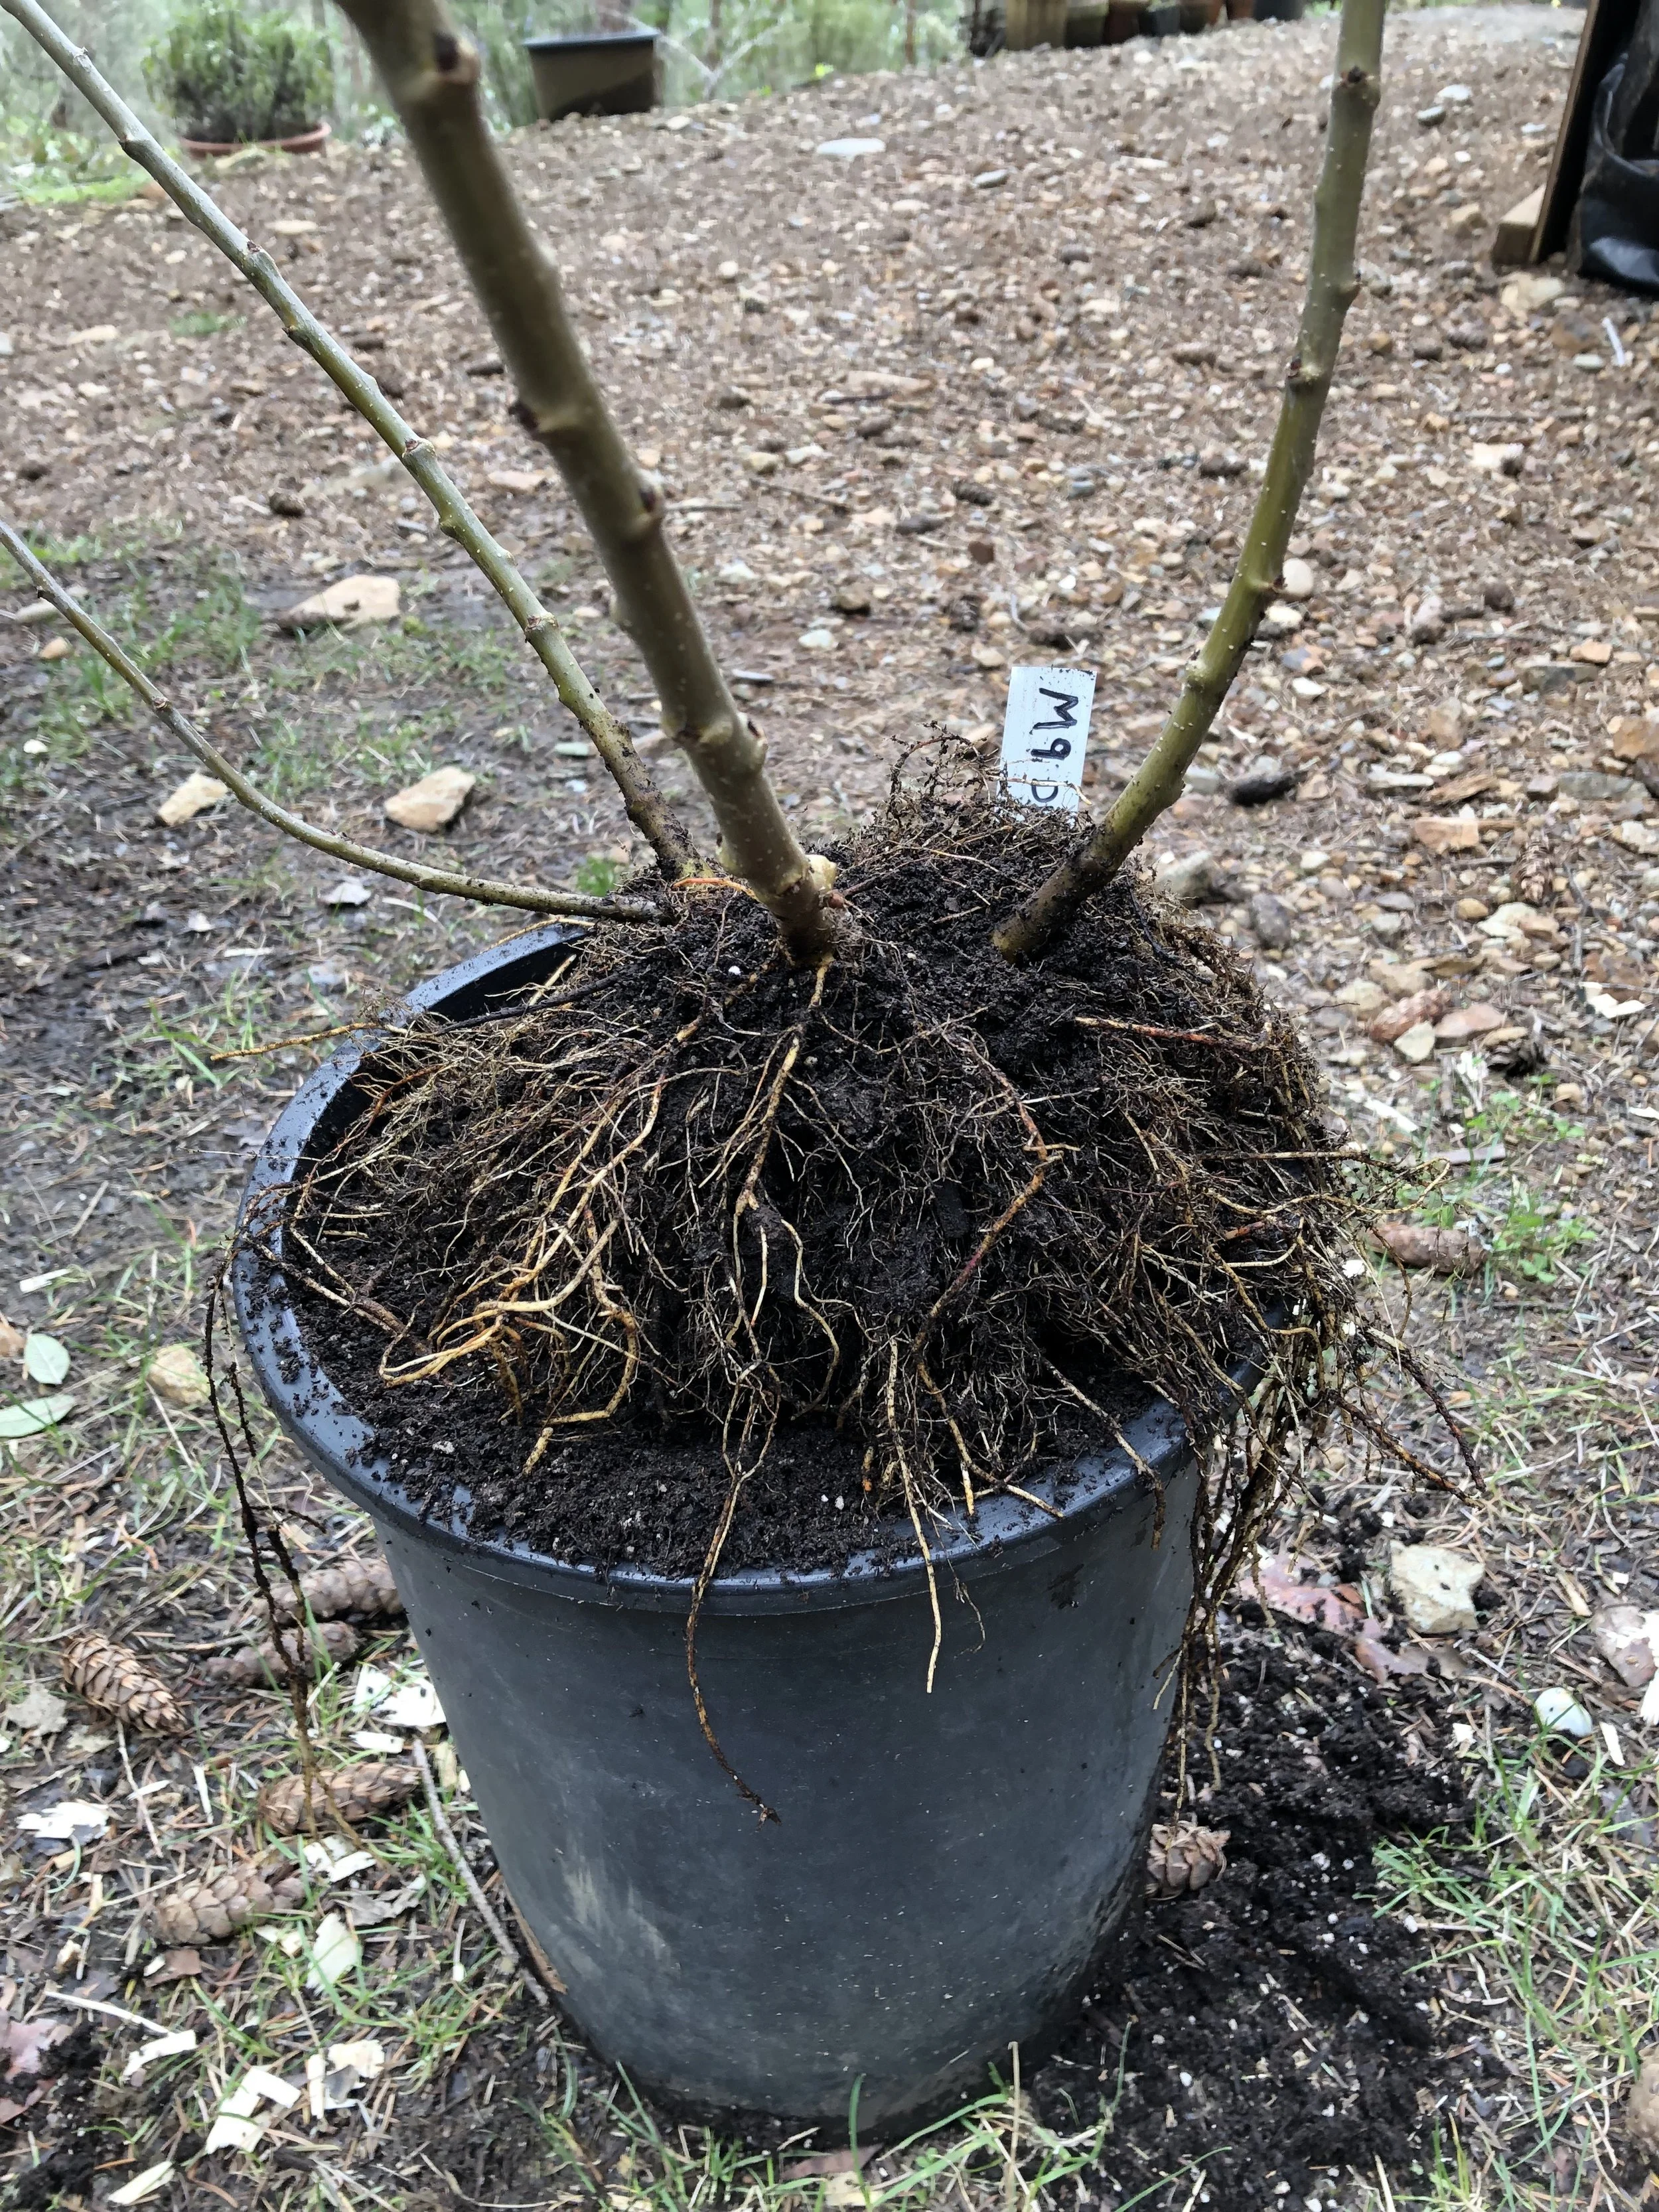
If you’re working with limited space but still want to expand your orchard, propagating your own apple rootstock could be both practical and rewarding. Last Spring, we experimented with a simple container-based technique using an M9 dwarf rootstock—and the results were impressive.
We started by planting a bare-root M9 rootstock into a container, burying part of the stem to encourage stability and root development. After a few weeks, buds began to emerge along the stem. At that point, we cut the main stem back to about two inches above the soil line. This step redirects the plant’s energy into producing multiple side shoots rather than a single leader.
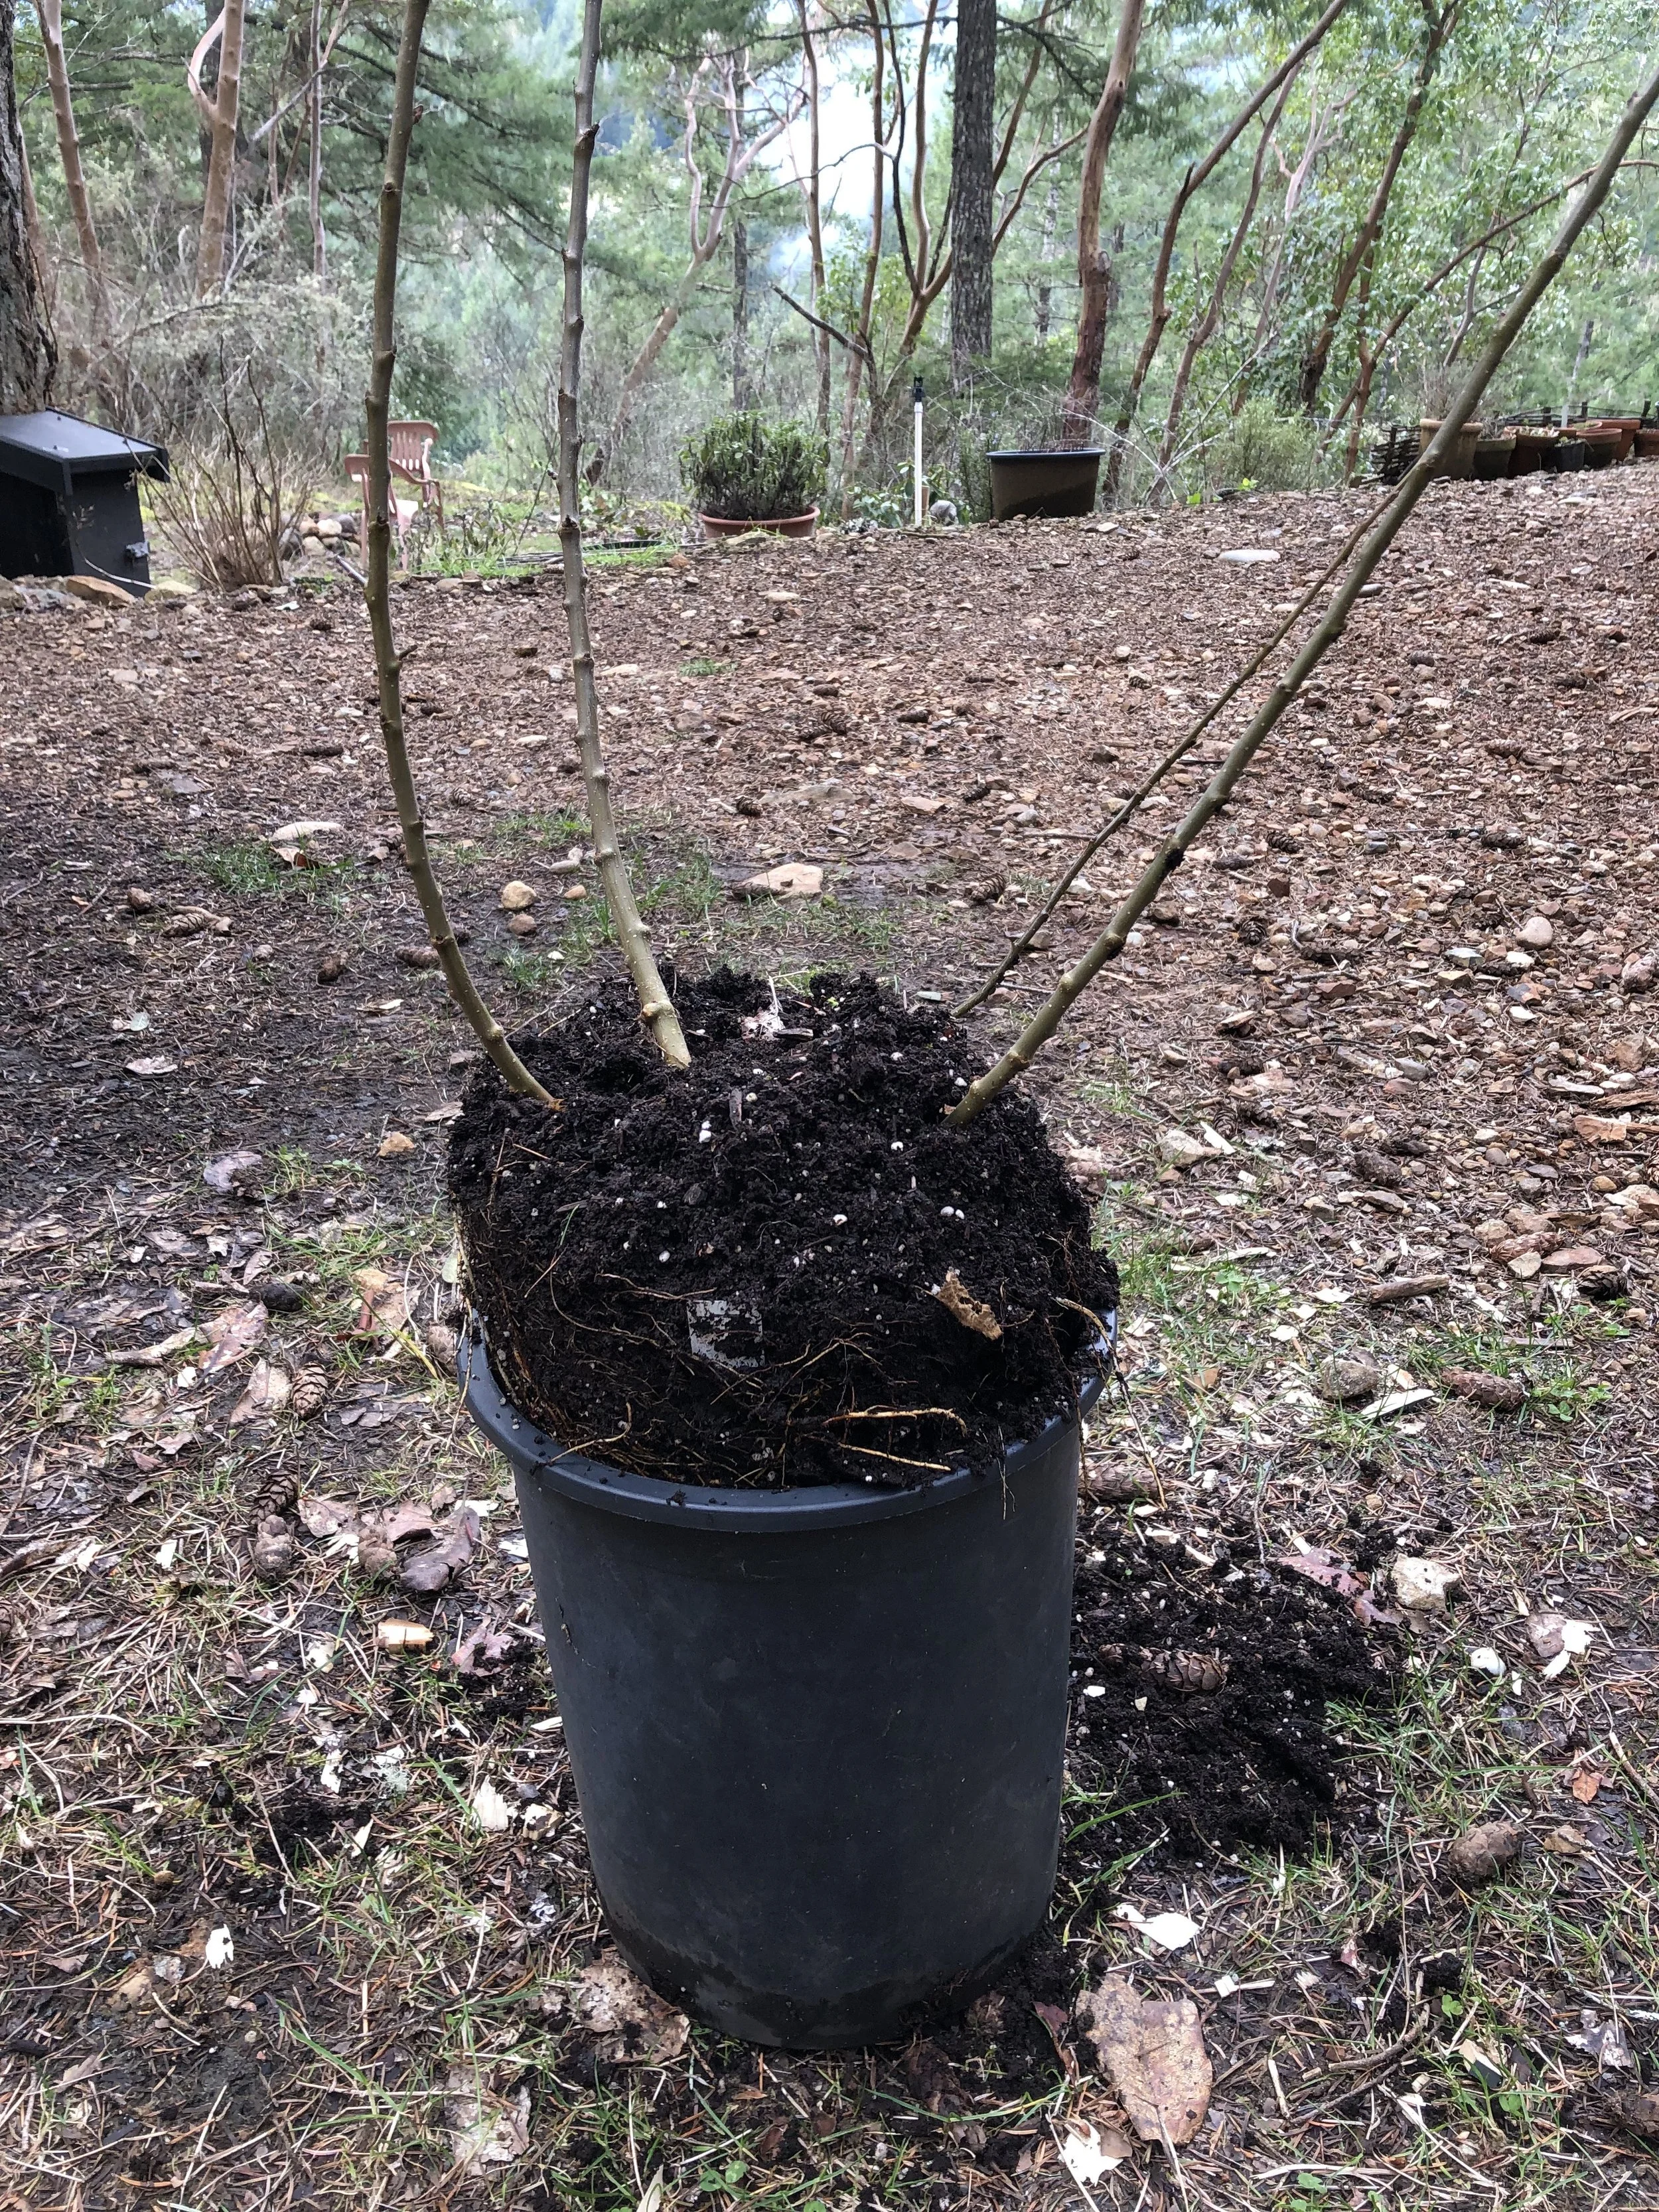
Once new shoots began to grow, we placed a second plant pot (with the bottom removed) over the original container. As the shoots elongated, we gradually filled this upper pot with a light mix of potting soil and compost—being careful not to fully bury or damage the new growth. Over the course of the summer, we continued adding soil as the shoots grew taller, eventually reaching 2–3 feet in height.
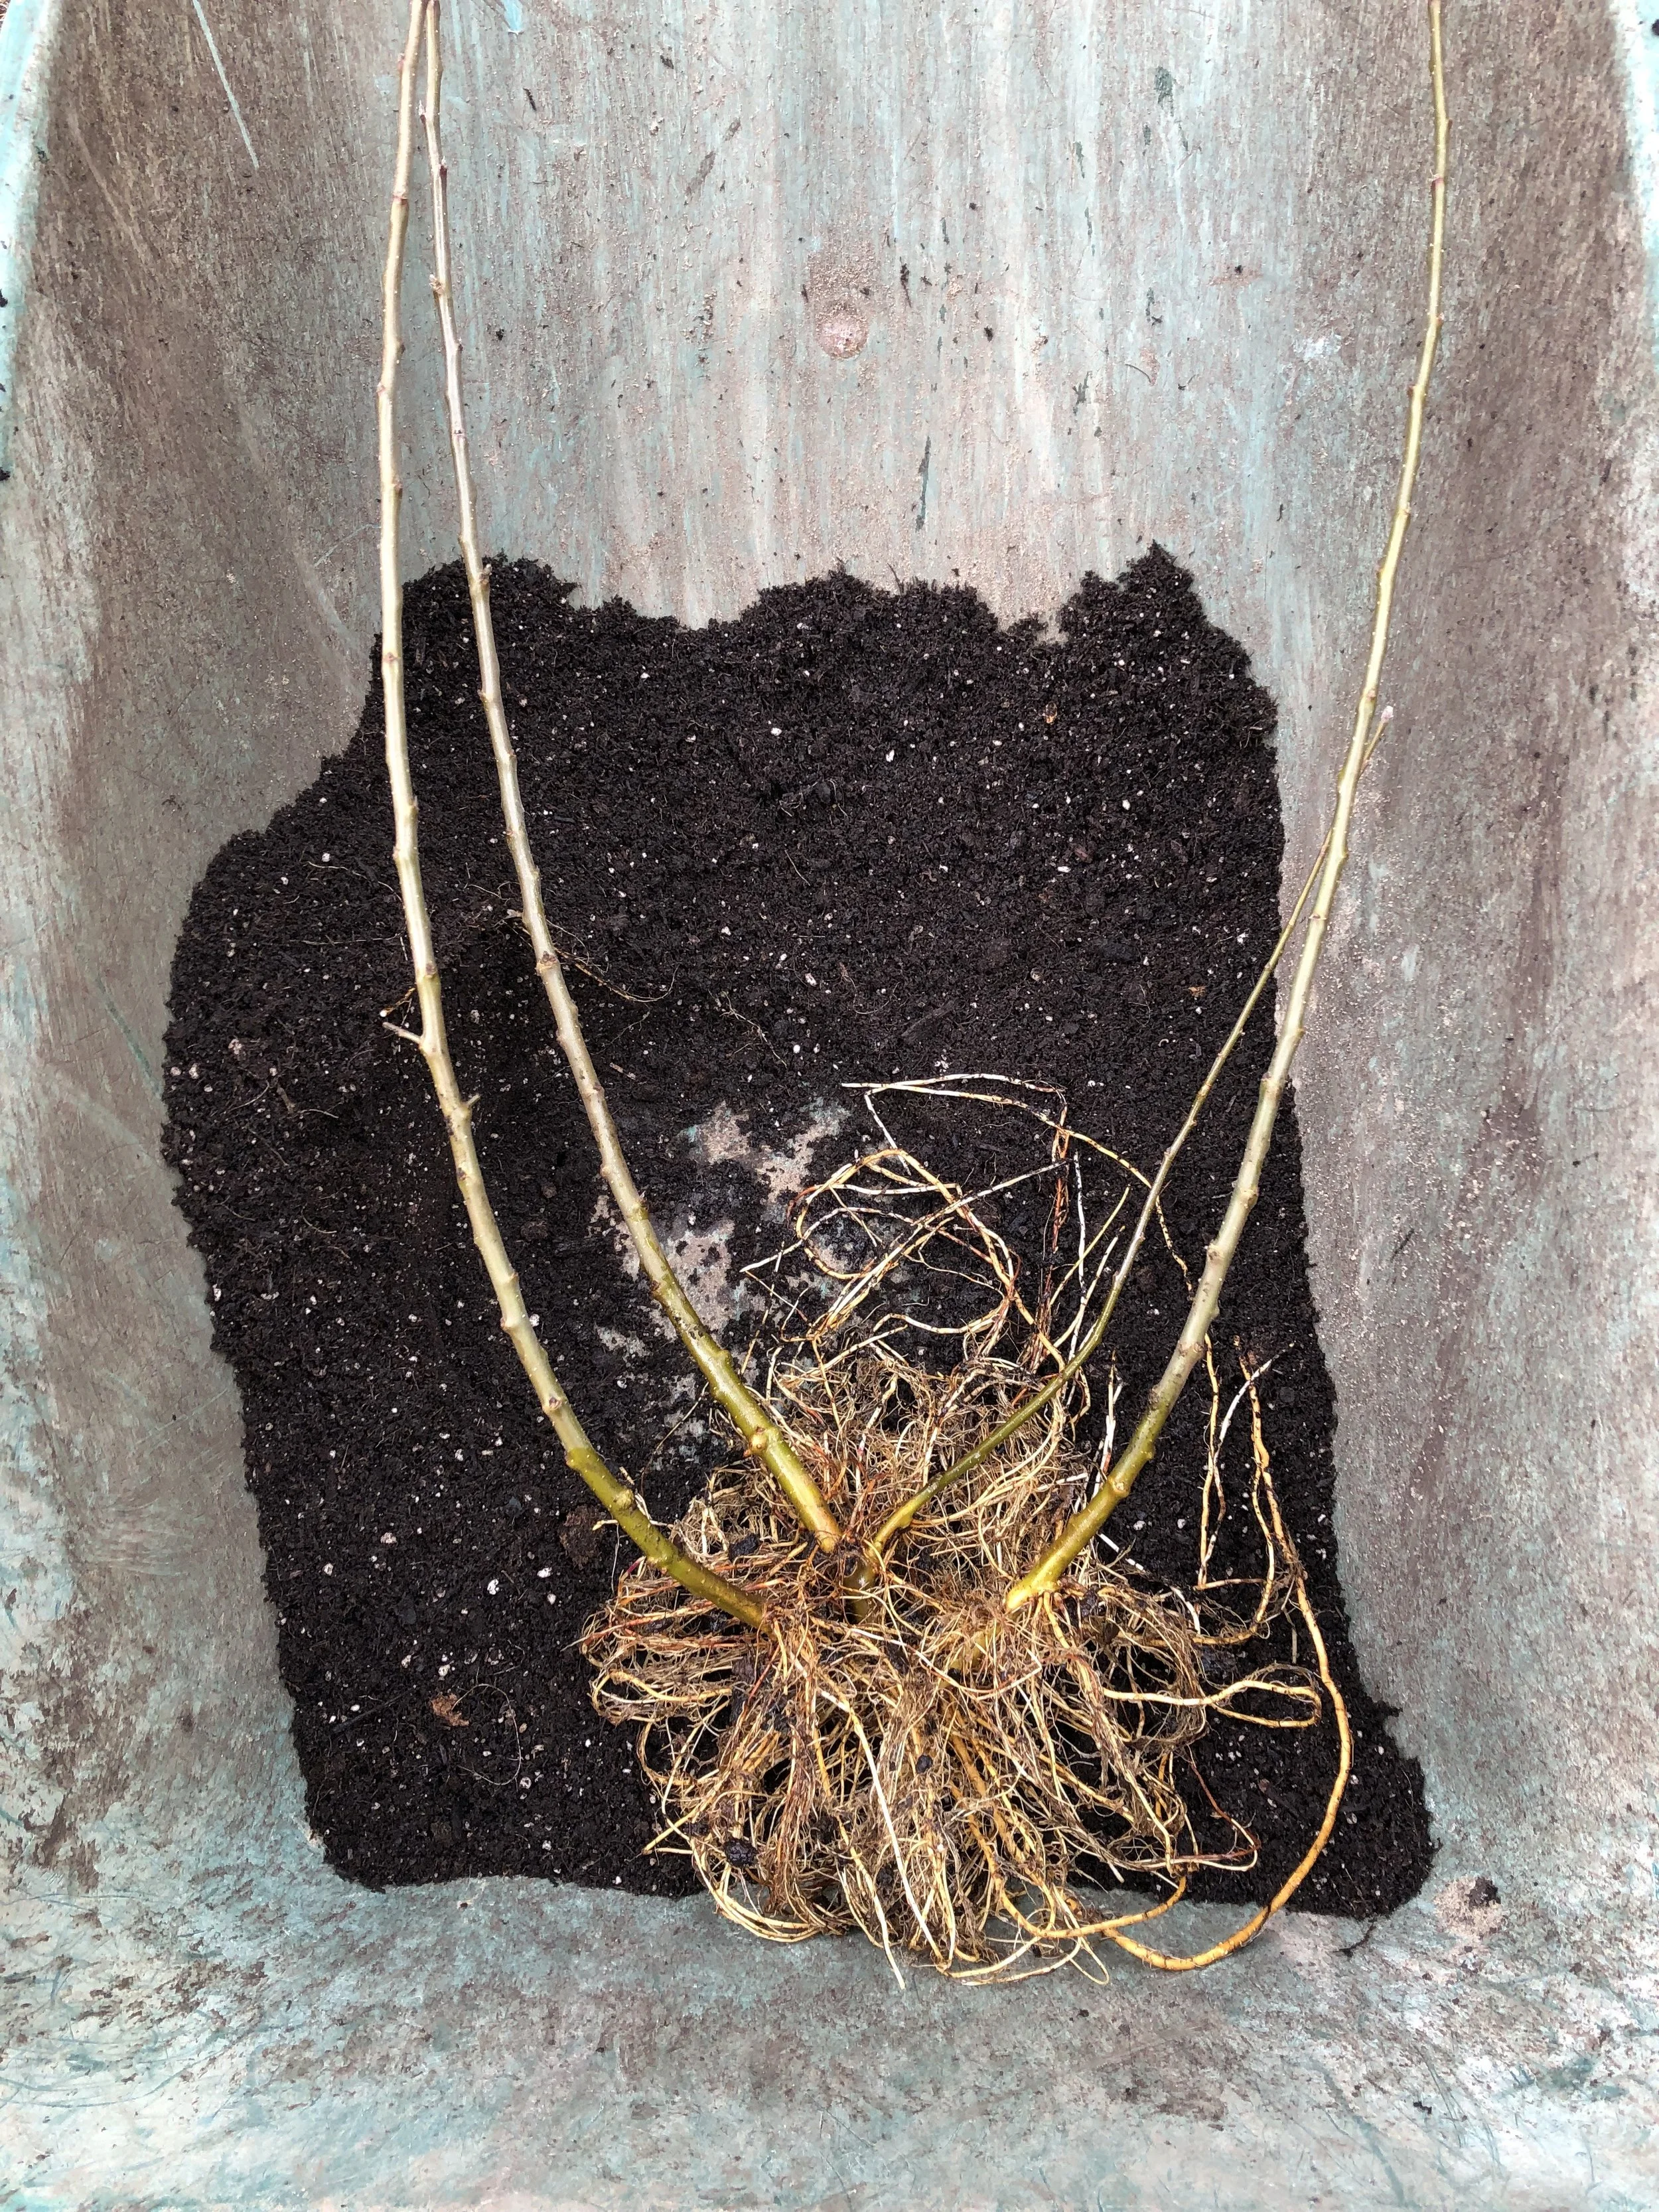
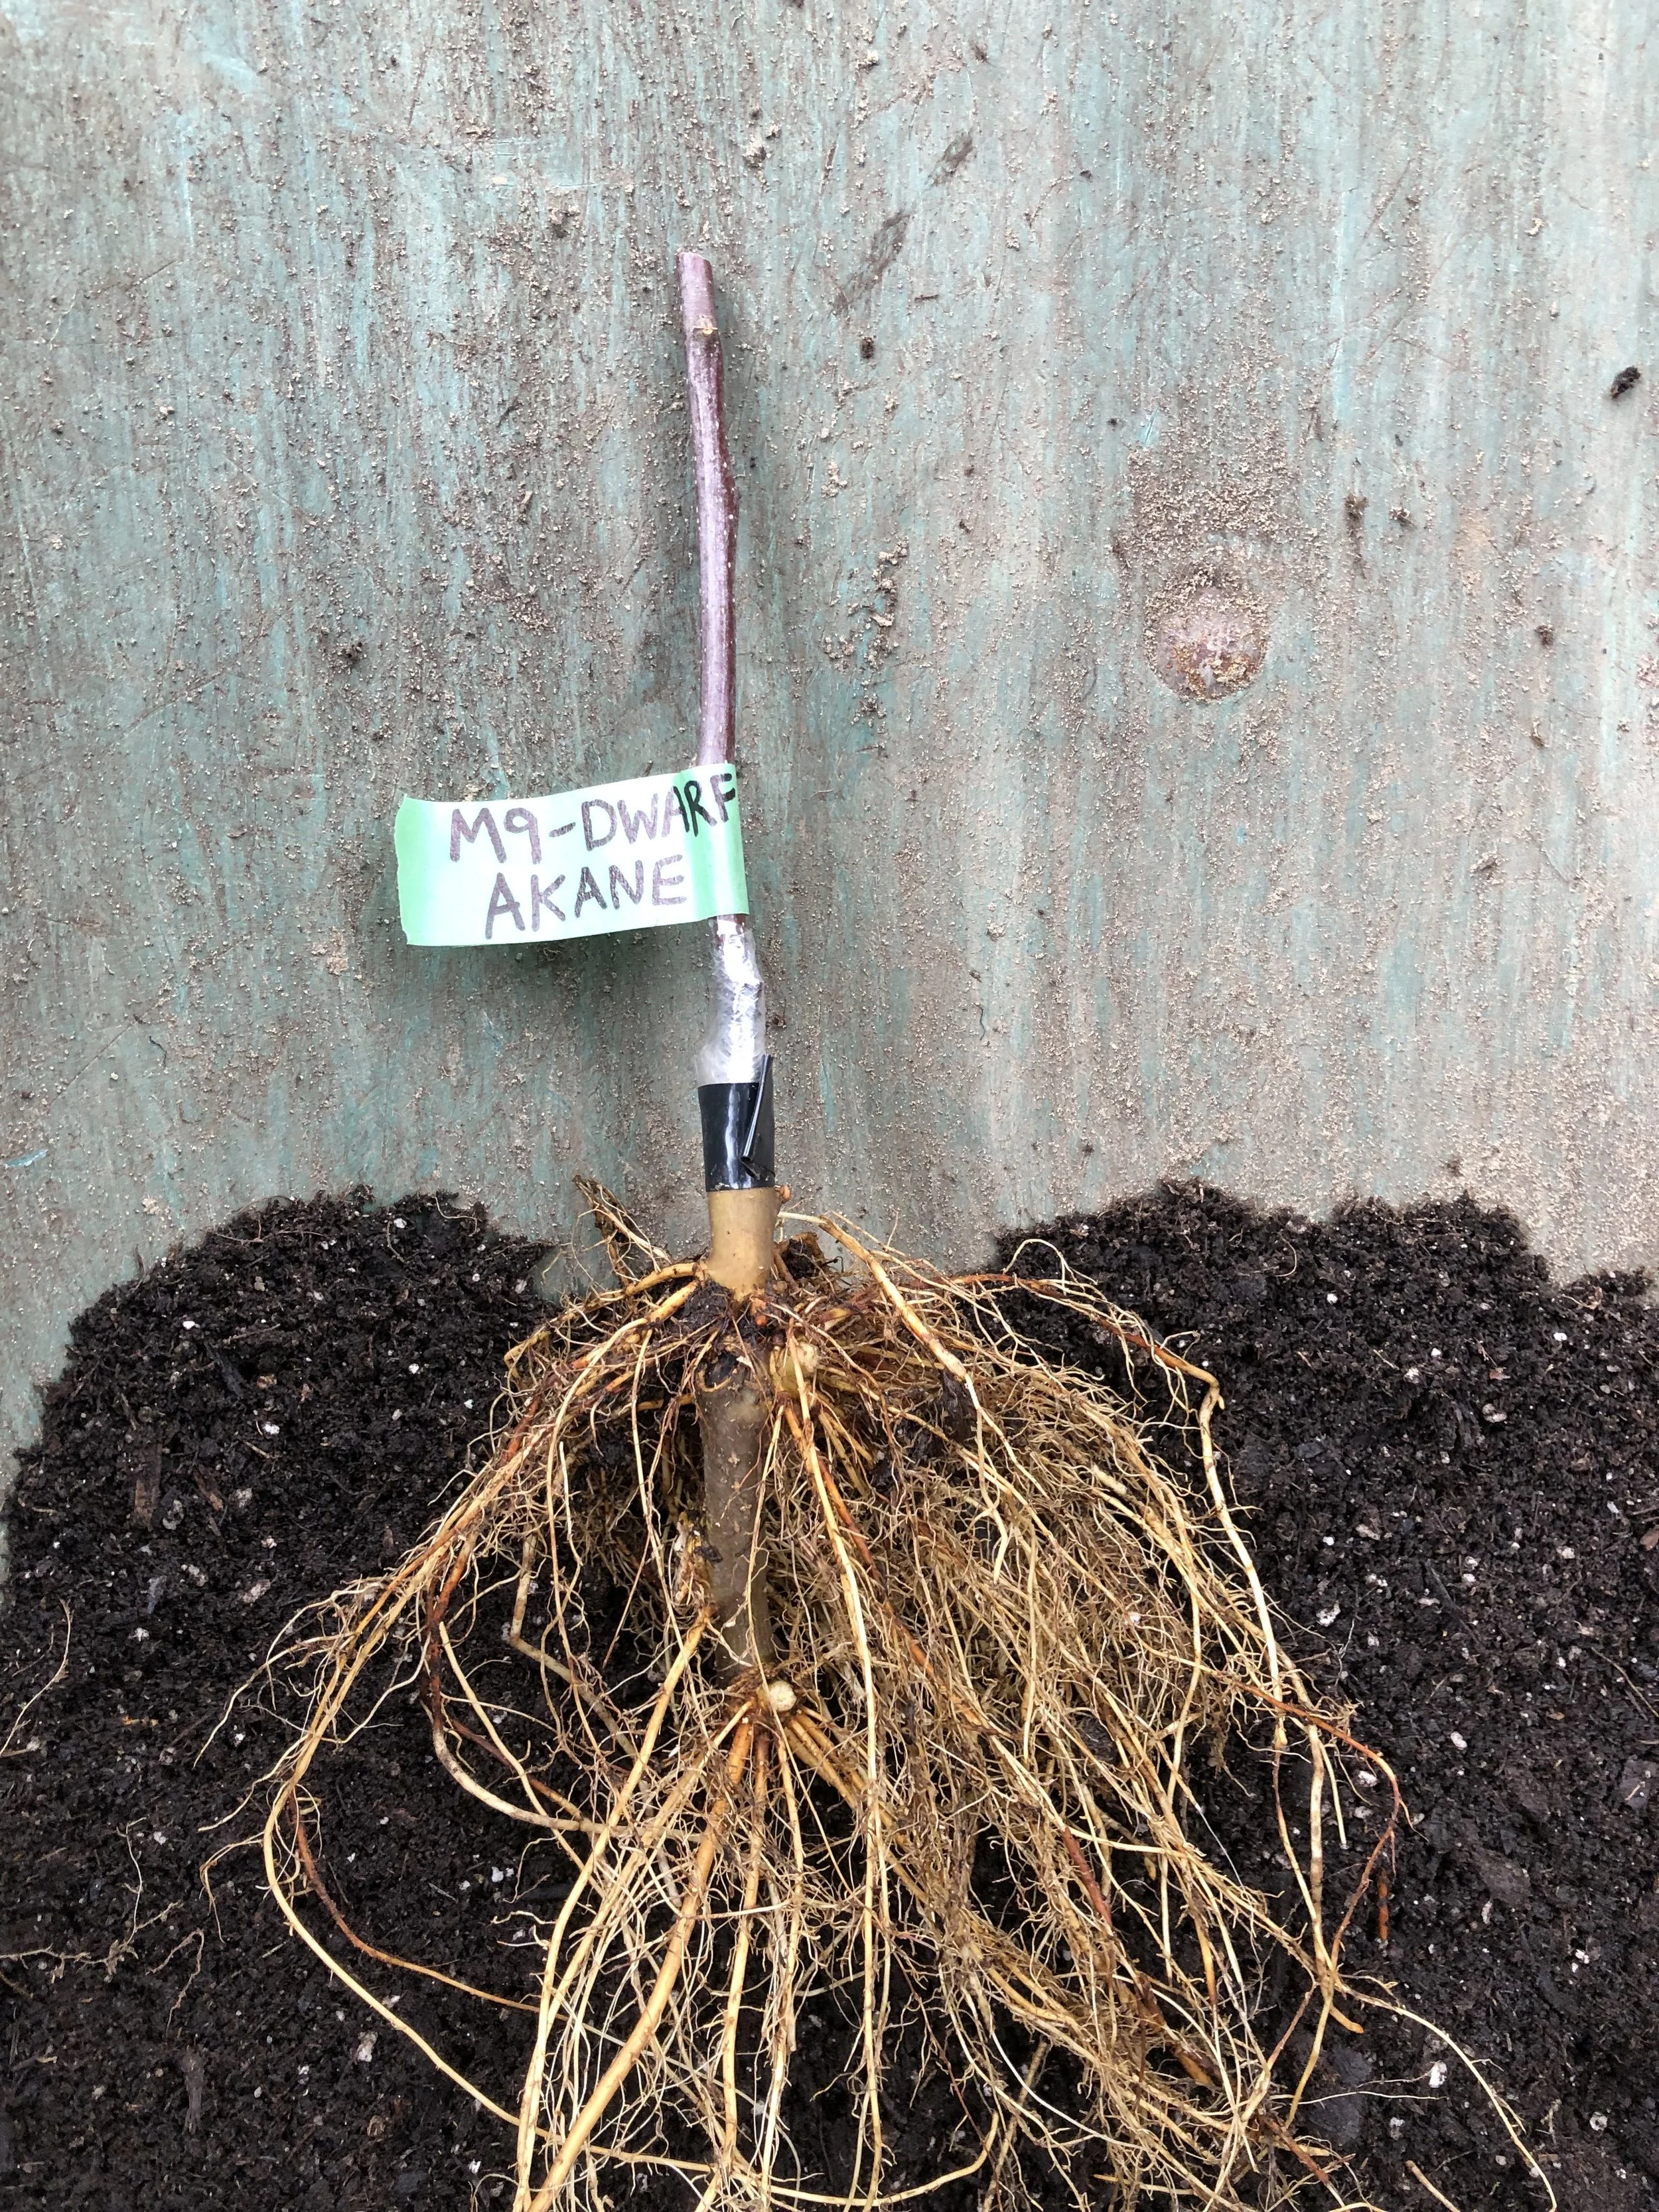
By late winter, we removed the upper pot and gently worked away the soil to reveal that several of the shoots had developed their own roots. I was able to separate four well-rooted shoots from the original plant—effectively turning one rootstock into four in a single year.
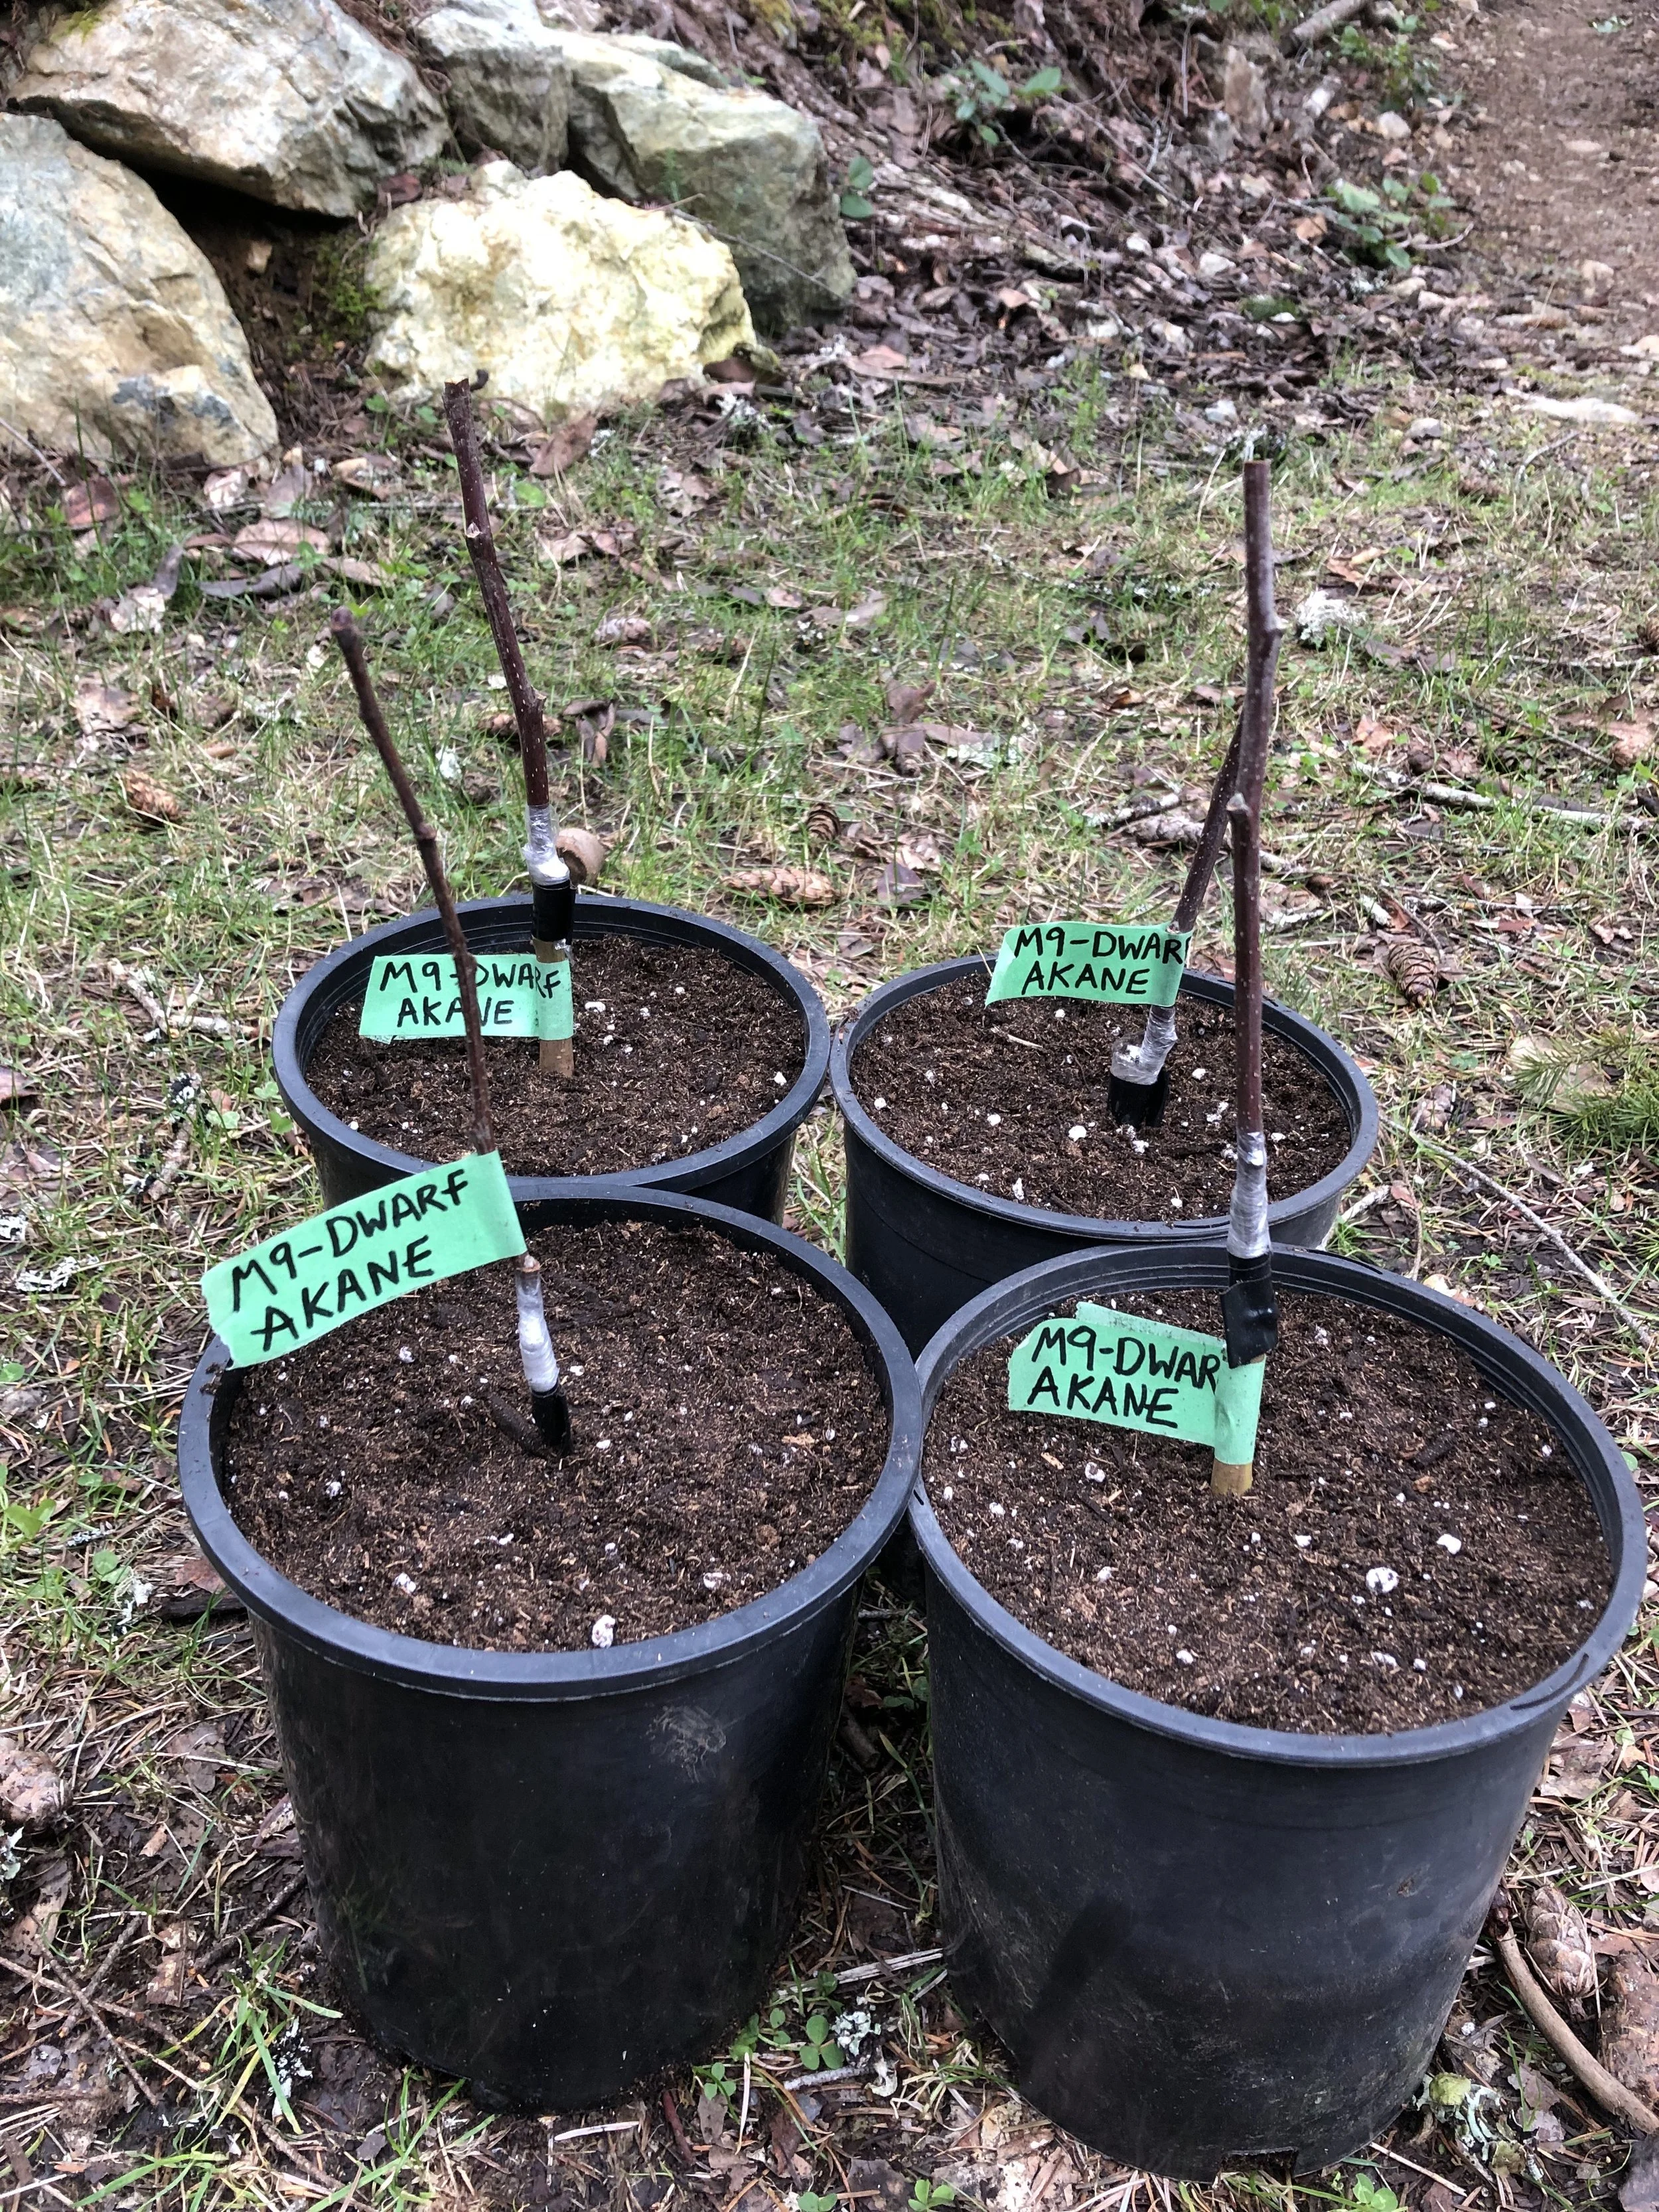
Each new rootstock was then trimmed just above the roots and prepared for grafting. (There are many grafting methods to attach your chosen apple variety, or scion. Grafting is covered in the blog post below.) After separation, I potted each new rootstock into its own larger container to support strong growth throughout its second season.
While using containers offers better control and is ideal for smaller garden spaces, he same technique can also work in the ground!
This is such a simple, space-efficient way to increase your rootstock supply—and a great step toward growing your own custom apple trees.
M9 Rootstock propagation
In pot for 1 year
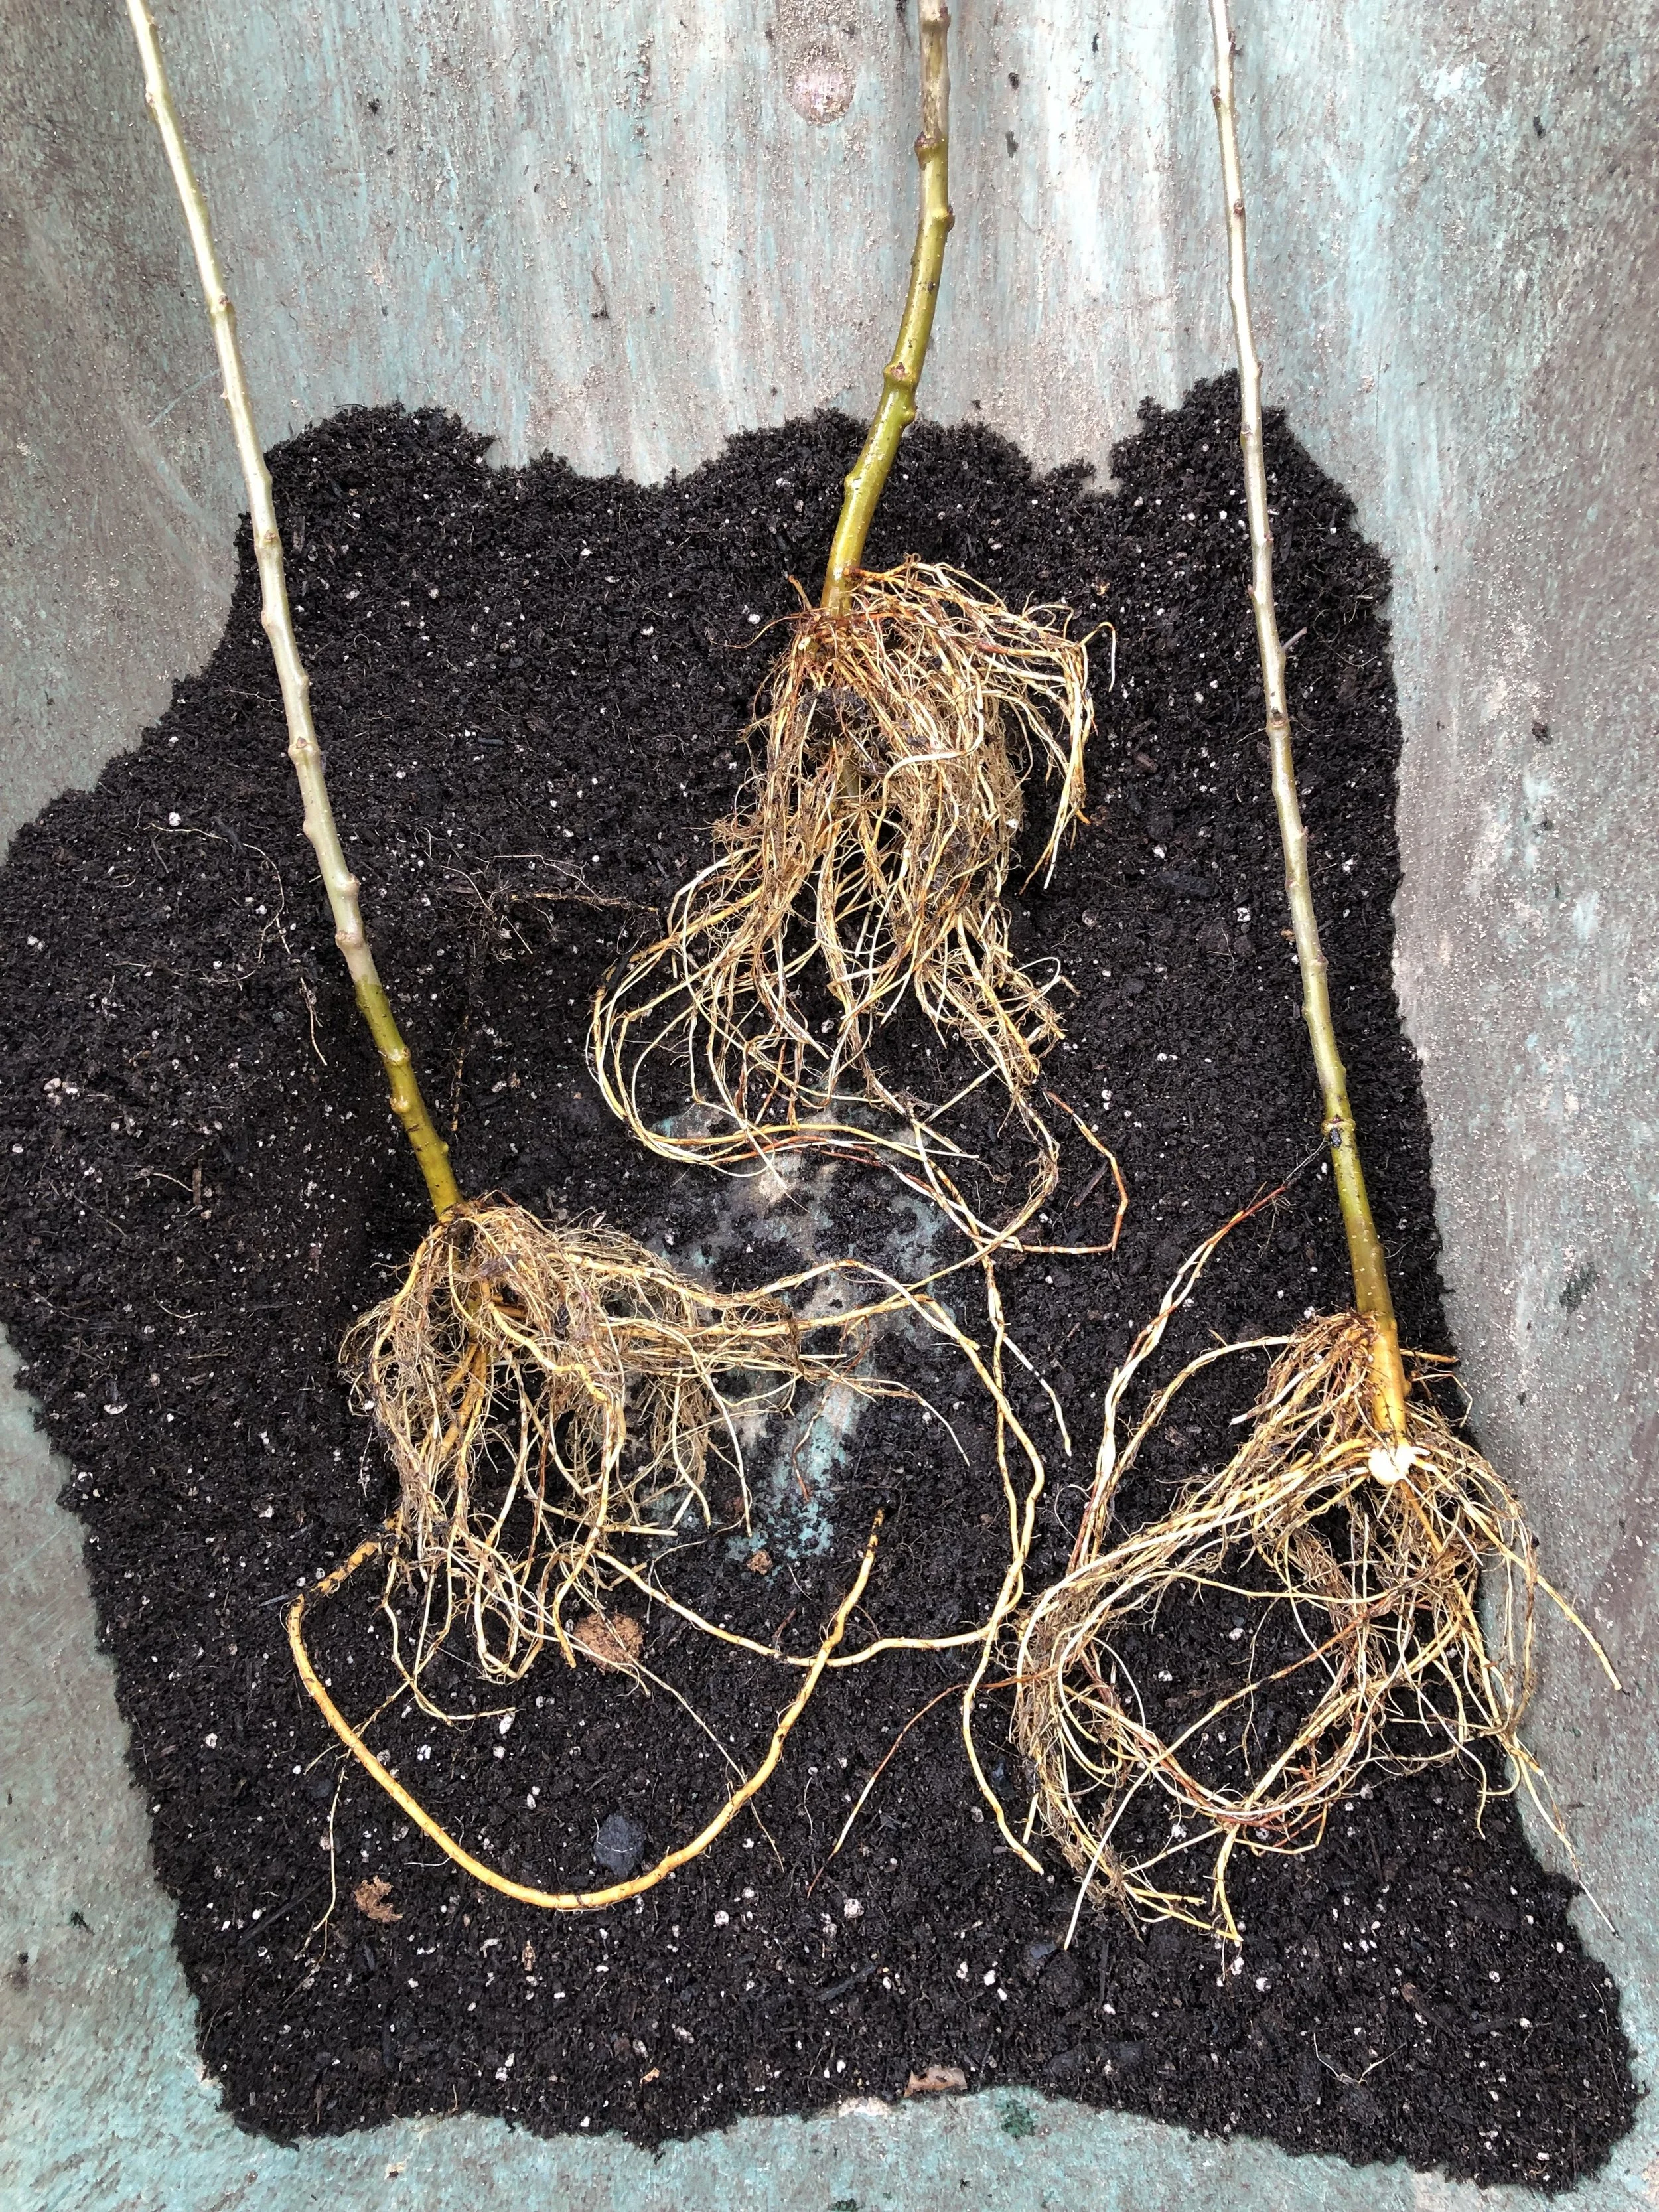
Root ball divided into 4 individual plants
Each grafted as bare root, then potted up.
Grafting apple and pear trees
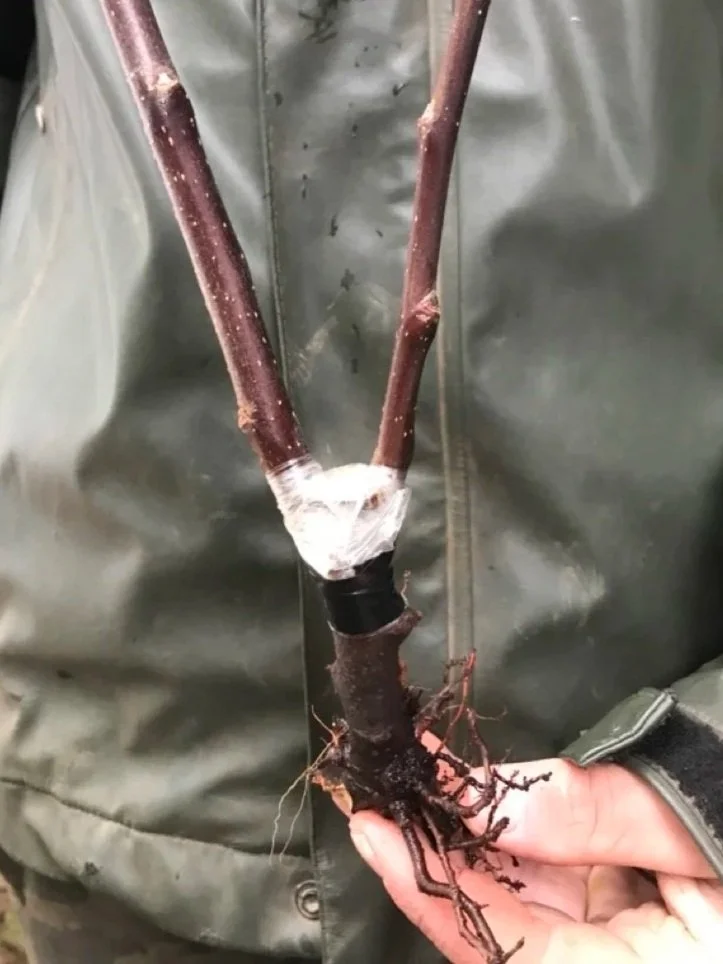
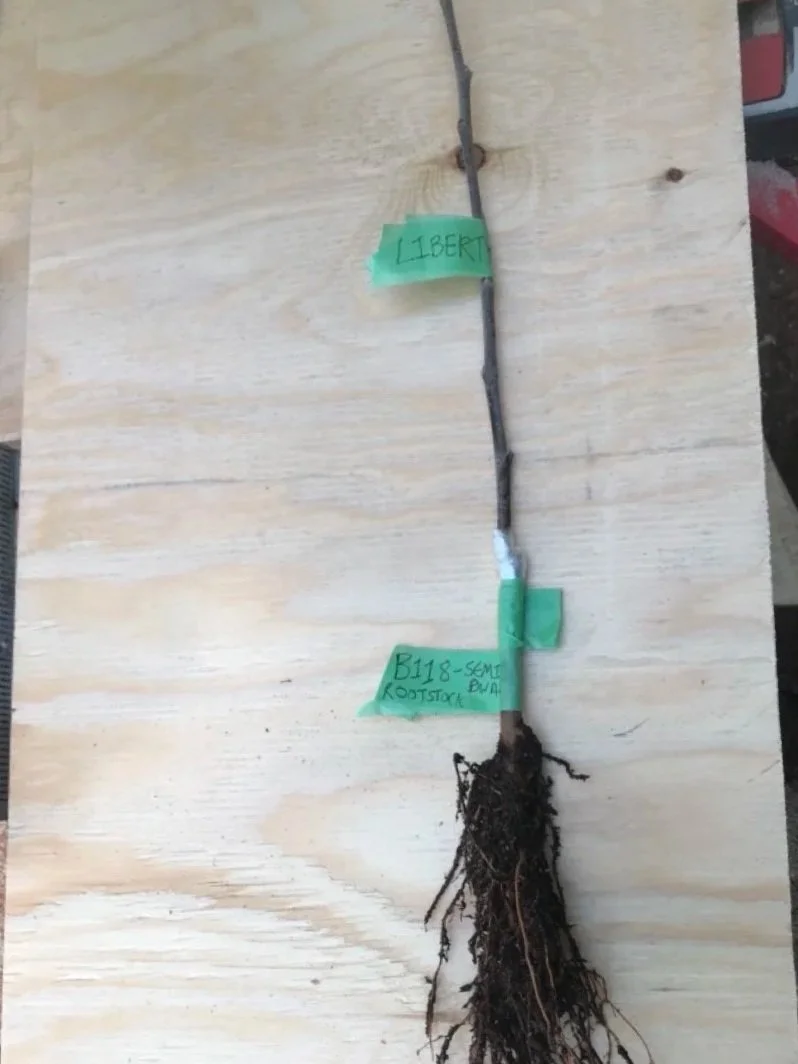
February 2026: For the second year in a row, this winter we are experimenting with grafting hardwood fruit trees. Grafting is an important technique for propagating specific apple varieties because the seeds from these fruits do not grow “true to type” - their offspring are always different than the parent tree. Grafting involves taking a small piece of branch—the "scion wood"—from a desired, high-quality apple tree, such as Spartan, Liberty or Granny Smith, and joining it onto a separate root system, or "rootstock." This process effectively clones the chosen variety.
The rootstock is selected for its traits specific to growth habit, disease resistance and root vigor. For small gardens, a dwarfing rootstock like M9 is ideal, as it produces a compact tree up to 10ft tall. The scion wood provides the fruit, and is typically collected from healthy, one-year-old shoots when trees are dormant. Timing is key! We have had most success with grafting freshly cut wood in late winter or early spring, just as the buds begin to swell.
In order for the graft joint to succeed, the vascular cambium tissues of both the rootstock and scion wood must be placed in contact with each other. Both pieces of wood must be kept alive until the graft has "taken". This usually takes a few weeks.
We have tried some different grafting styles, including the whip and tongue method, which ensures a tight union, and another technique that involves slicing the bark and peeling it back to expose a big area of cambium. We have successfully produced grafted trees using both methods.
Proper care afterward helps the graft take successfully. This technique lets gardeners customize their orchards, combining disease resistance and size control with the exact apple varieties they love.
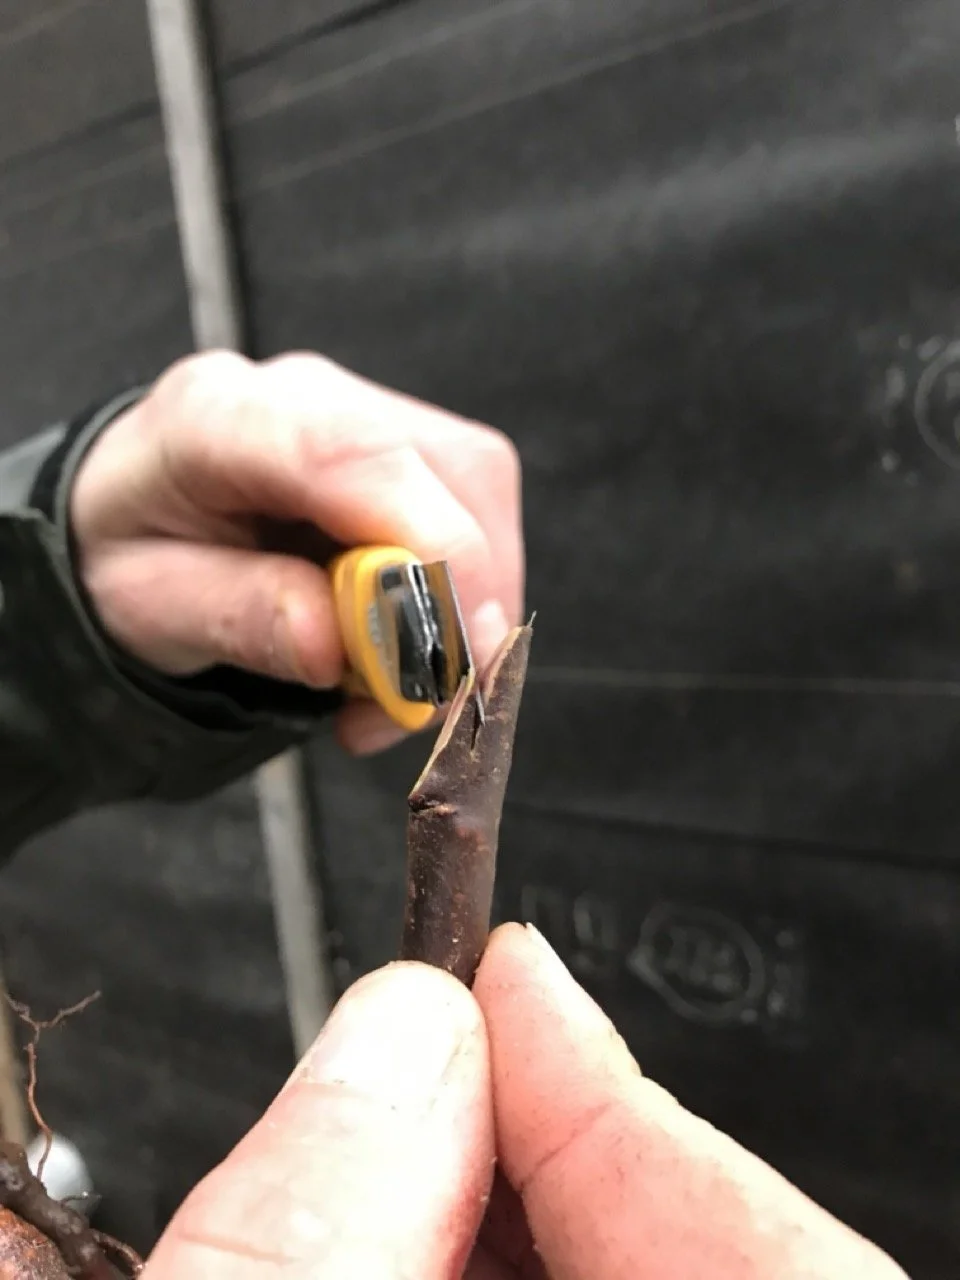
Preparing Rootstock for a Whip and Tongue graft. Use sharp, sterile tools to make clean cuts!
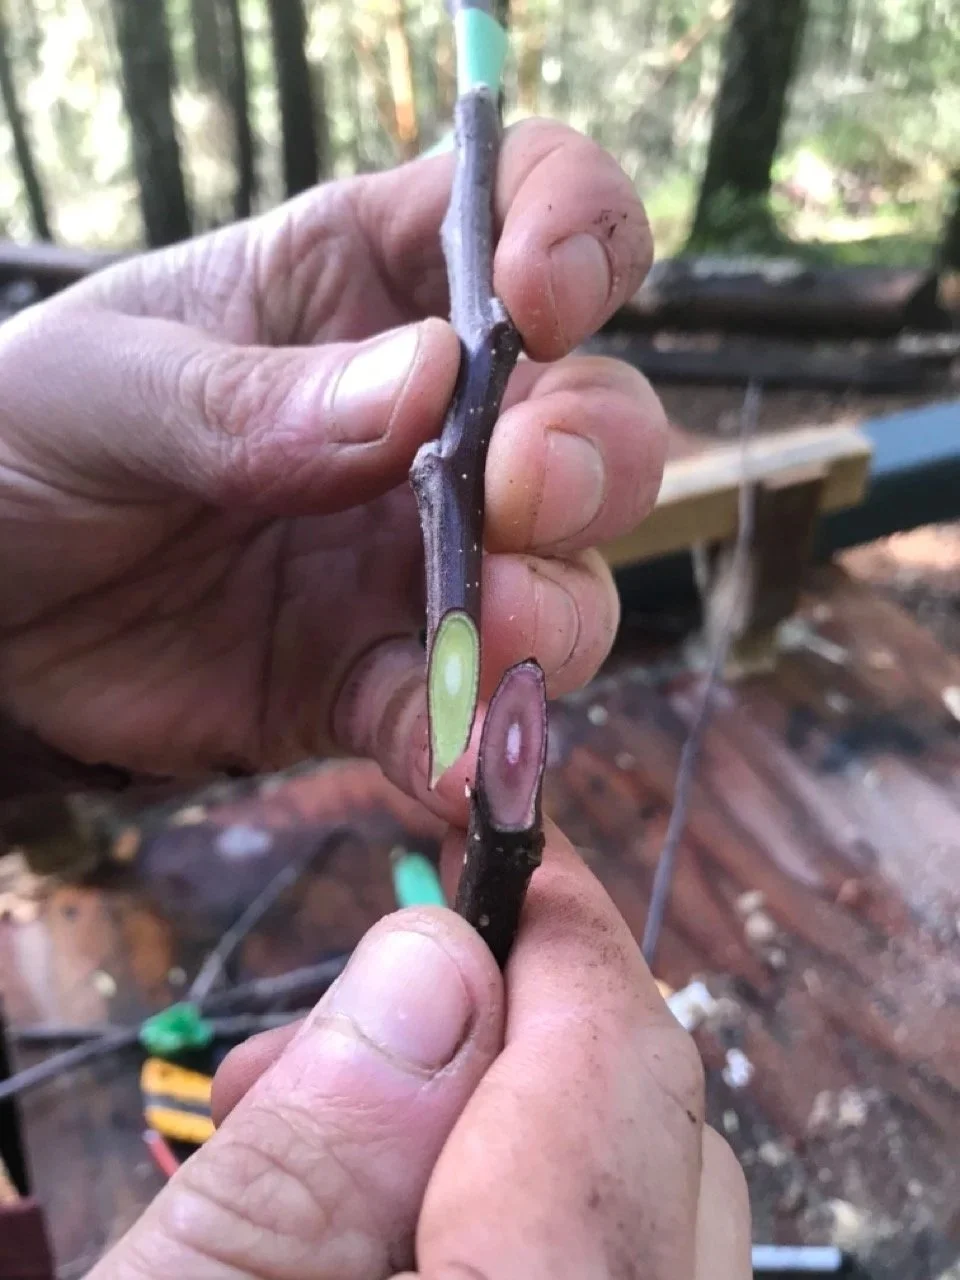
Scion wood (L) and Rootstock wood (R), initial cuts exposing the cambium layer.
The graft union needs to be supported, and moisture loss prevented. Here, we used plastic wrap and electrical tape.
Wedging the scion wood in to the rootstock
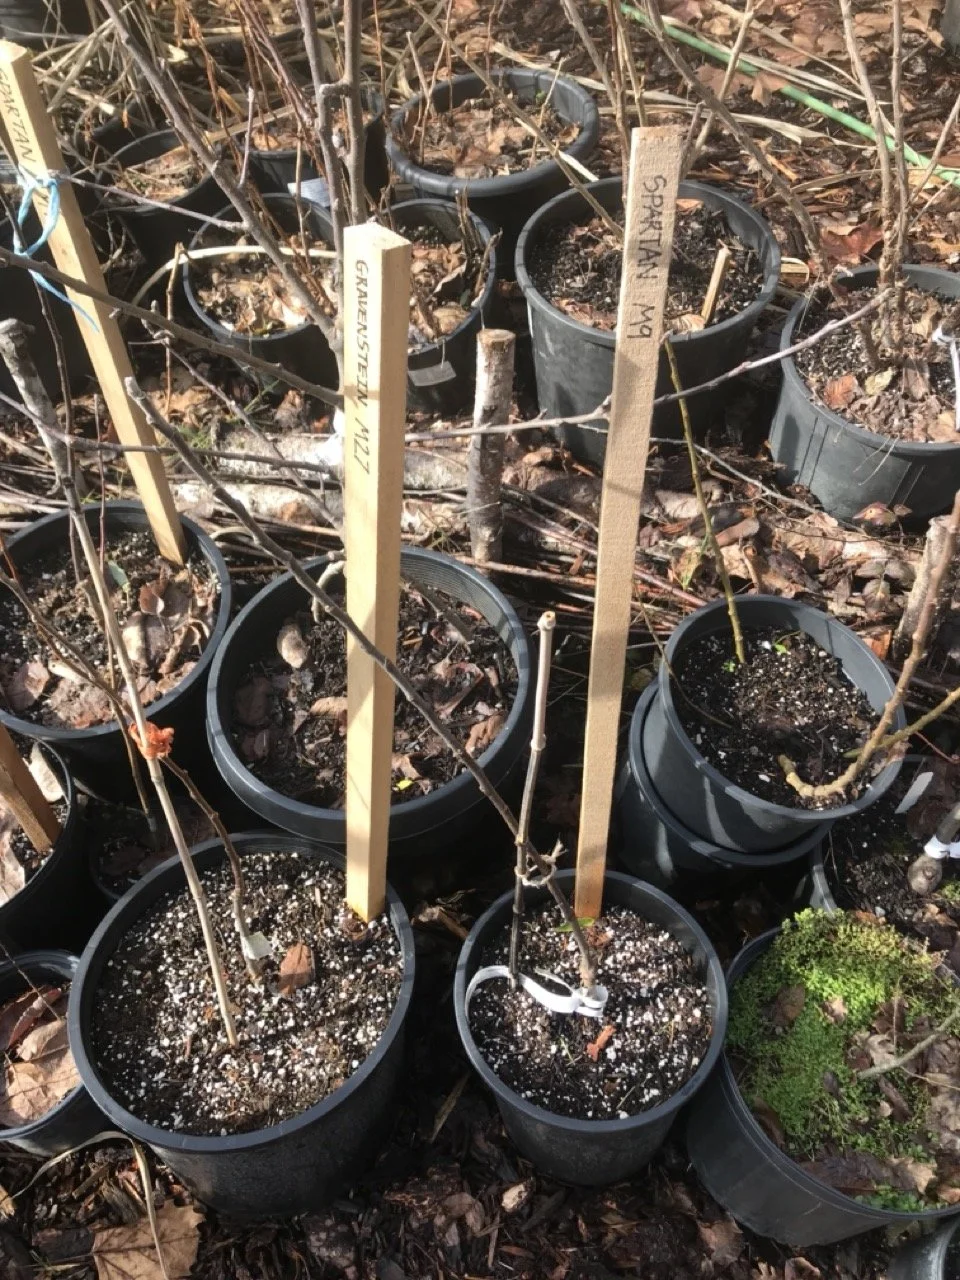
It is important to label your grafts!
Grafted trees need to be planted in good potting soil, watered, and staked for support. We write the variety name on the stake using permanent marker.
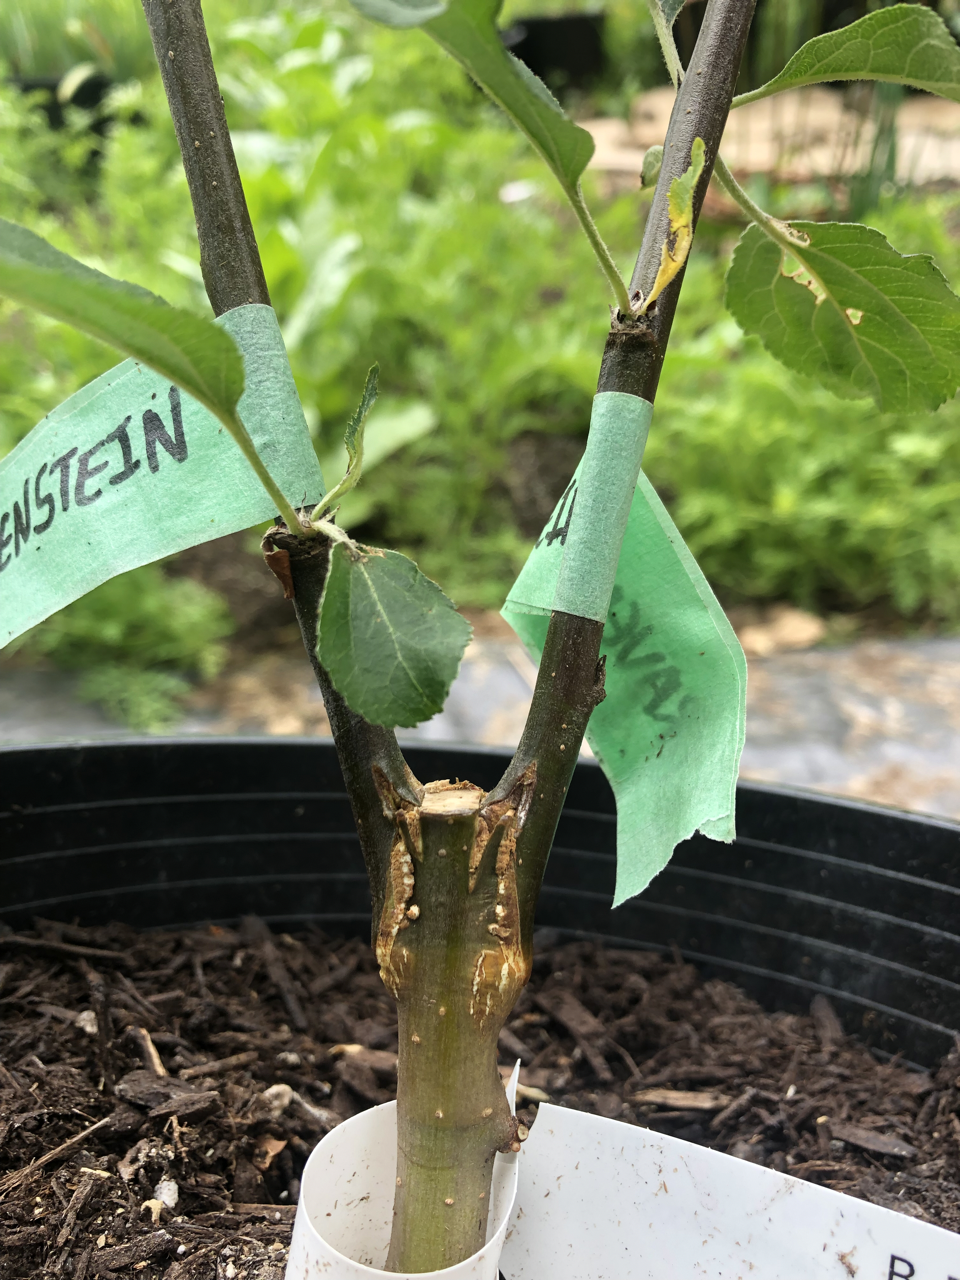
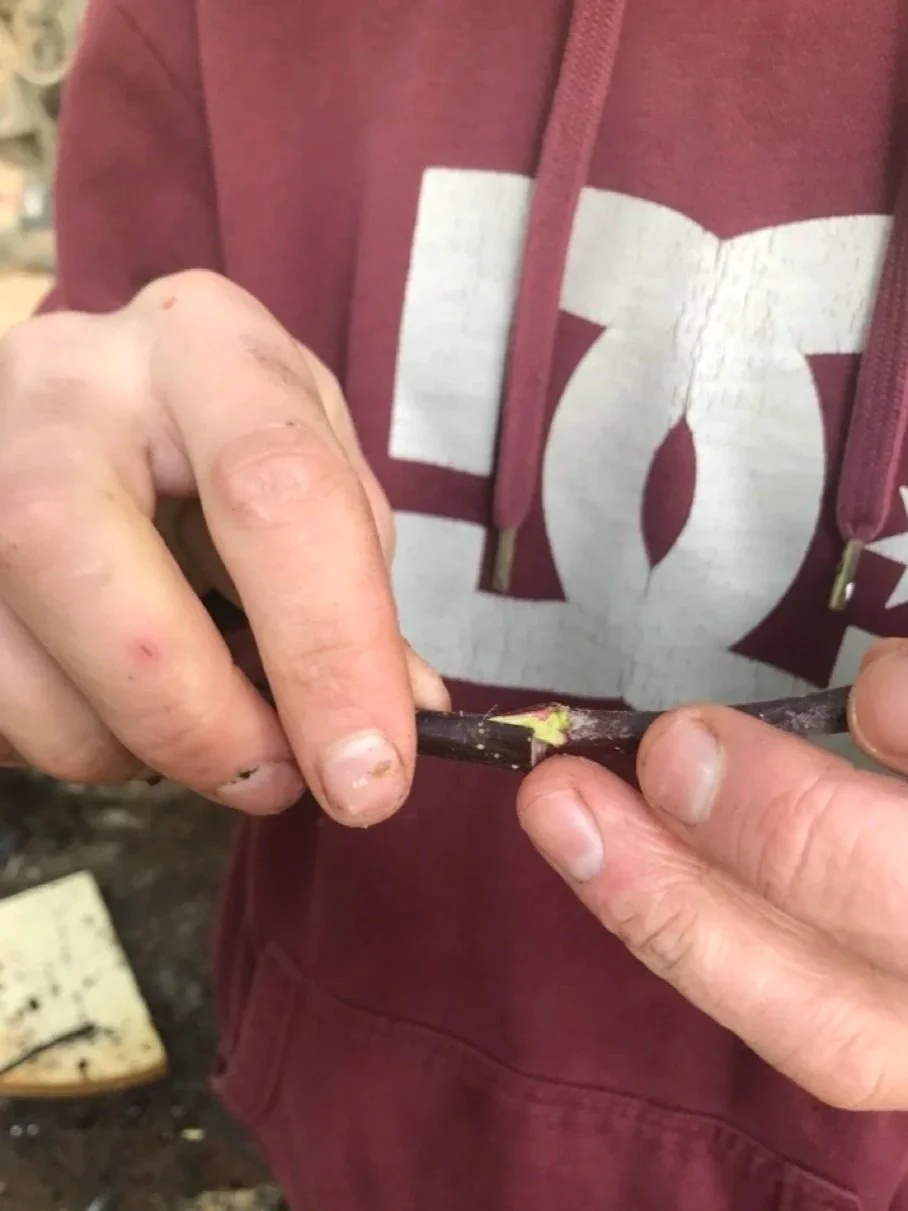
3 months later, tape has been removed. Fusion between the two woods is evident. Successful whip and tongue graft.
WE’RE HIRING!

ABC Garden Services is hiring for the 2026 season!
Role details:
14 - 25 hours per week
$28/hour to start
March - October 2026
Garden labour, possibly some management responsibilities depending on the person
The ideal candidate:
Experienced landscaper/gardener able to work efficiently and independently.
Physically capable, and can handle outdoor work in all conditions
Must have own vehicle. Mileage will be reimbursed.
Located close to Cowichan Valley
Friendly and communicative
Bonus skills: carpentry, farming, horticulture, using/maintaining tractors & power tools.
This would be a great fit if you’re looking for flexible scheduling, some autonomy in your days, and a boss who really cares about you.
If this sounds like something you’d be interested in - or if you know someone who might be - please get in touch!
2025 Year in Review
A look back on our first year in business - how did it go? what did we learn? Scroll down to see the fruits of our labour last year…
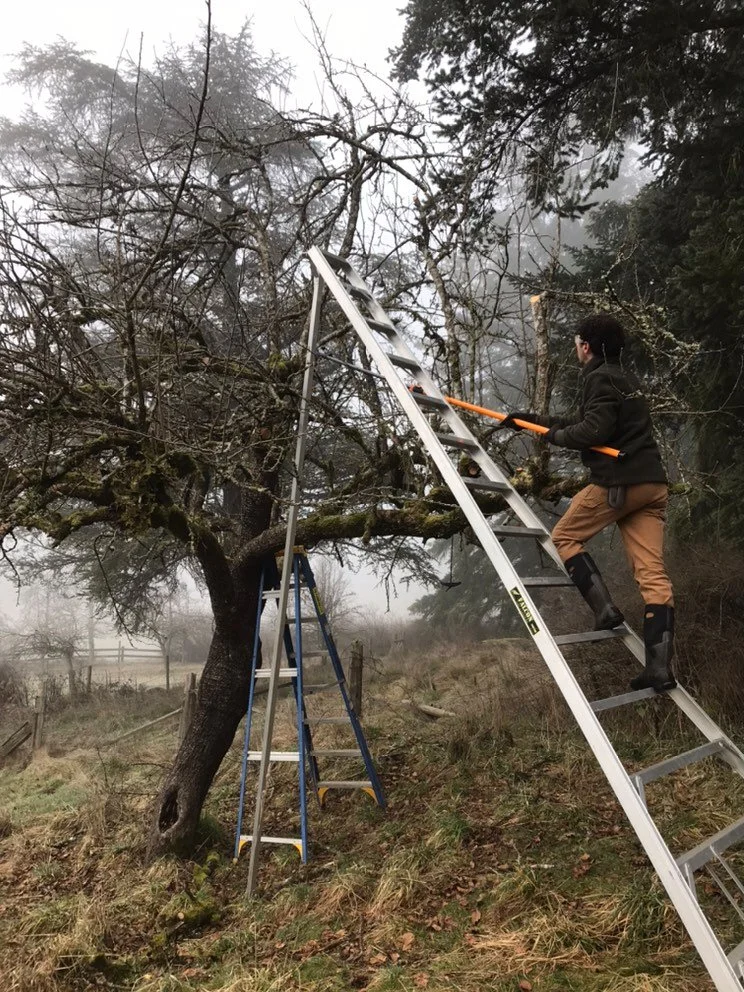
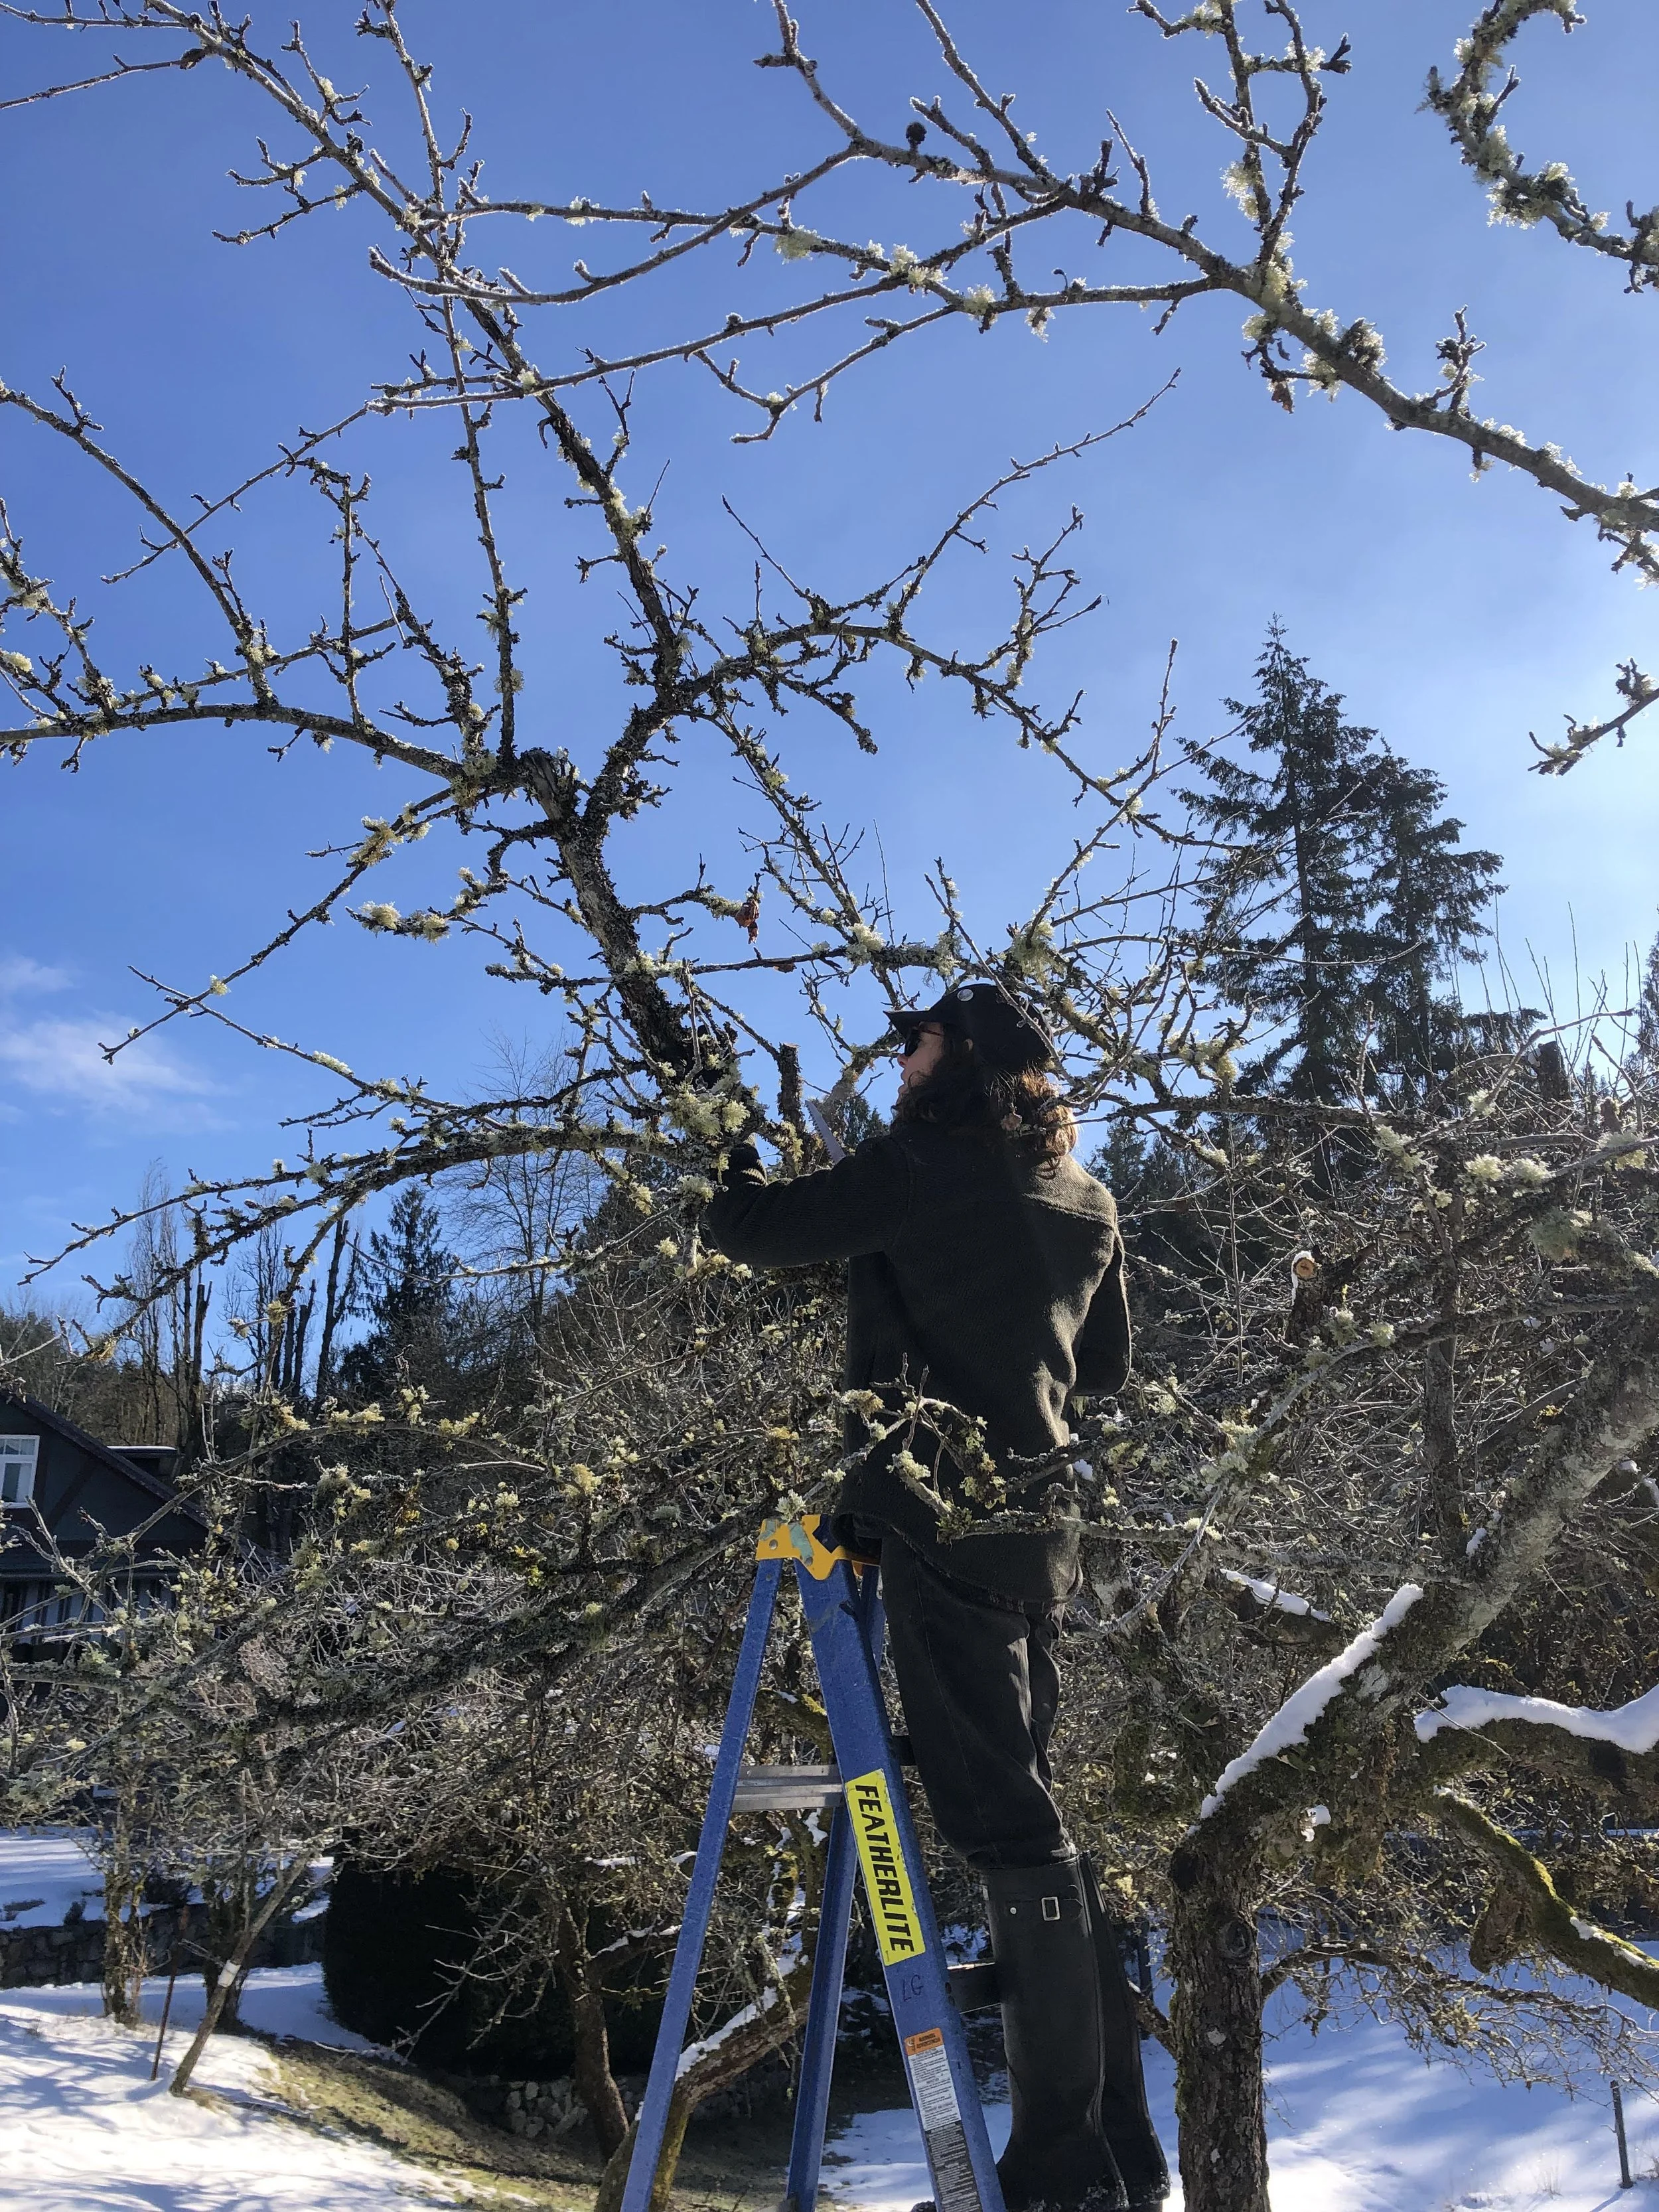
Dormant pruning old apple trees 2025
January - Registered the business name “ABC Garden Services”
February - Advertised fruit tree pruning services online, and received lots of interest right away. Soon our calendar was filled with bookings. We started working on a wide range of trees for all kinds of different clients. Bought a bigger ladder and more hand tools. Started a Facebook page.
Some of our initial advertising
March - Pruning fruit trees from Mesachie Lake to Chemainus to Shawnigan. Got hired to do a couple educational “prune alongs” with homeowners who want to learn how to care for their own trees.
- Table at Duncan Seedy Sunday, selling plants and handing out business cards. Met lots of friends, new and old!
- Rented a room in The Hub at Cowichan Station to host a free No-Dig Gardening session. 17 attendees, lots of great questions, not enough time to cover everything. Click here to access the full slidedeck from the presentation
Watch this space for a full Q&A from this session, coming soon!
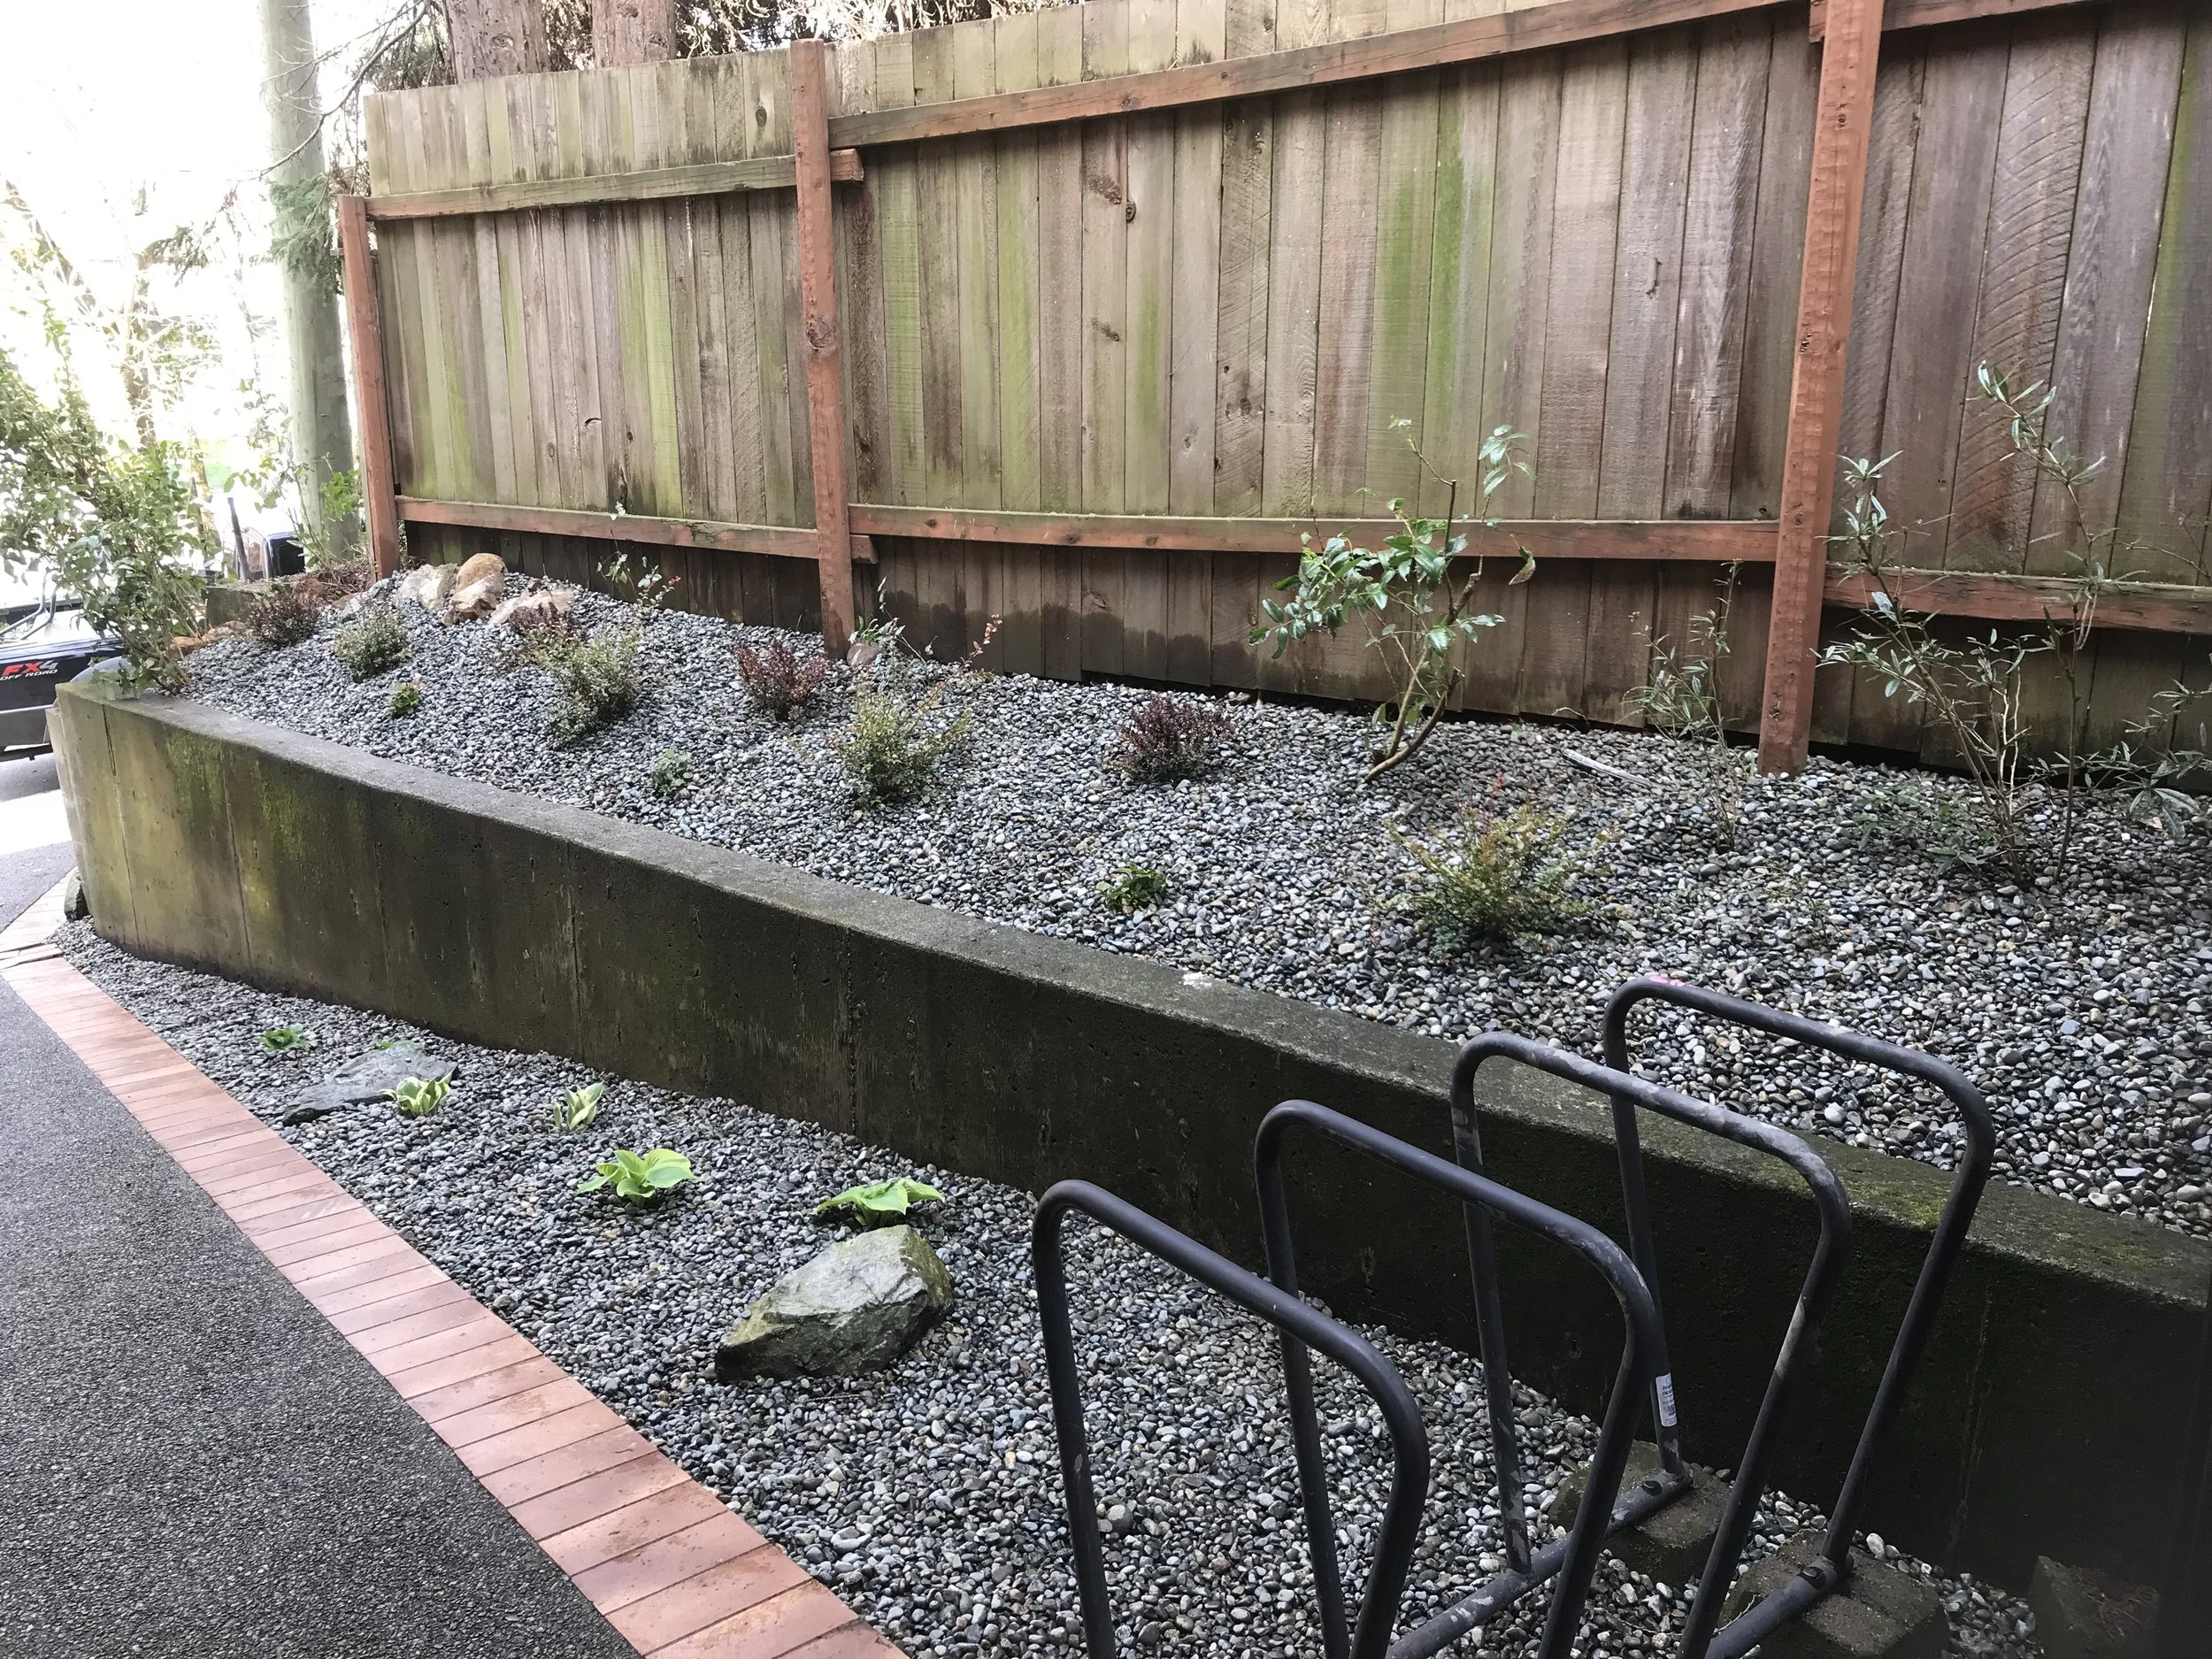
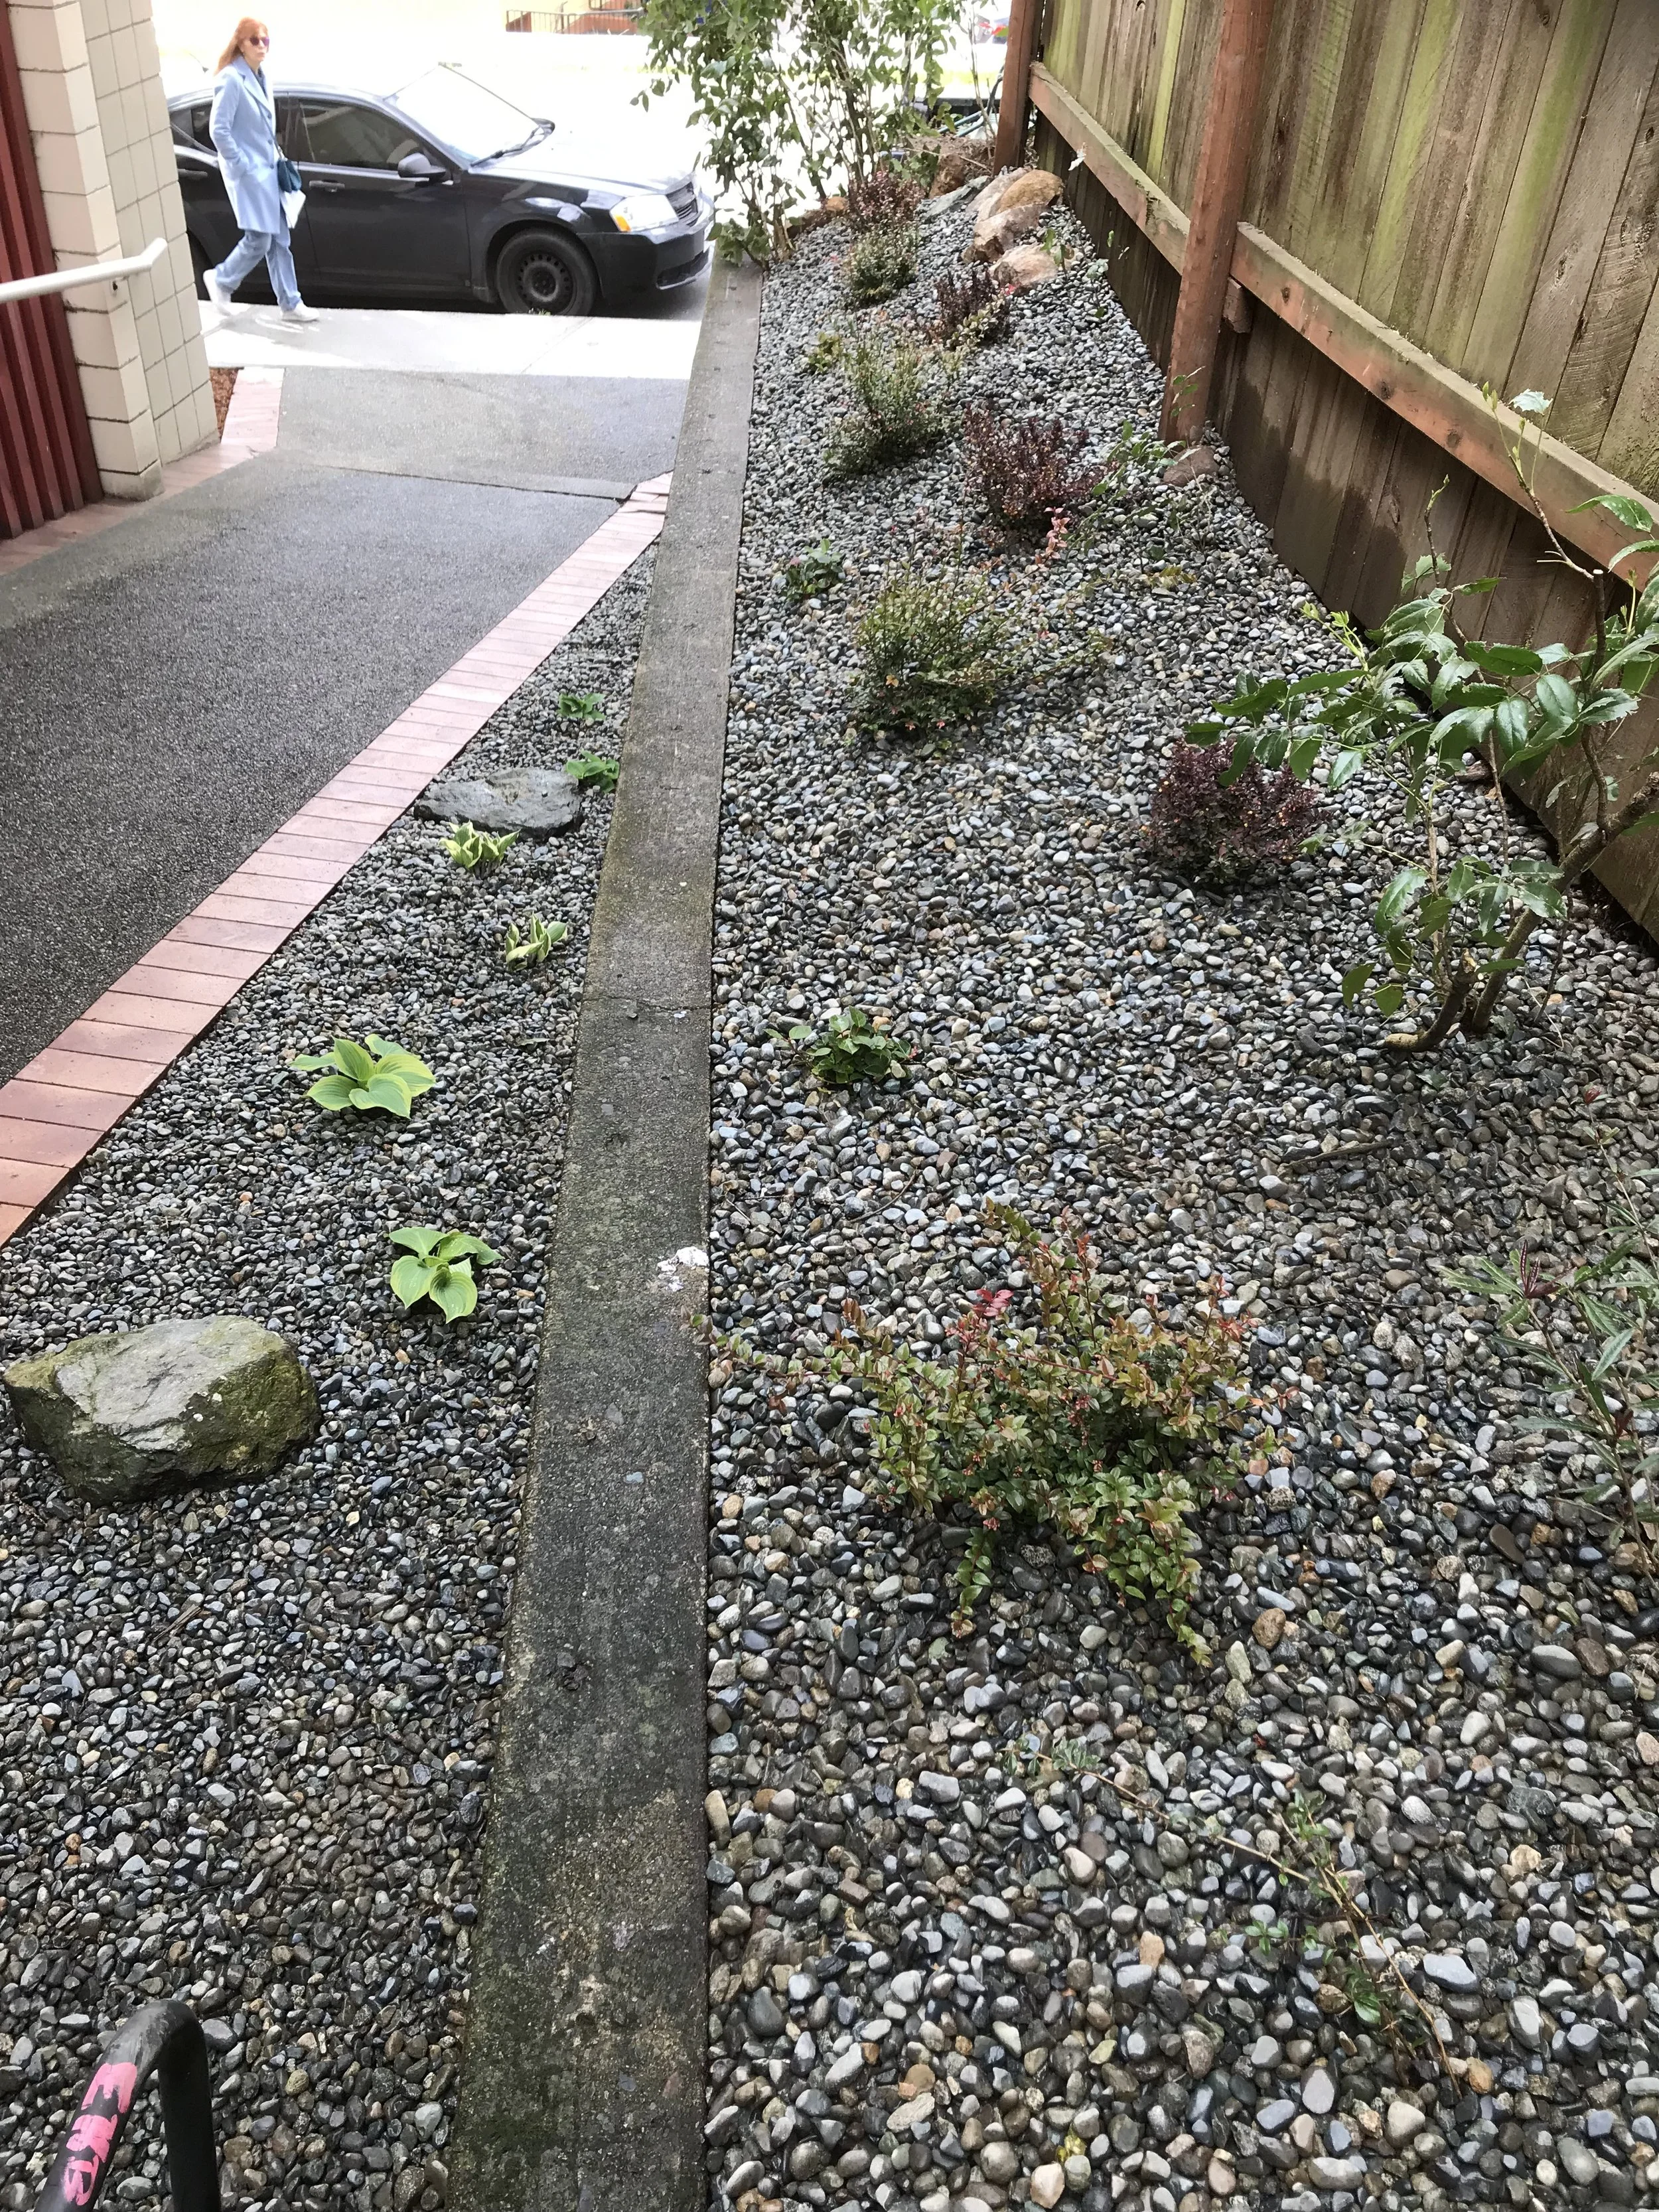
April - First install of the year at Cowichan Professional Building, Duncan.
This project was an interesting challenge because the garden is located in a shady area between buildings and under a group of well-established Cedar trees. New plantings included Berberis thunbergii f. atropurpurea 'Gentry' (Royal Burgundy), Gaultheria shallon (Salal), Vaccinium ovatum (Evergreen Huckleberry), and three different types of Hostas. There were already some Chinese berberis and Oregon grapes from a previous planting. The client requested stone mulch. We added a lot of Sea Soil compost to the soil before planting, and amended each planting hole with a generous scoop of Gaia Green 4-4-4. There is drip irrigation installed underneath the pebbles. The result is a hybrid of classic urban “crackscaping” and a coastal rainforest-inspired garden with three different native edible berries, plenty of spiky plants to discourage intruders, bright colours year-round, and an overall clean aesthetic.
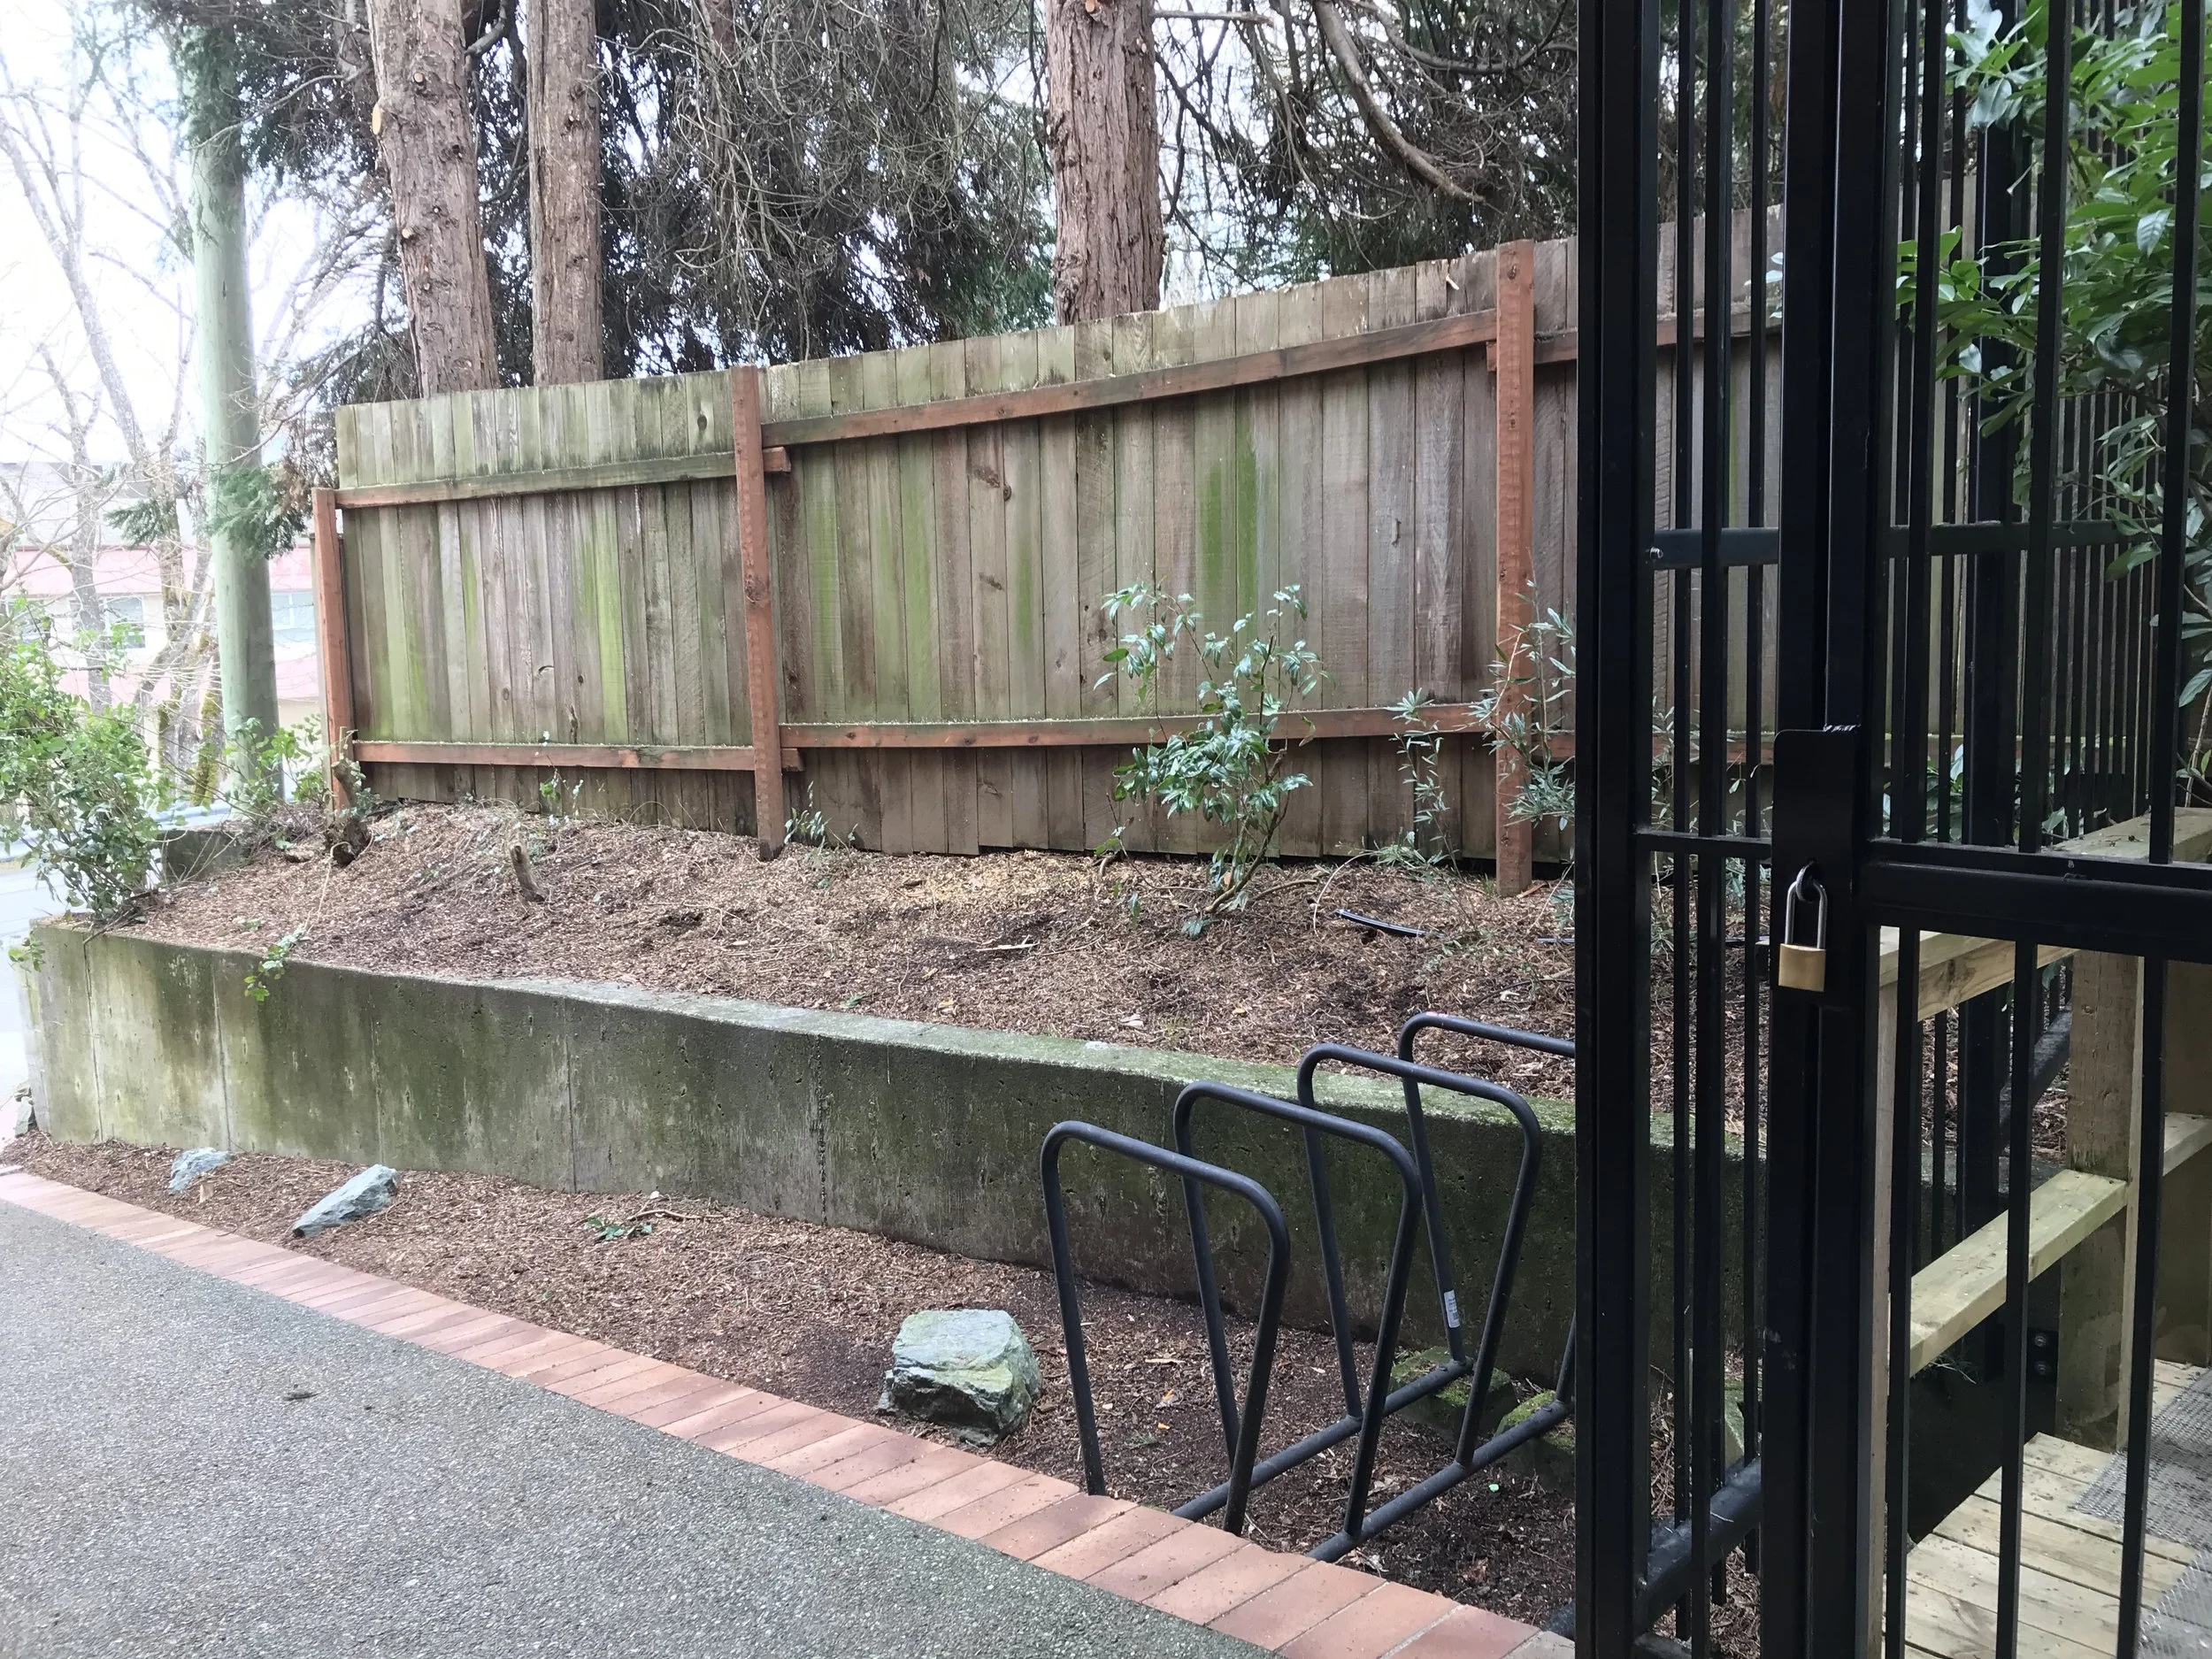
Before
After
After install
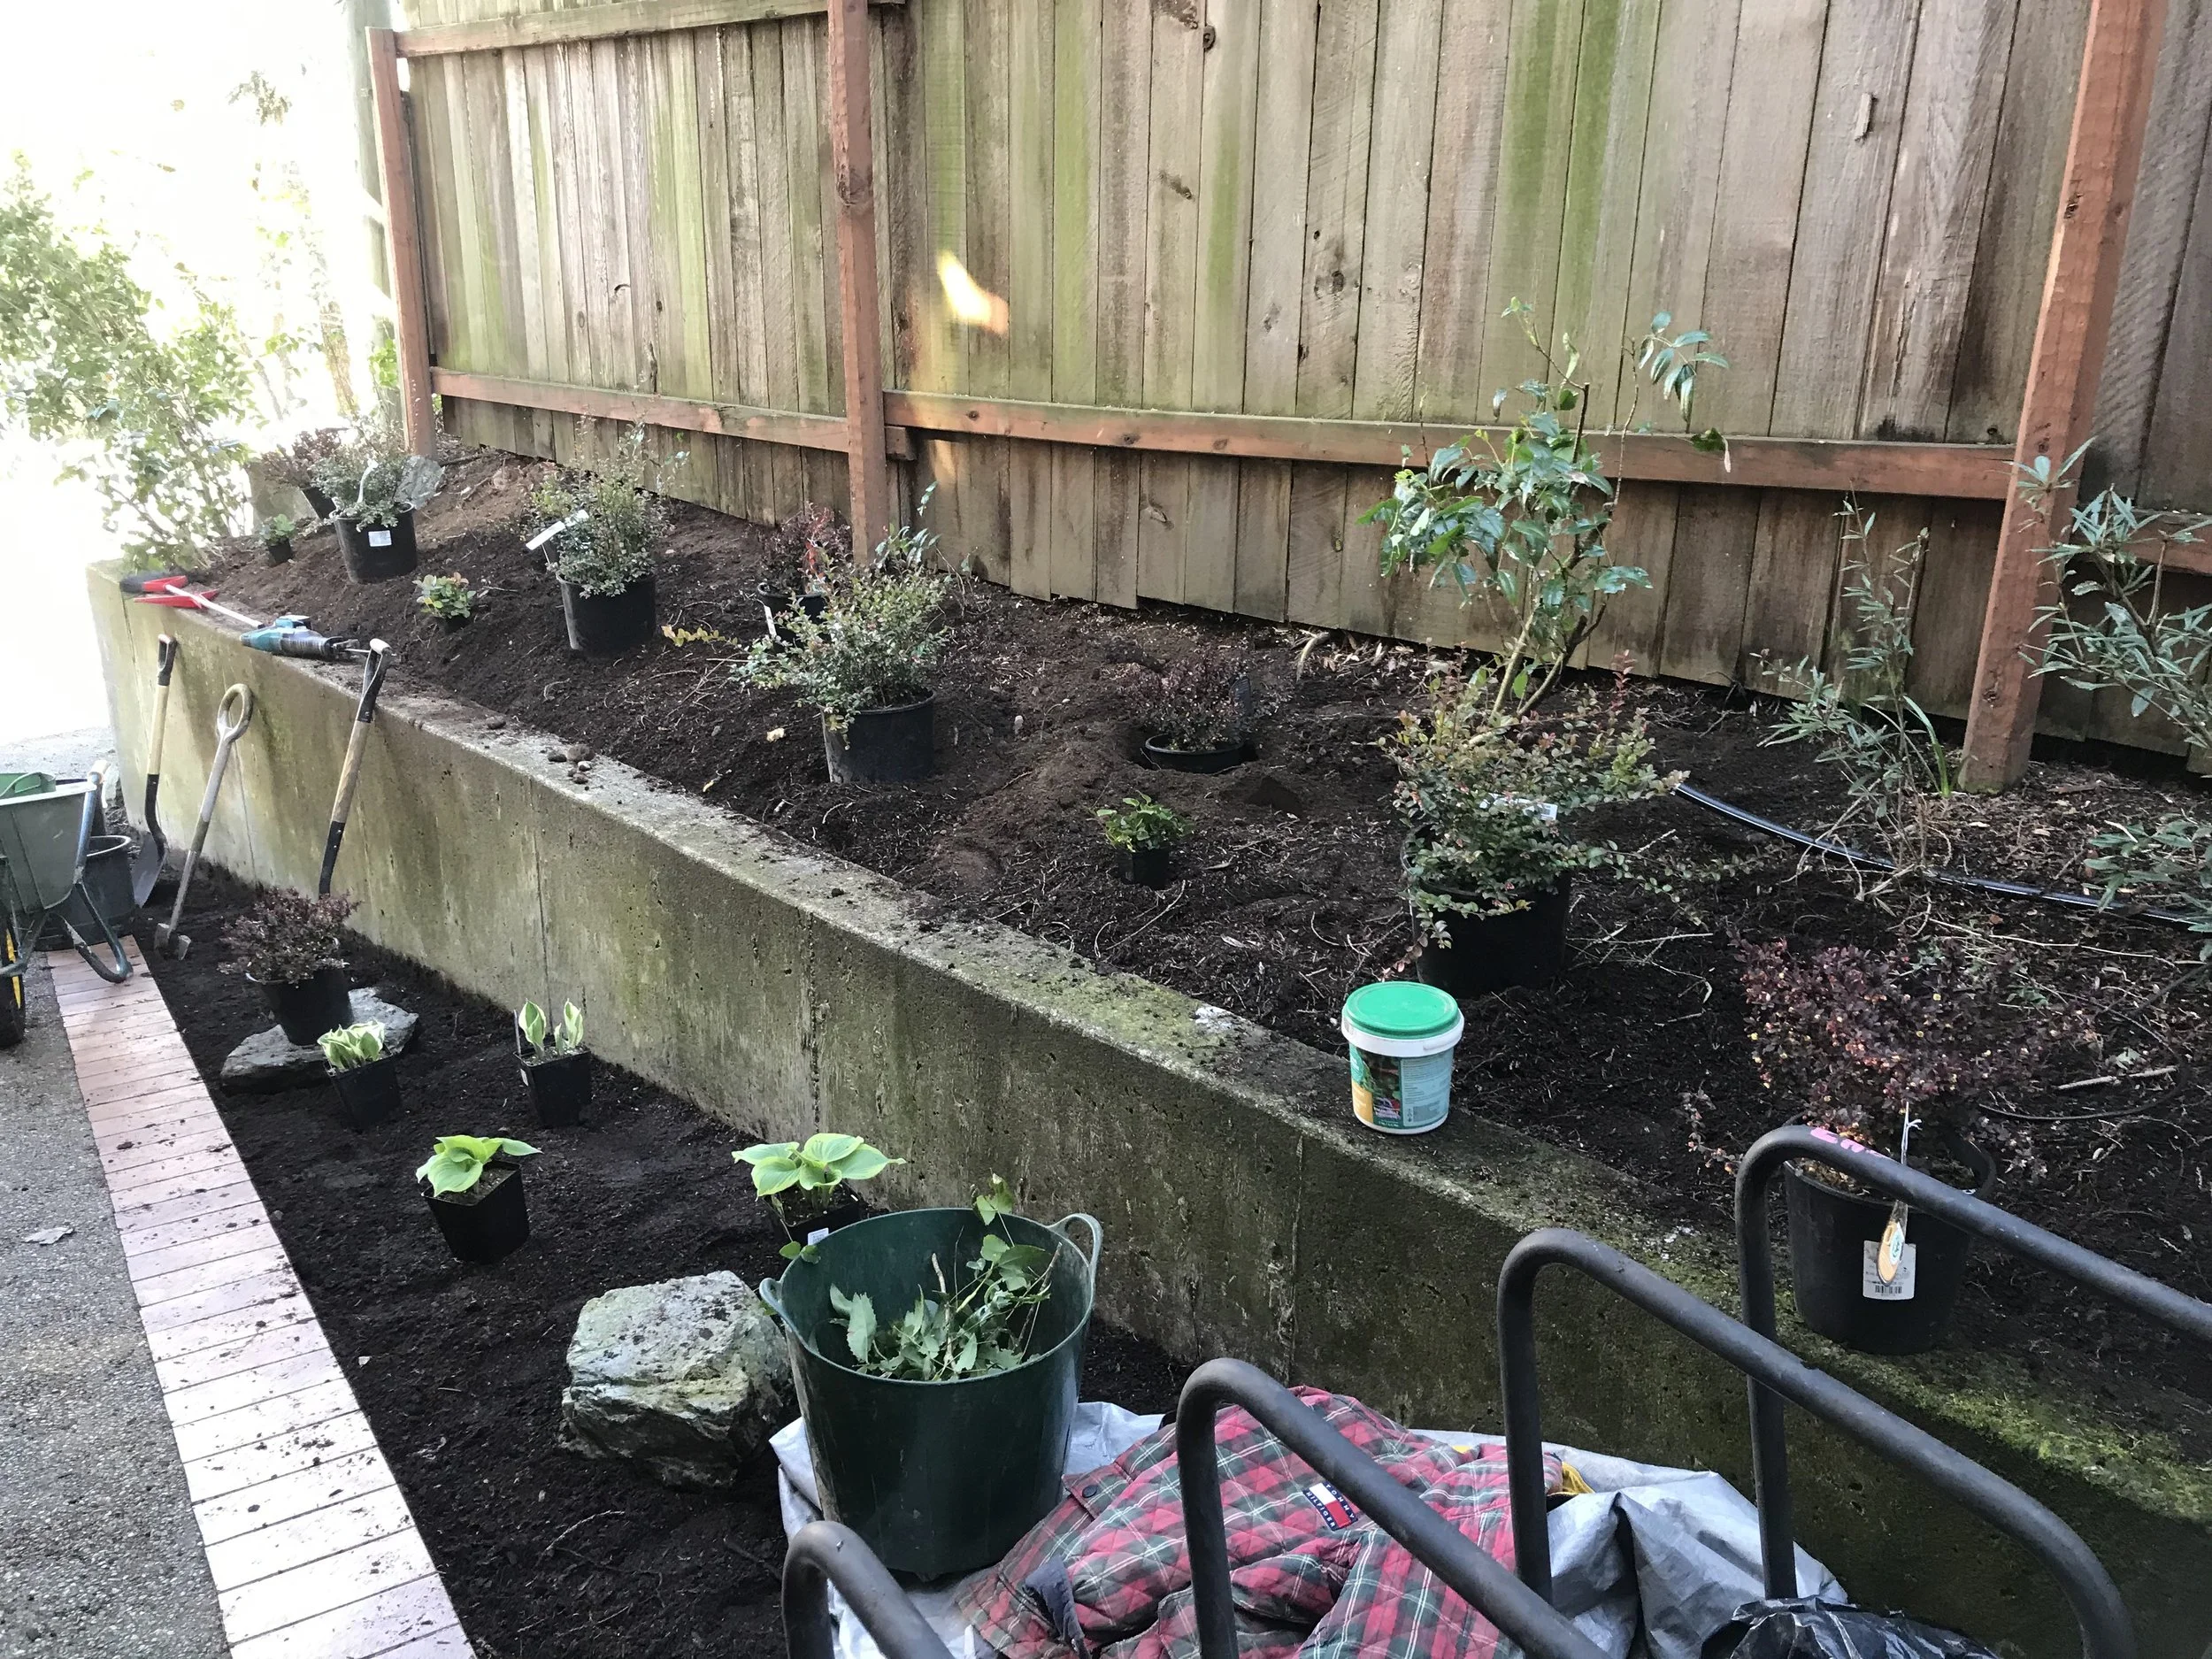
Work in Progress!
May -
Invasive removal day for a client whose entire yard was overgrown with tough old blackberry vines.
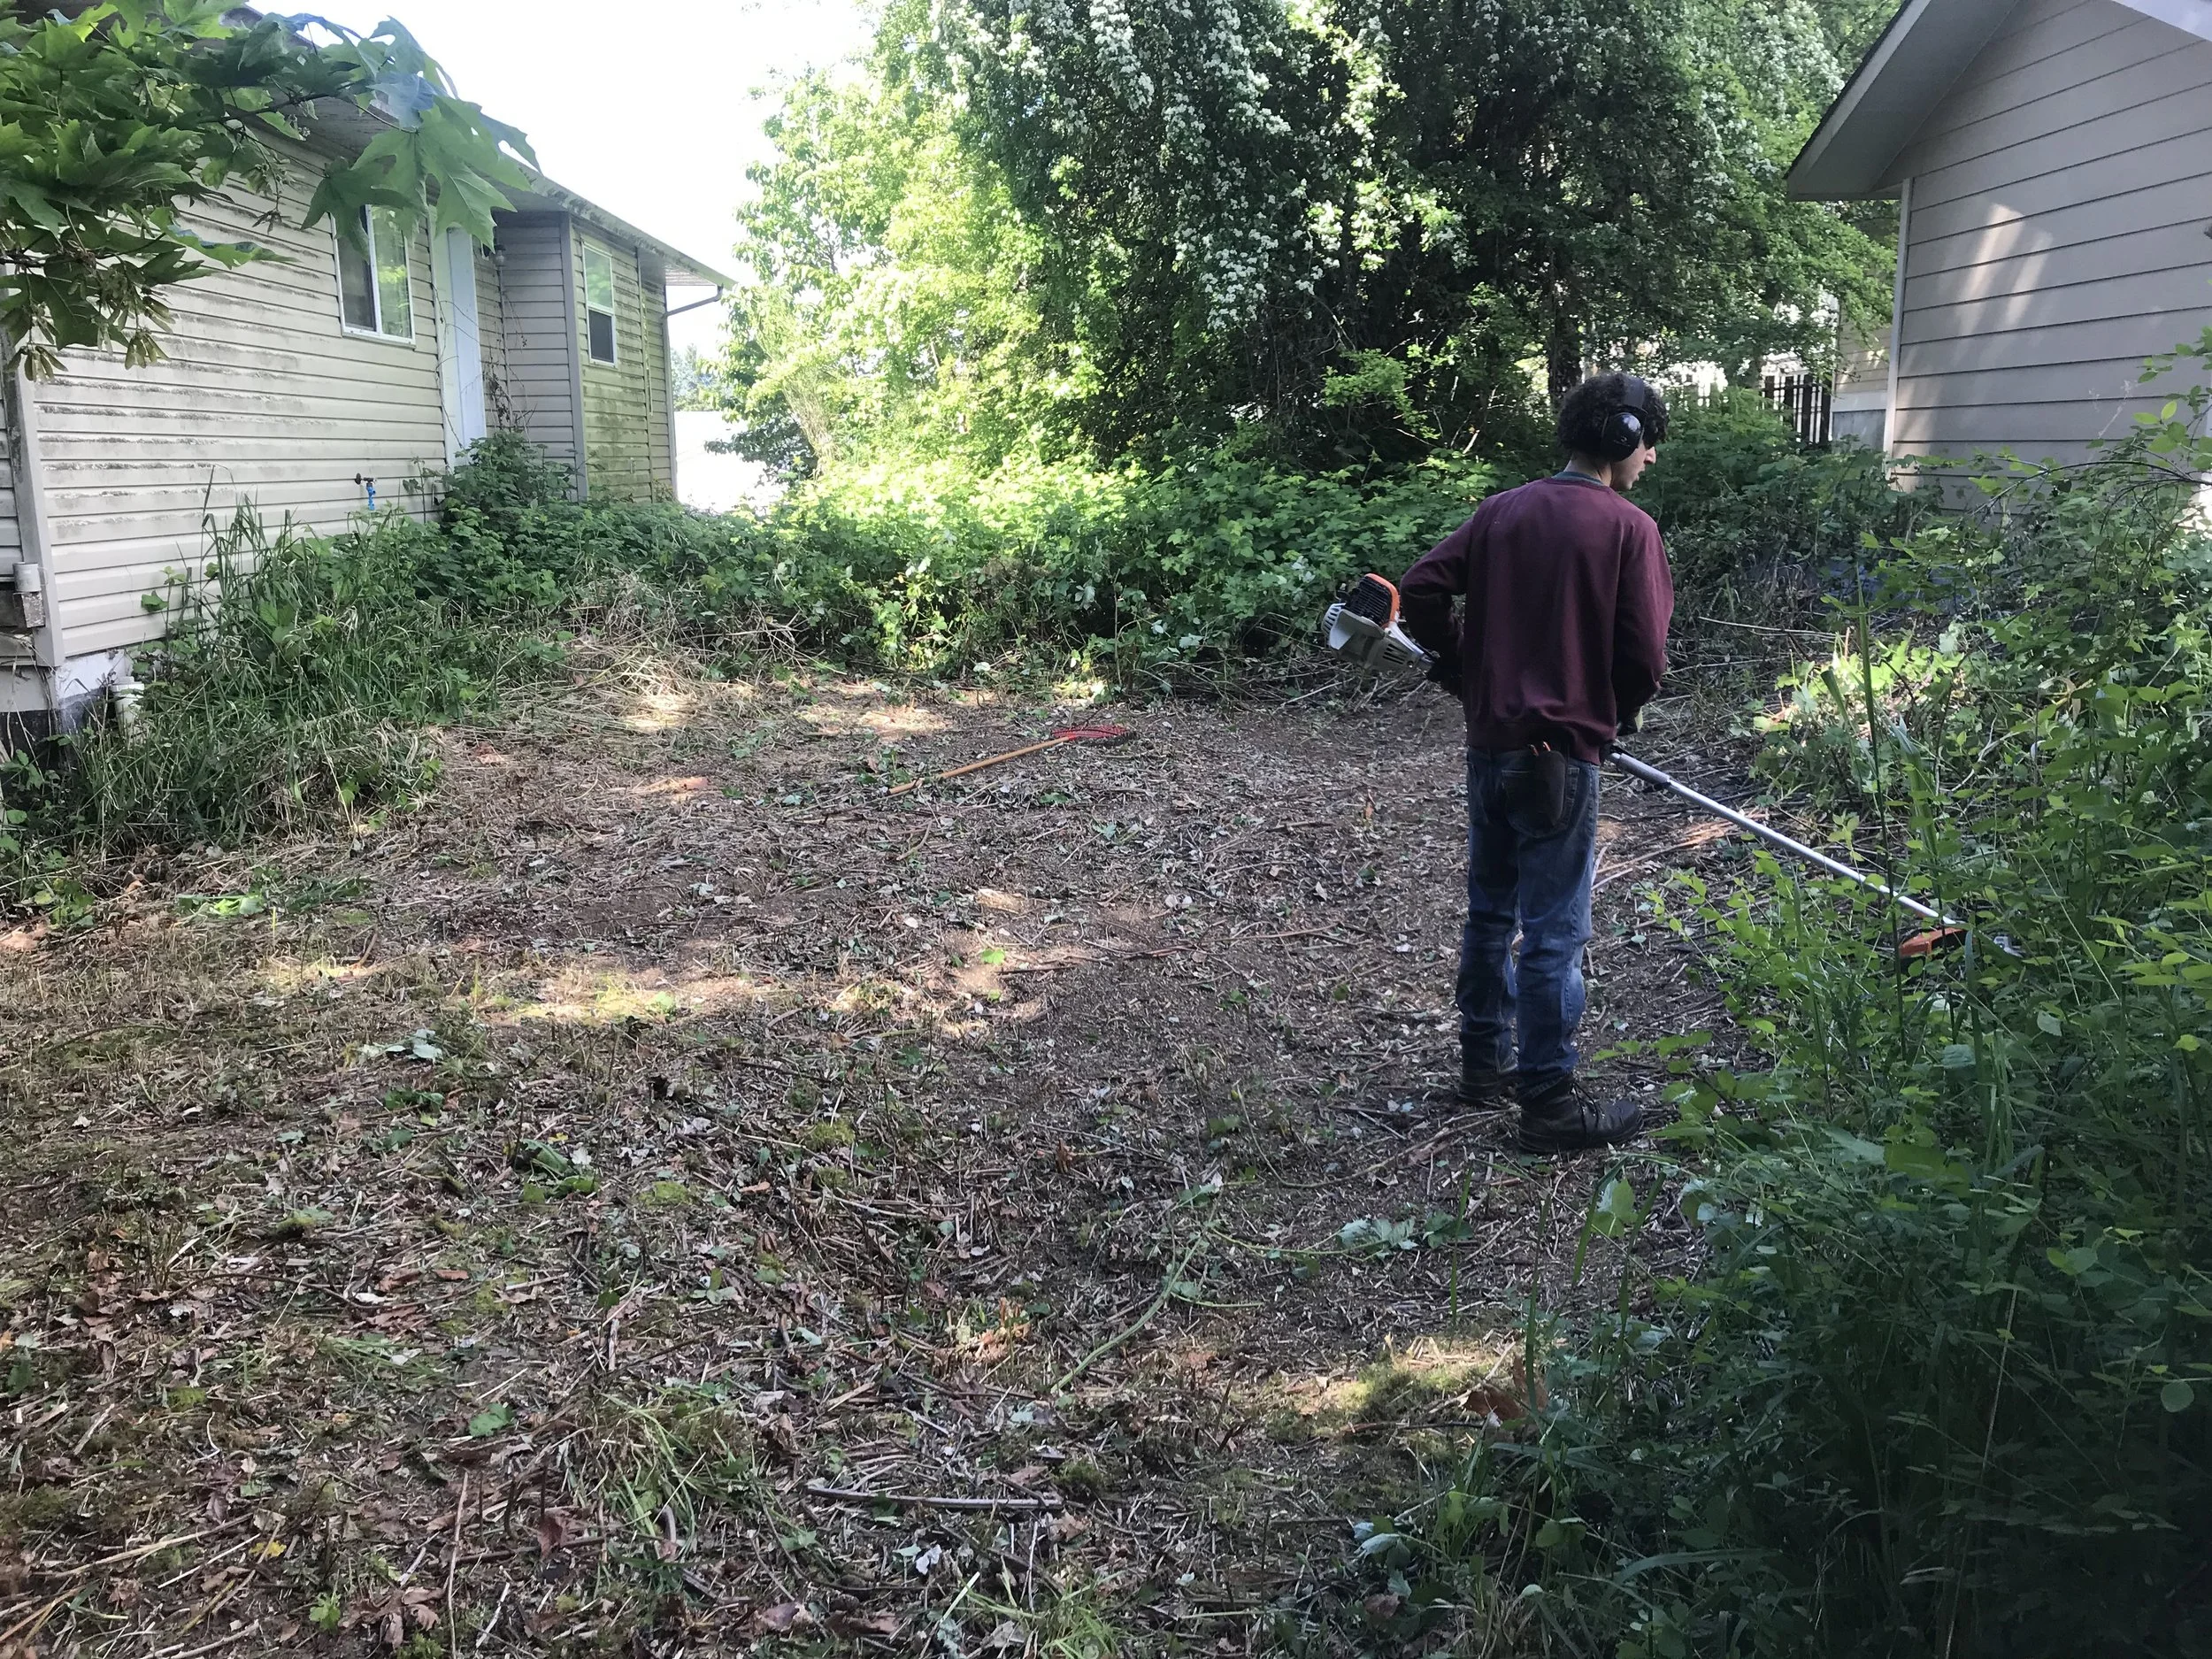
Blackberry removal
June - A front yard transformation for Cathy, who requested a low-maintenance design that her 2 young boys and their friends could enjoy - she wanted to nurture their love of growing food, and we were happy to help!!
This was a big install, and a major highlight of our Summer season. It took 4 full days from beginning to end. Cathy had an awesome collection of flat stones for us to work with, so we had a lot of fun creating the curving stone pathway. We cleared a lot of things out and planted strawberries, rhubarb, and red currants. The raised bed is a Sproutbox kit product, which was super easy to build, and much more accessible for both Cathy and the kids to use when growing their tomatoes, peppers, and salad greens.
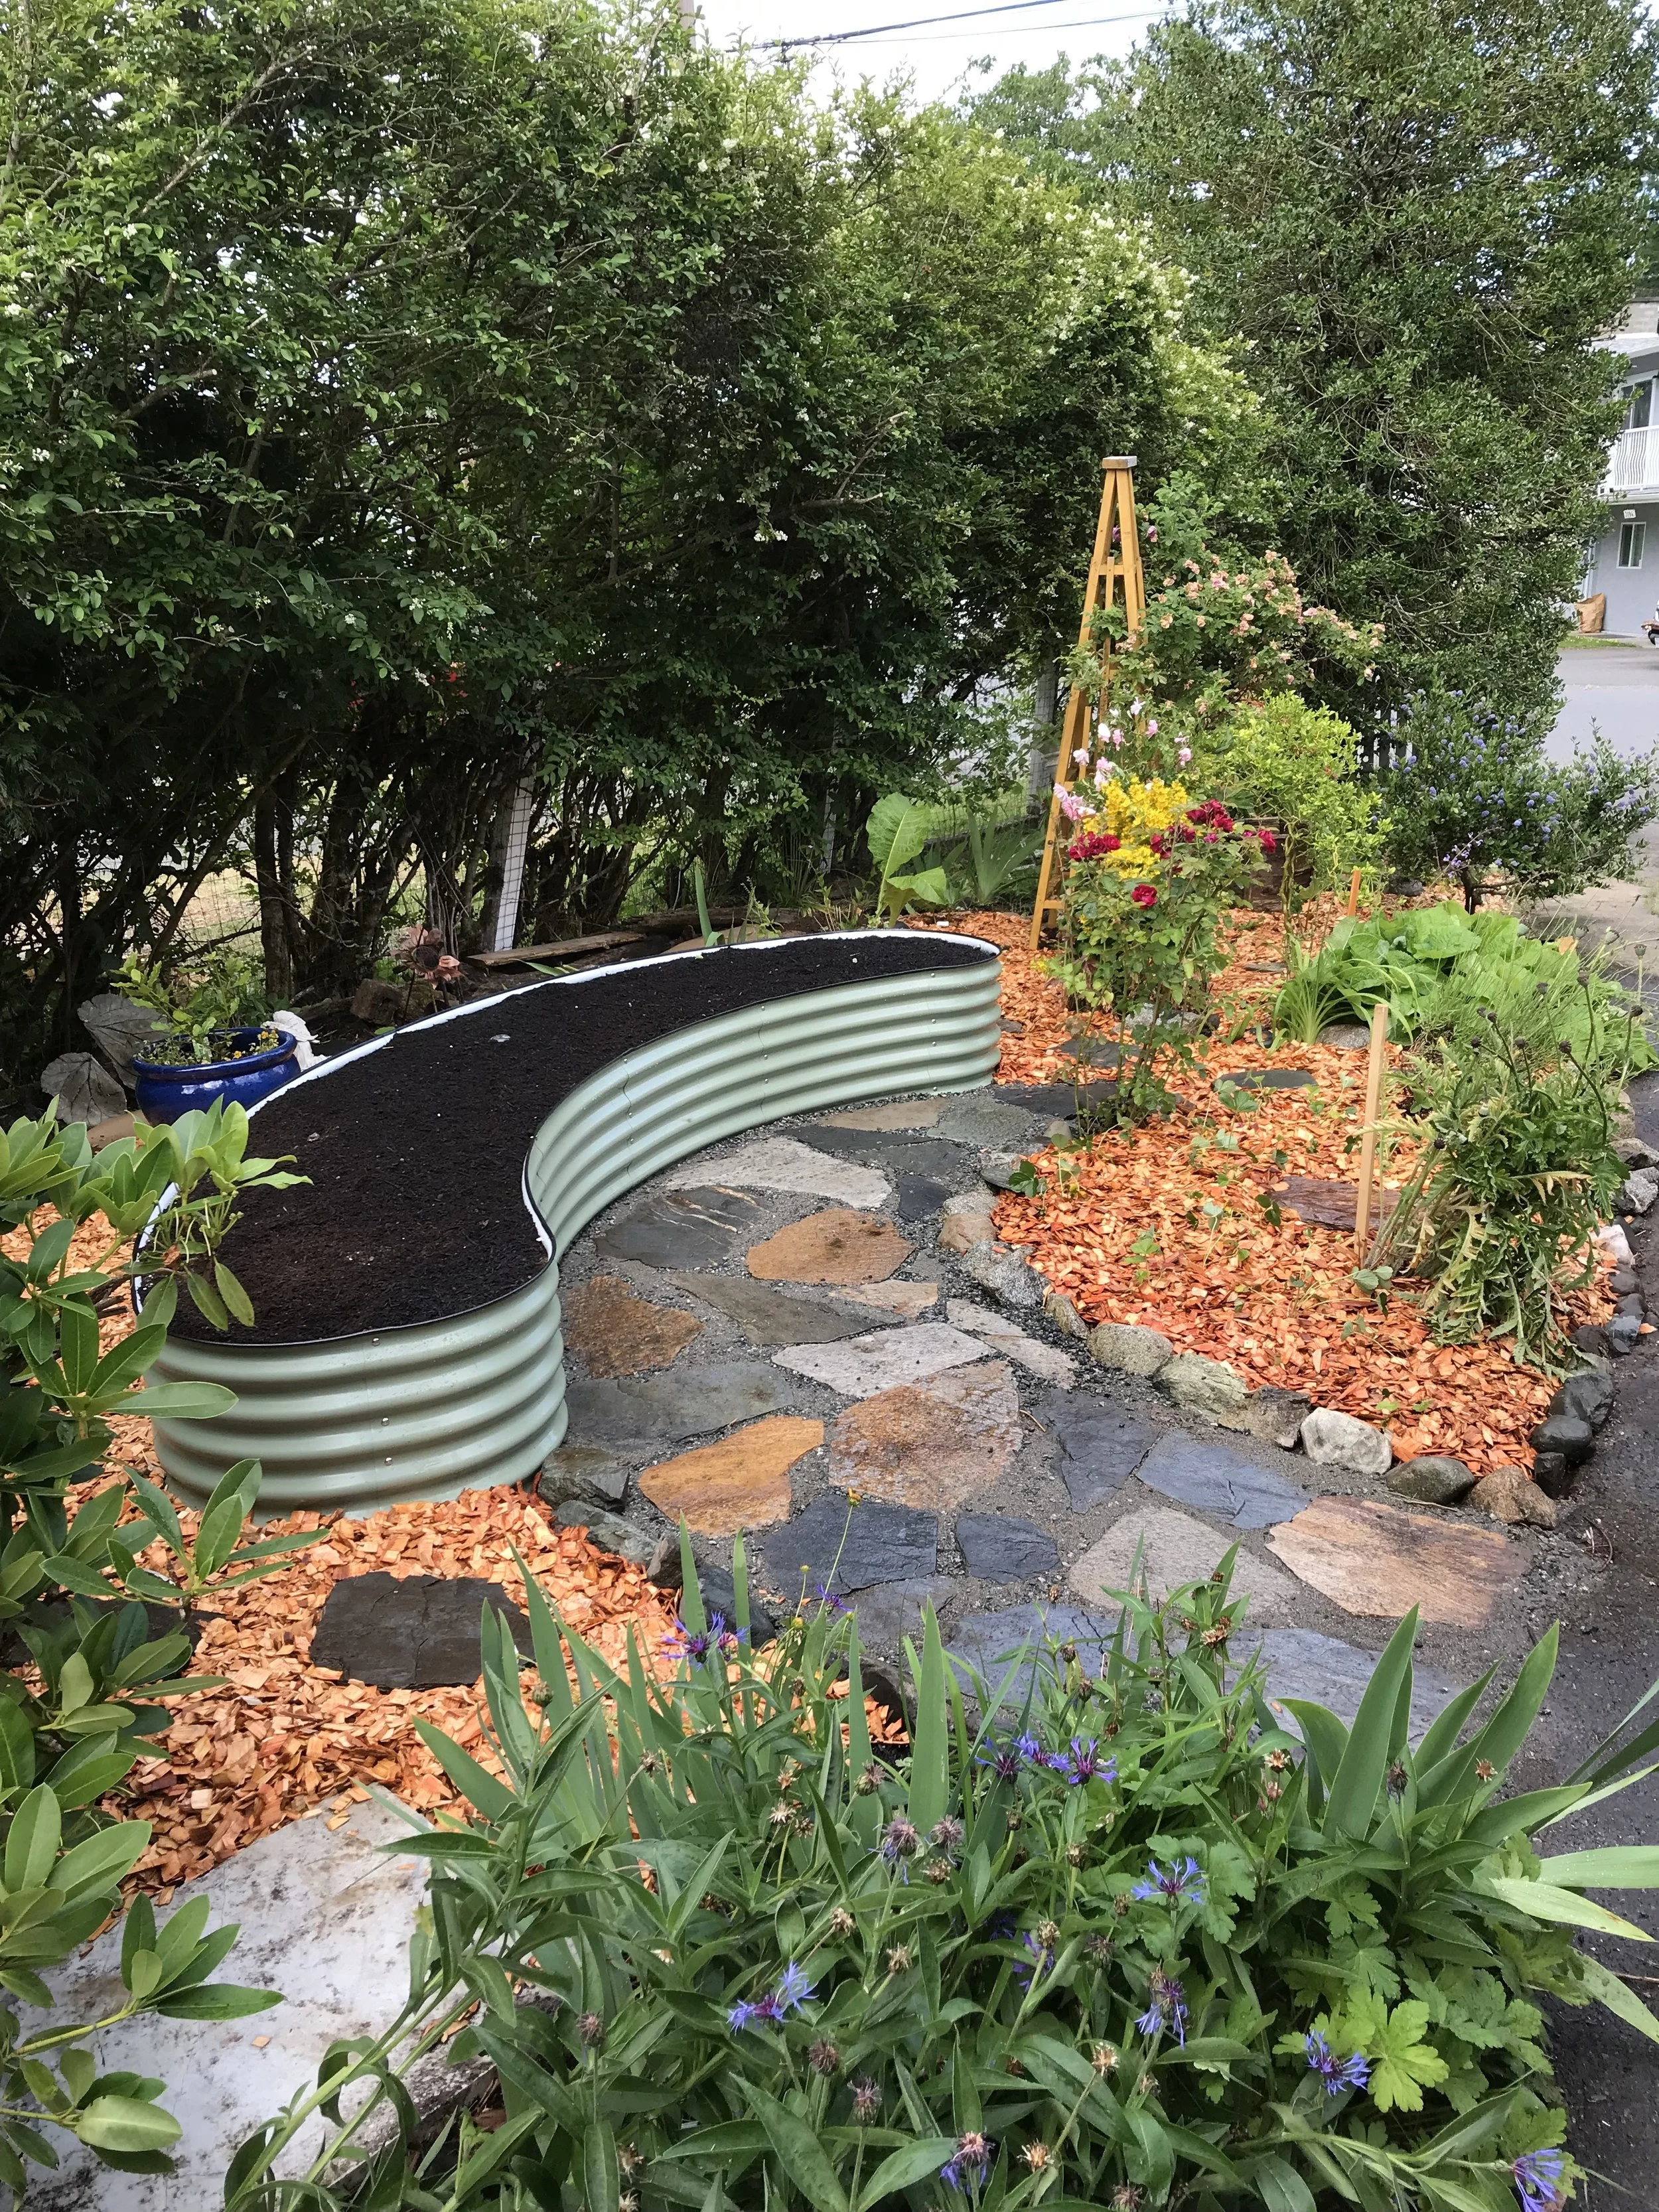

Completed install for Cathy
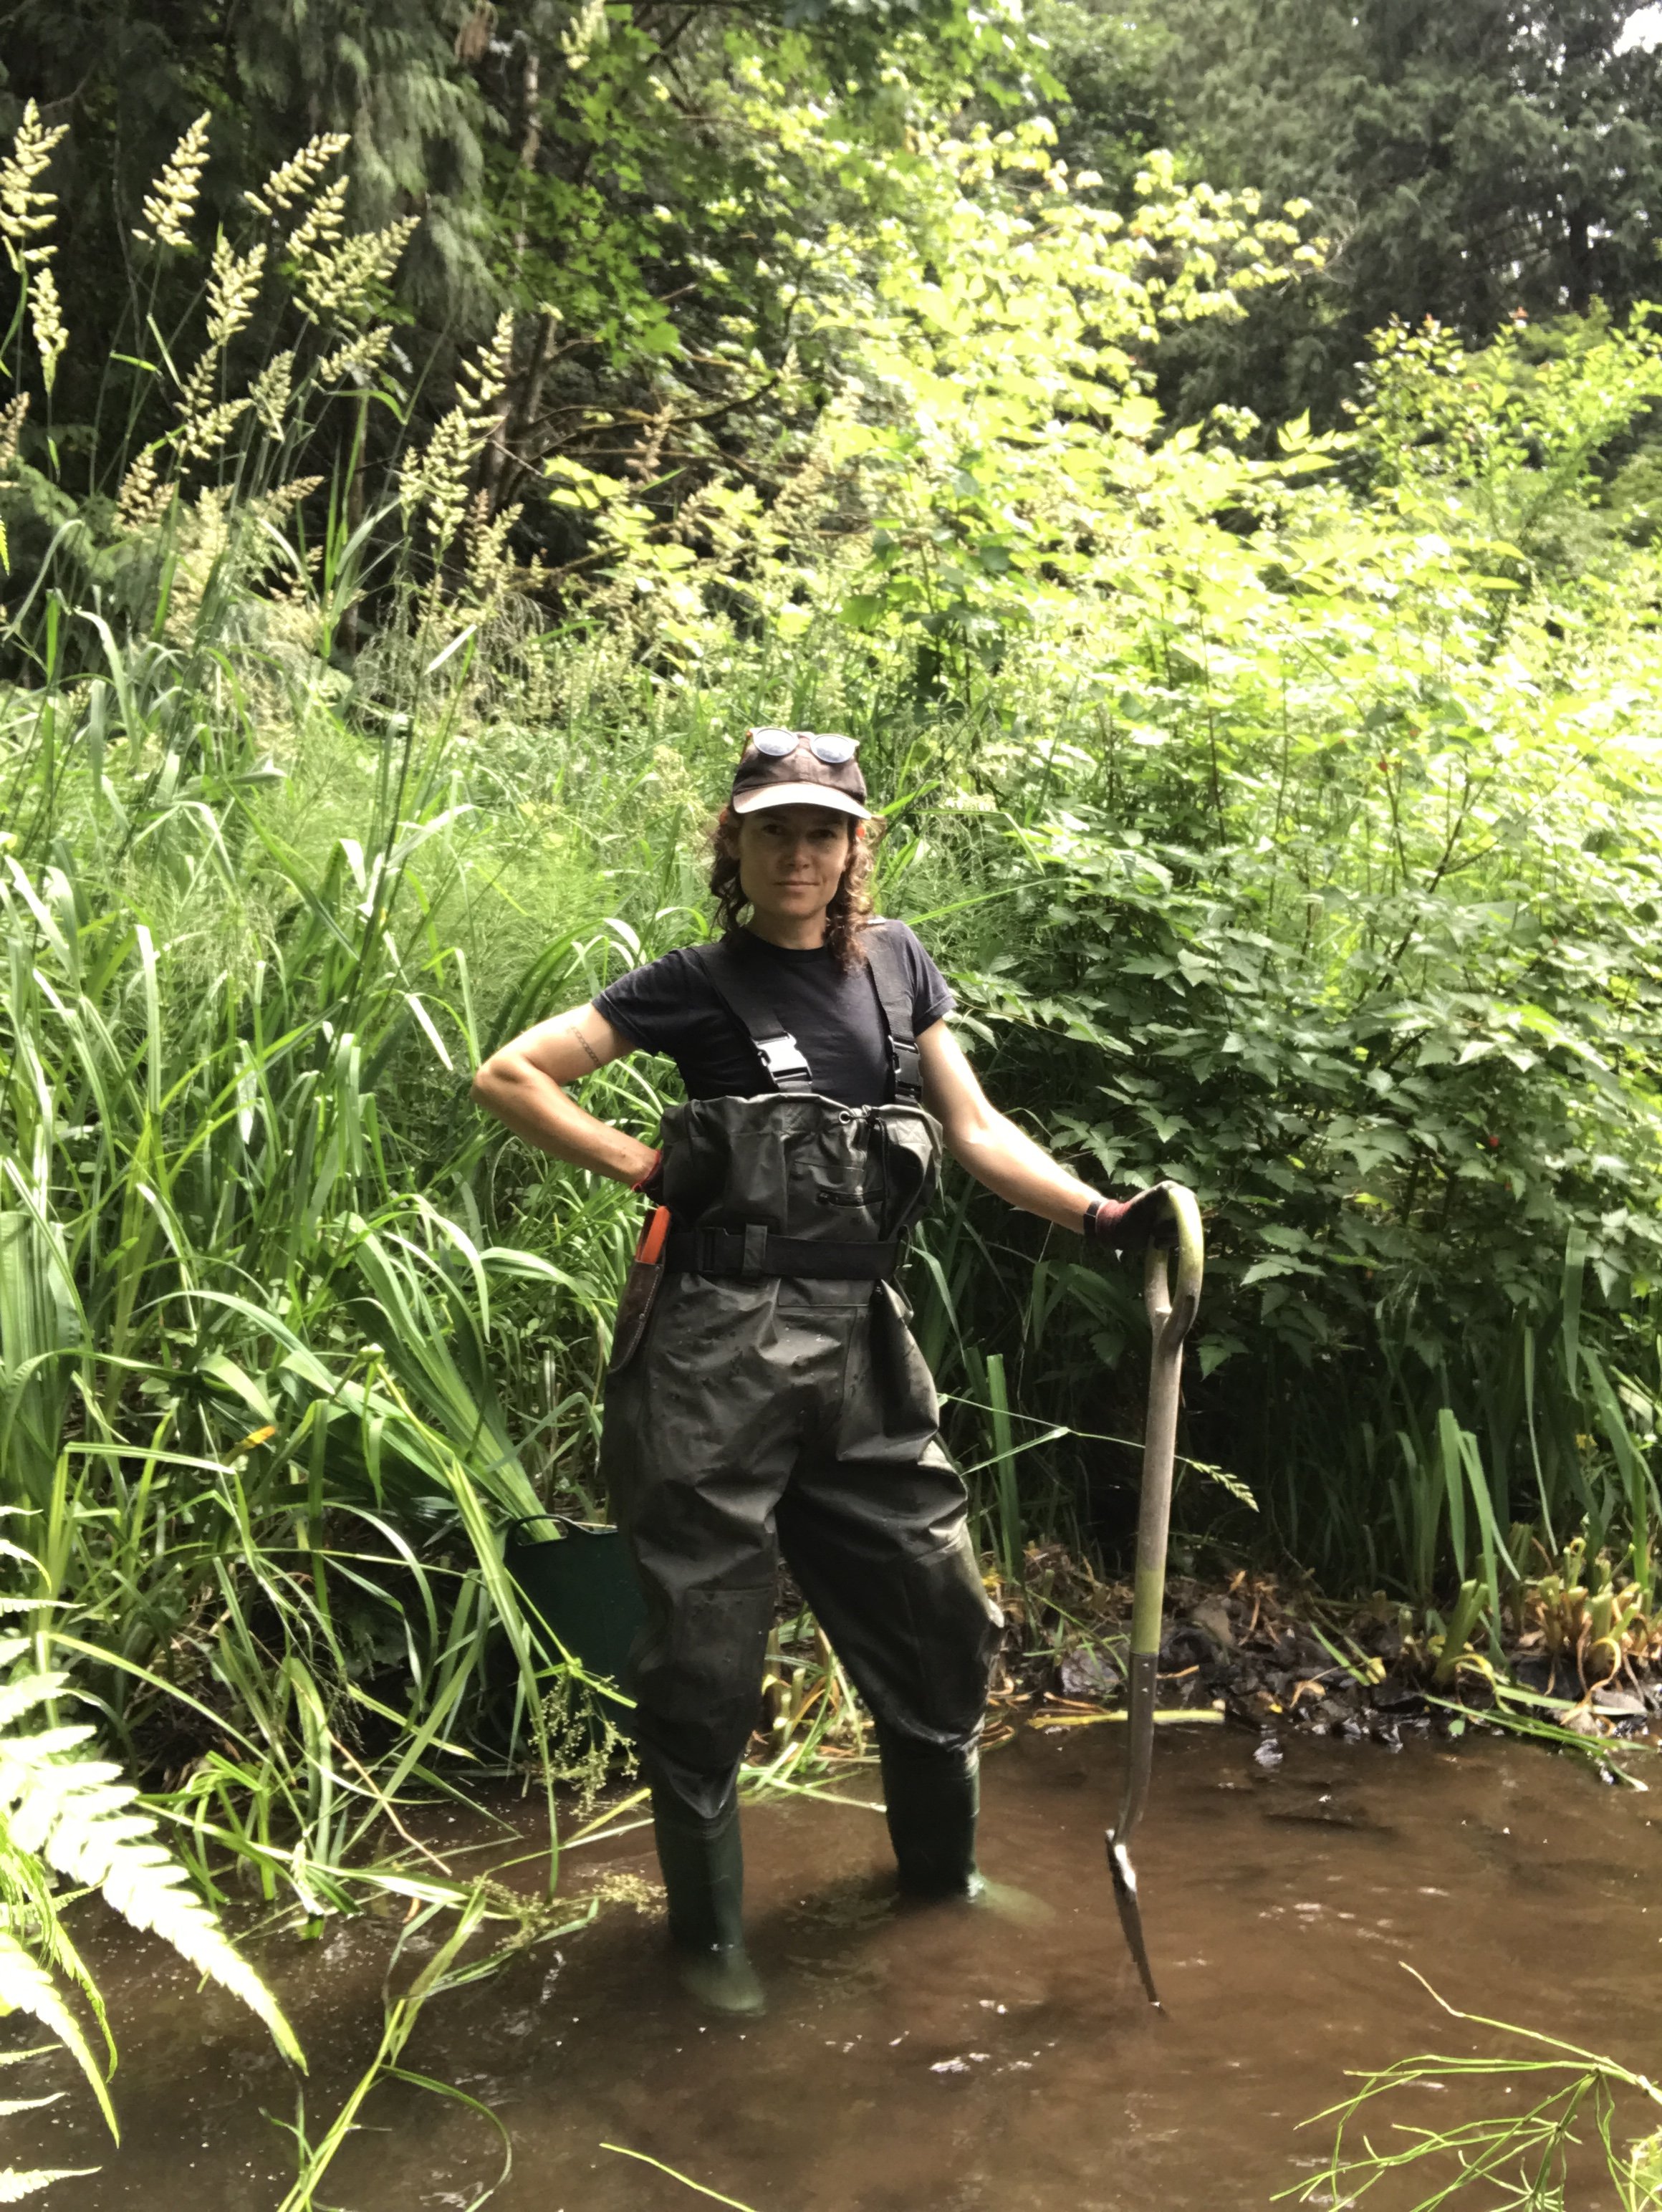
-More invasive removals, this time digging Yellow Flag Iris out of a creek on a client’s acreage:
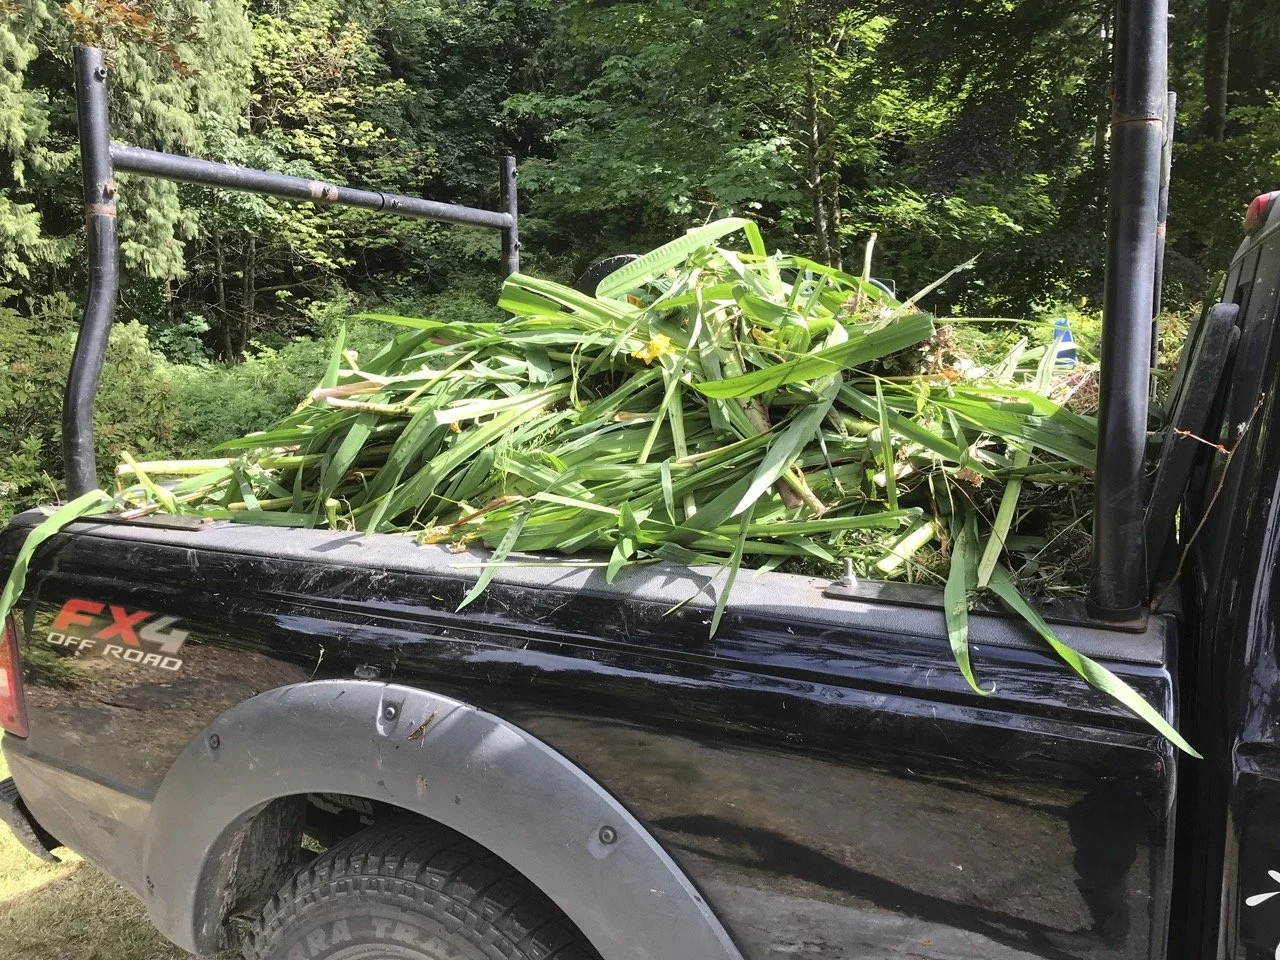
Yellow Flag Iris removal - load 1 of 3 !!!

July-
- Planting day at Julia’s new homestead: cleared out existing raised beds, topped up with compost, and planted fully with vegetables and herbs. Built a cattle panel trellis for tomatoes and cucumbers.
- Building a new fence for Holly’s heritage acreage
August -
- Built fence and installed new gate for livestock at Julia’s homestead
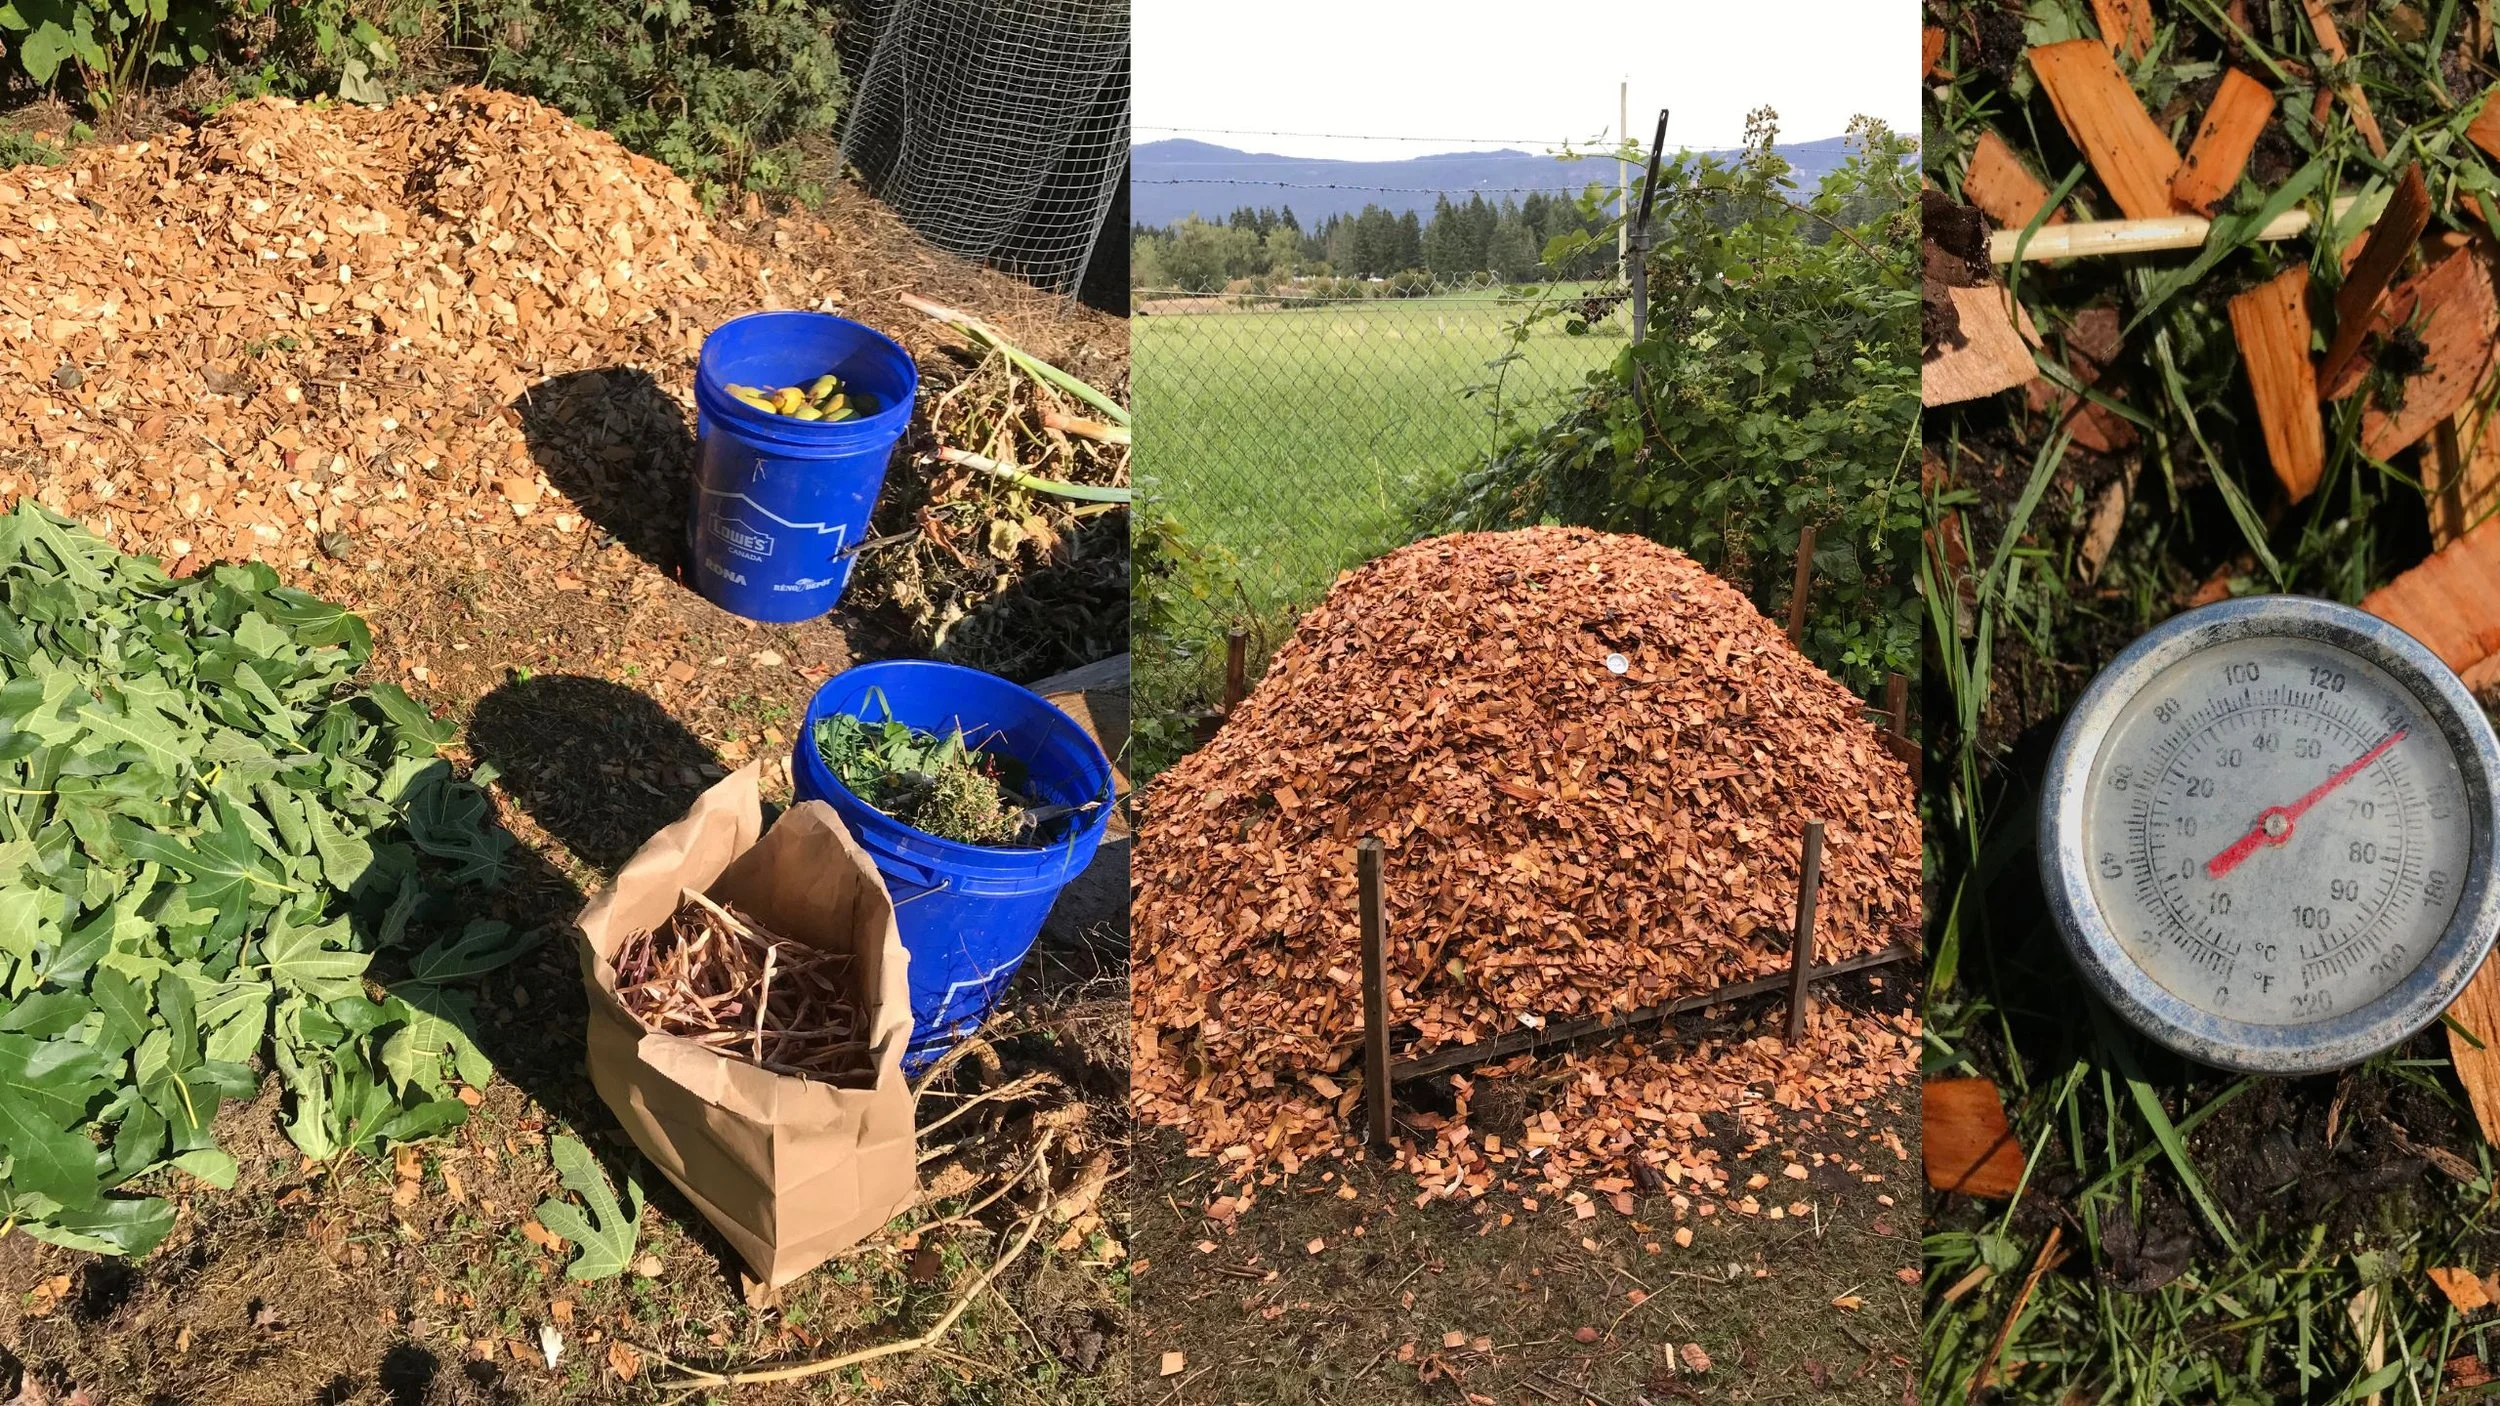
- Mid-Summer garden maintenance for all clients included building a
deluxe hot compost pile for JoAnn, using garden waste, fresh greenery,
alder chips, coffee grounds, blood meal, and kitchen scraps
September -
- New front garden for Tom + B
- Fall gardening lessons at QMS begin
October -
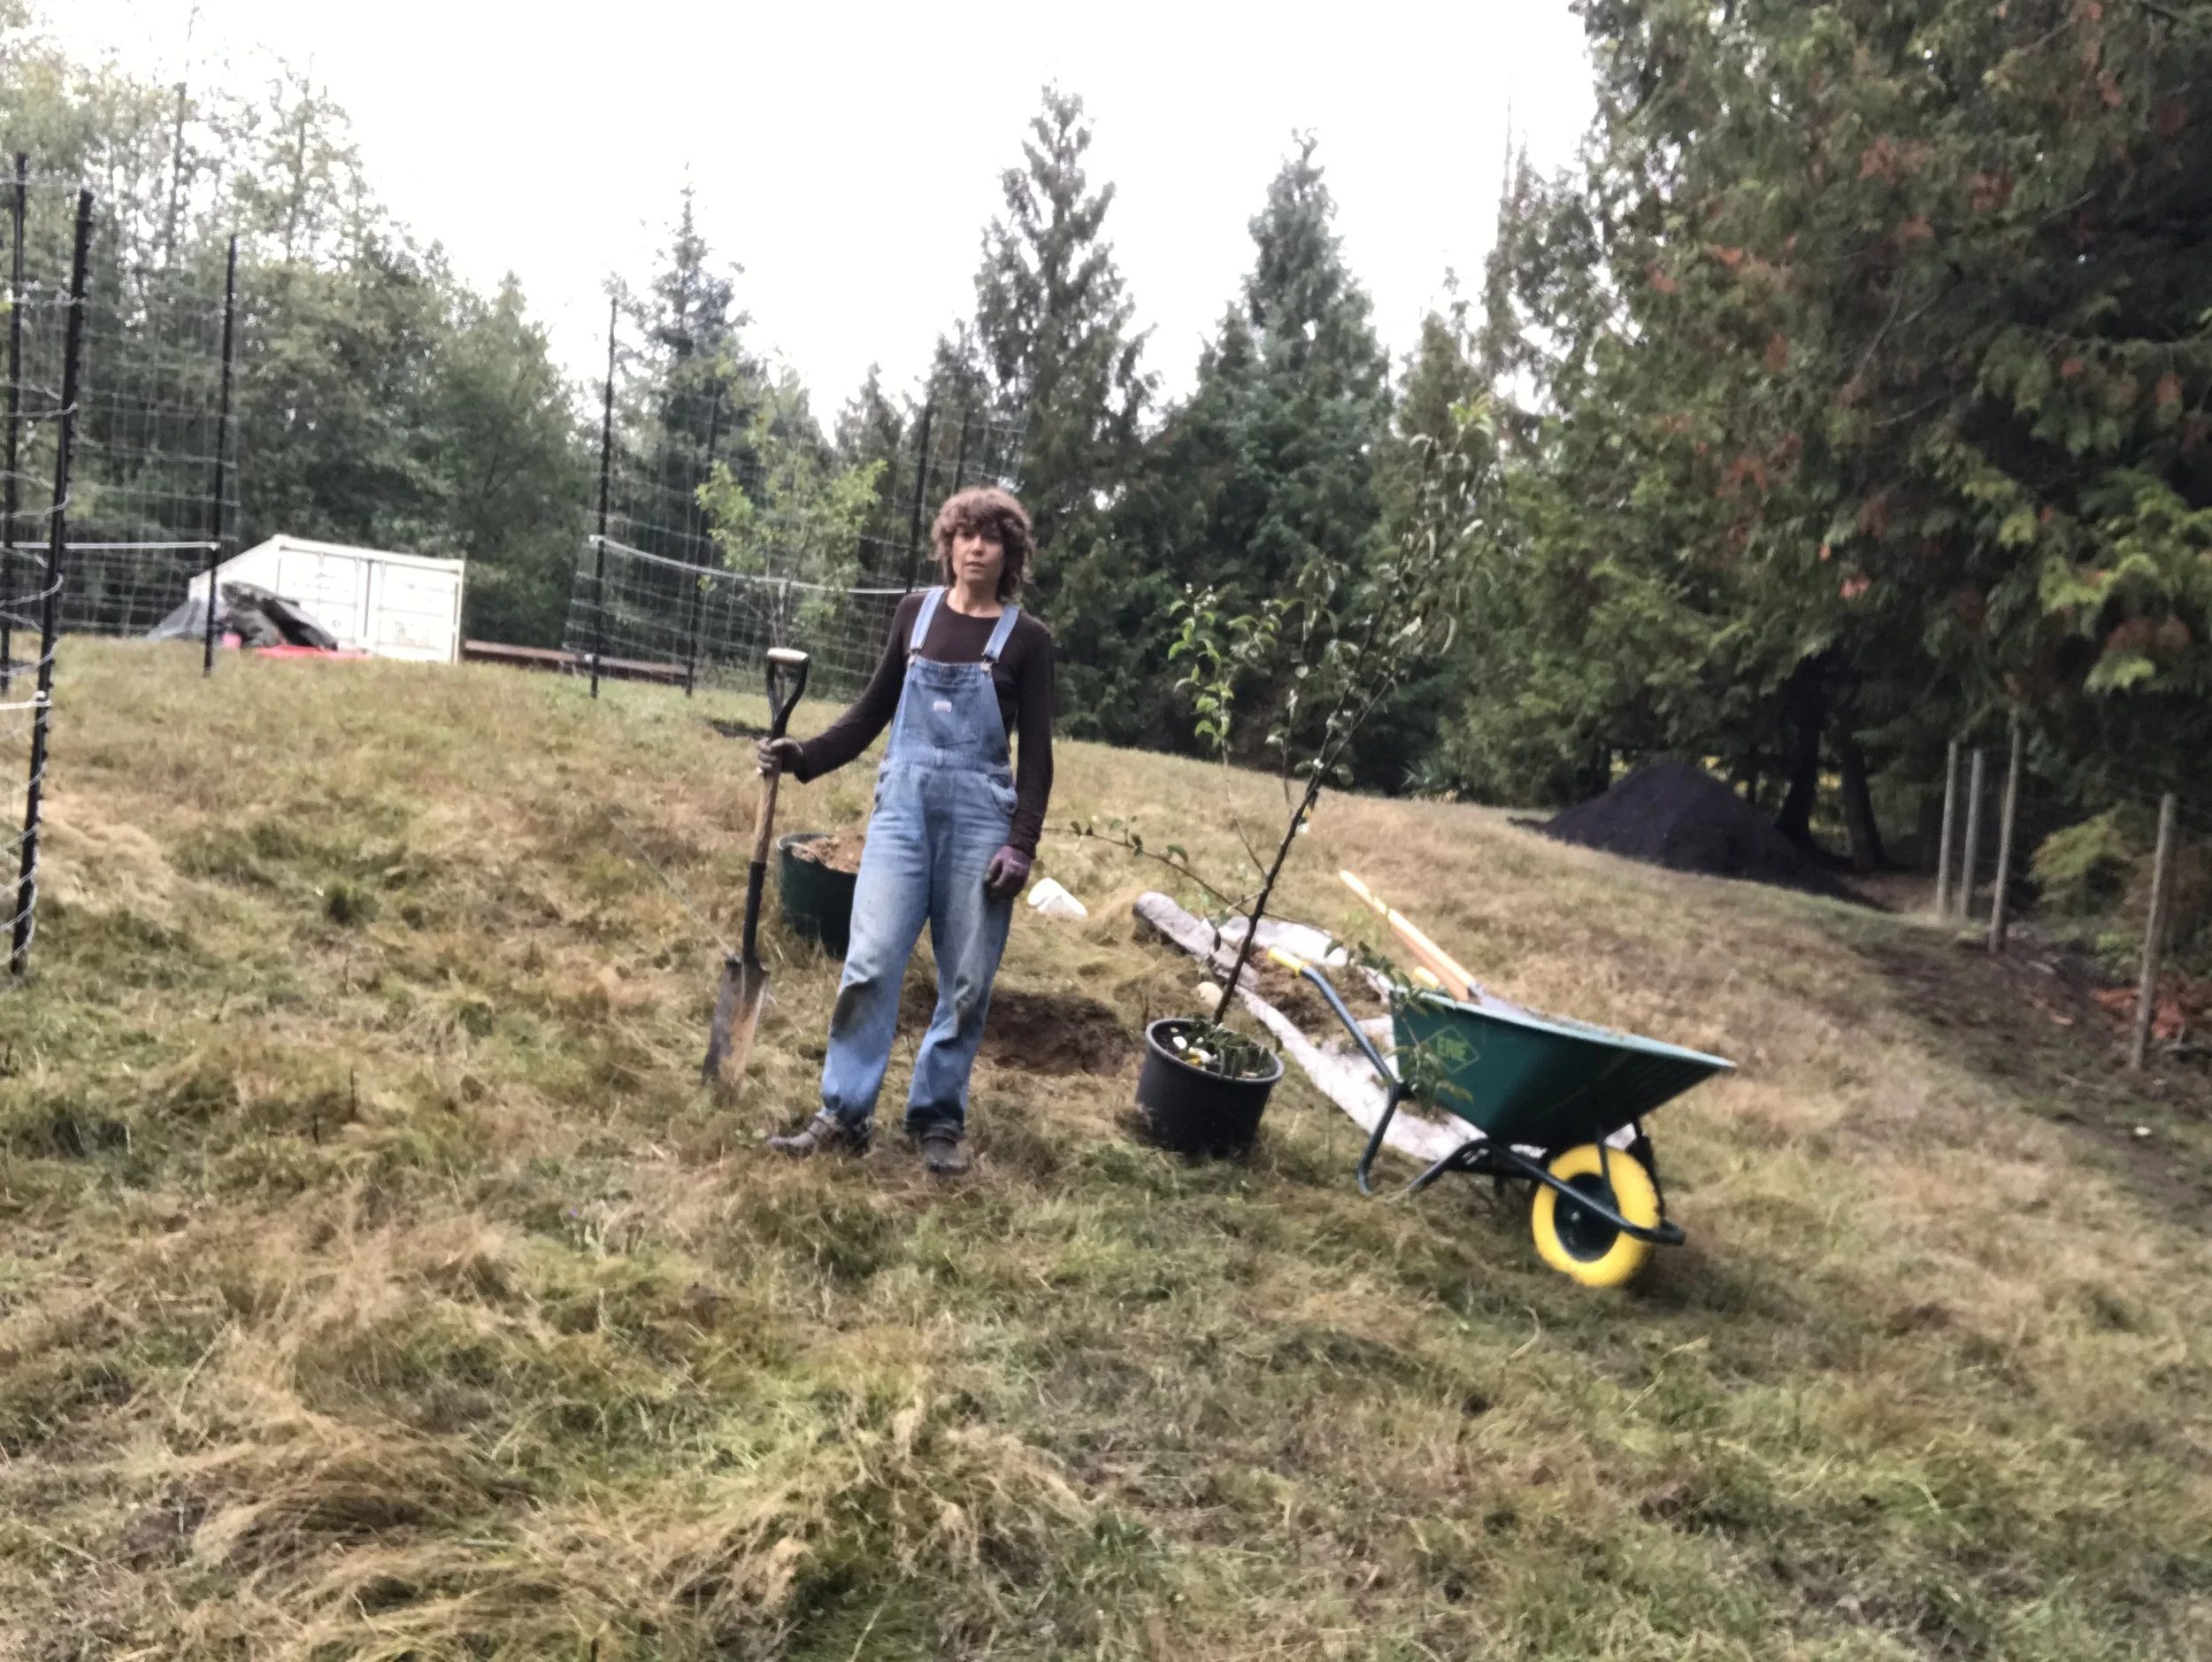
- Fall clean-ups begin
- ‘Tis the season for planting fruit trees!
November -
- Wrapping up for the season, planting garlic, mulching everywhere. Ready for a winter break!
Get in touch!
Contact us to book a call or a site visit